- Automation
- Home
- /
- Learning Hub
- /
- Python unittest Tutorial: Complete Unit Testing Guide
- -
- May 15 2023
Unit Testing in Python: Comprehensive Guide
Explore Python Unit testing with various frameworks like unittest and PyTest in this article.
OVERVIEW
Unit testing is an indispensable part of software development, which is crucial for ensuring software quality and reliability. Detecting bugs during the early phases of the development process is far less expensive than fixing them in later stages of development or after the product has been launched. Fixing bugs in the later stages of development can result in lost revenue, unhappy customers, and reputational damage, leading to high costs and time consumption.
Integrating unit testing into the development process makes it possible to identify and resolve problems early on, preventing them from becoming major issues. This saves time and resources and leads to higher-quality products that meet or surpass customer expectations.
The benefits of unit testing go beond cost savings and improved quality. Unit testing can also help to pinpoint areas of the code that are prone to errors or require optimization, leading to better overall performance and faster execution times. Furthermore, unit testing gives teams confidence in their code, knowing it has been thoroughly tested and meets the necessary standards.
This Python unittest tutorial covers several areas of unit testing, including its significance, Test Driven Development (TDD) principles, and unit test anatomy. It also offers suggestions for writing clear and concise unit test cases and testing various input types.
The main goal of this Python unittest tutorial is to present the unittest framework, the default unit testing framework for Python. We will demonstrate how to use unittest through many test scenarios to automate tests for a website.
Let 's get started!
Introduction to Unit Testing
Unit testing is a critical technique that helps developers ensure software quality by testing individual units in isolation. It is a vital part of the software development lifecycle, and it helps to reduce the complexity of software development while improving software quality. In this section of the Python unittest tutorial, we will discuss what unit testing is, why it is important, and the main benefits of unit testing.
What is Unit Testing?
Unit testing is an important software testing technique that helps to ensure the quality of individual units or components of a software application. This approach involves testing a single function or method in isolation to check if it performs as expected and meets the requirements and specifications.
The primary objective of unit testing is to catch defects early in the software development life cycle, which reduces the cost and effort of fixing defects later in the process. By isolating and testing individual units, developers can quickly identify and resolve issues without testing the entire application.
Unit testing is a crucial part of the Test Driven Development (TDD)process, where developers write tests before they write the actual code. This process helps to ensure that the code meets the software requirements, and it promotes better design practices while reducing the complexity of the software.
In most cases, unit tests are automated, which allows developers to run them quickly and easily, identify defects in real time and measure the code coverage. Code coverage is a metric that helps developers determine the percentage of code executed during testing, and it helps them identify areas of code that may need further testing.
Importance of Unit Testing
The importance of unit testing in software development cannot be overstated. Here are some key reasons why unit testing is essential:
- Early detection of defects
- Improved Code Coverage
- Improved code quality
- Encourages better design practices
- Improved Team Collaboration
- Accelerated development cycles
- Increased confidence in code changes
- Mitigation of regression issues
- Enhanced maintainability
- Better Documentation
Unit testing plays a critical role in identifying defects early in the software development process, enabling developers to address them before they escalate into more significant issues. This approach allows developers to test individual units in isolation, swiftly locating and resolving issues before they lead to more significant problems.
Unit testing ensures that all lines of code are thoroughly tested, providing complete coverage of the codebase. This helps developers identify any areas that need additional testing, ensuring that every possible scenario is tested.
Unit testing can help improve code quality, ensuring that each unit works as it should. Doing so can prevent bugs from creeping into the codebase, making the software more dependable and simpler to maintain.
By fostering the development of smaller and more modular code, unit testing promotes better design practices. This can make the software easier to test, understand and maintain, reducing complexity.
Unit testing promotes better collaboration among team members. Developers can easily share their code and identify potential issues by writing unit tests. This helps create a collaborative culture and ensures the development process is streamlined.
Unit testing speeds up the software development cycle by enabling developers to identify and resolve defects quickly. By automating the testing process, developers can save valuable time and concentrate on other crucial aspects of software development.
Unit tests can instill confidence that code changes will not have any unforeseen impacts on the software. By automatically running unit tests, developers can ensure that new code does not disrupt the software's functionality.
Unit tests can prevent regression issues from developing in the software. By testing individual units, developers can ensure that new changes do not impact the existing functionality that was already tested.
Unit testing makes it easier to maintain software by identifying the impact of changes and updates on the code. By testing individual units, developers can quickly ascertain the impact of modifications and avoid unexpected side effects.
Unit tests can serve as documentation for the codebase. By writing clear and concise unit tests, developers can create detailed descriptions of how each unit should perform. This helps new developers to understand the codebase and saves time in the onboarding process.
Note : Run Python unittest Test Scripts across 3000+ browsers & devices. Try LambdaTest Now!
Difference between Pytest and Unittest
PyTest and Unittest are both testing frameworks in Python, but they have some core differences in terms of syntax, features, and ease of use.
| Feature | PyTest | Unittest |
|---|---|---|
| Syntax | Concise and less boilerplate code | Requires specific naming conventions |
| Fixture System | Powerful fixture system | Built-in fixtures and setup/teardown |
| Test Discovery | Automatic test discovery | Requires methods to start with "test" |
| Parameterized Tests | Supports parameterized testing | Limited support for parameterization |
| Assertions | Rich set of built-in assertions | Standard set of built-in assertions |
| External Dependency | External library, needs separate installation | Part of the Python standard library |
| Ecosystem | Rich ecosystem of plugins | Limited ecosystem |
Choosing between PyTest and Unittest depends on factors such as project requirements, familiarity, and desired features. Unittest may be preferable for projects with simple testing needs, while PyTest offers more advanced features and a more concise syntax for larger and more complex projects.
Why is PyUnit (Unittest) preferred for Unit testing?
PyUnit (unittest) stands out as a favored option for unit testing in Python due to several key factors that collectively contribute to its widespread adoption and industry acceptance.
- Standard Library Inclusion:
- Familiarity and Consistency:
- Community Support and Resources:
- Compatibility and Portability:
- Integration with Tools and Ecosystem:
- Stability and Reliability:
- Industry Acceptance:
PyUnit (unittest) is seamlessly integrated into Python's standard library, eliminating the need for additional installations. This inclusion ensures that the testing framework is readily available, promoting simplicity and reducing external dependencies in Python projects.
Following the design principles of the xUnit family, PyUnit provides a familiar structure for developers acquainted with other xUnit frameworks like JUnit in Java or NUnit in .NET. This consistency facilitates ease of understanding and adoption, fostering a smooth transition for developers with experience in these frameworks.
PyUnit boasts a robust and active community of Python developers who have contributed to and utilized the framework for an extended period. This vibrant community support translates into a wealth of resources, including tutorials, comprehensive documentation, and online forums. Developers can leverage this extensive knowledge base for guidance and collaborative problem-solving.
PyUnit is designed to be compatible with various Python versions, accommodating both Python 2 and Python 3. This flexibility is particularly valuable for projects with specific version requirements or those that need to maintain compatibility with older Python versions.
Seamless integration with popular Python Integrated Development Environments (IDEs) enhances the developer experience. PyUnit supports features such as test discovery, execution, and result reporting within the IDE environment. Moreover, it is compatible with test runners, continuous integration (CI) systems, and code coverage tools, allowing for a smooth integration of unit tests into the broader development workflow.
As an integral component of Python, PyUnit benefits from the collective expertise of the Python core development team. This association with the core ensures a high level of stability and reliability, providing developers with confidence in the accuracy and dependability of their unit tests.
PyUnit is widely embraced by many prominent Python libraries and frameworks, including popular ones like Django and Flask. The extensive adoption of PyUnit in the industry contributes significantly to its credibility and reliability as a unit testing framework, making it a preferred choice for developers across diverse Python projects.
Writing Effective Unit Tests
Developers know that writing effective unit tests is critical to software development. These tests can identify defects in the early stages of development, saving valuable time and resources while improving software quality. Automated tests assess specific code units, such as functions or methods, for potential issues before they become more significant problems.
In this section of the Python unittest tutorial, we will present some important topics like TDD principles, the anatomy of a unit test, how to write clear and concise unit tests, and the importance of testing different types of inputs.
Test Driven Development (TDD) principles
When it comes to software development, Test Driven Development (TDD) is a widely-used approach that prioritizes writing tests before writing any production code. This process involves writing an automated test case for each code unit before developing it.
To effectively use TDD, developers must adhere to a set of principles that guide the development process. Some of the key principles of TDD include:
Writing the Test First
In TDD, the first step is always to write a test. This helps ensure that the code being developed meets the requirements of the test. Writing the test first also helps developers avoid writing unnecessary code.
Testing Small Units of Code
In TDD, tests are written for small code units, such as a single function or method. This approach keeps the code modular and easier to maintain.
Running All Tests Before Writing New Code
Before writing new code, developers must run all existing tests to ensure they pass. This ensures that any changes made to the code do not break existing functionality.
Writing Minimal Production Code
In TDD, developers only write the minimum amount of production code necessary to pass the test. This approach keeps the code simple and reduces the risk of introducing unnecessary complexity.
Refactoring Code Regularly
In TDD, developers must regularly refactor code to ensure it remains maintainable and scalable. Refactoring involves improving the design of the code without changing its functionality.
Repetition for Each Unit of Code
TDD requires developers to repeat this process for each code unit until the entire software is developed. This ensures that each code unit is thoroughly tested and meets the system's requirements.
In summary, Test Driven Development (TDD) is an approach that involves writing tests before writing production code. The principles of TDD, such as writing the test first, testing small units of code, running all tests before writing new code, writing minimal production code, refactoring code regularly, and repeating the process for each unit of code, guide the development process. TDD offers several benefits, including improved code quality, reduced debugging time, better collaboration, and faster development.
Anatomy of a Unit Test
To develop effective unit tests, it is essential to comprehend the unit test structure. A unit test comprises three components: setup, execution, and assertion.
Setup Phase
During the setup phase, the test environment is initialized. This phase includes creating any required variables, mock objects, or test data to execute the coding unit.
Execution Phase
Execution is the second phase of a unit test. In this stage, the actual code unit is called and executed. The objective of this phase is to execute the code unit in the same way that it would be called in the production environment. All relevant code paths should be executed in this phase to ensure comprehensive testing.
Assertion Phase
Finally, the assertion phase is the last stage of a unit test. In this phase, the output of the code unit is compared to the expected output. If the actual output and expected output match, the test is considered successful. Otherwise, the test is considered a failure.
In summary, a strong understanding of the anatomy of a unit test is necessary for creating effective unit tests. By following the setup, execution, and assertion phases, developers can ensure that their tests are comprehensive and accurate, resulting in better software quality and quicker debugging.
Writing Clear and Concise Unit Test Cases
Writing effective unit tests requires that your test cases are clear and concise. Here are some best practices to remember when writing clear and concise unit test cases:
- Use descriptive names
- Keep tests small and focused
- Comment complex tests
- Use assert methods
- Avoid hard-coding values
Use descriptive and meaningful names that accurately reflect what the test is checking.
Each test should focus on a single code unit and test only one behavior.
If a test is complex, use comments to explain what it is checking and why it is necessary.
This makes it clear what the test is checking and ensures that the test is concise.
Use variables or constants to define values used in multiple tests.
By adhering to these best practices, you can write clear and concise test cases that effectively test your code units and make it easier for others to understand and maintain your tests.
Testing different types of inputs
To develop effective unit tests, it's crucial to test the code with various inputs. This helps identify edge cases, prevent errors, and ensure the code meets the end-user's needs. Types of inputs to test include:
- Valid inputs ensure that the code meets the requirements.
- Invalid inputs help identify edge cases and prevent errors.
- Boundary cases ensure the code functions correctly in all scenarios.
- Null inputs prevent null pointer errors.
- Using large inputs identifies performance issues.
- Using diverse inputs ensures the code is robust and meets the end-user's needs.
Getting Started with Python unittest Testing
Python is a popular and powerful programming language widely adopted by software developers worldwide. One of the key reasons for its popularity is the availability of a wide range of libraries and frameworks that make it easier to develop complex applications.
Among these, the unittest framework is a built-in testing framework that simplifies writing and executing unit tests in Python. This framework is based on the xUnit architecture, a popular unit testing framework that has been used in many programming languages.
With the unittest framework, developers can write comprehensive unit tests for their Python code, ensuring that it works as expected and meets the requirements of the stakeholders. In this section of the Python unittest tutorial, we will explore the basics of using the unittest framework to write effective unit tests for Python code.
Overview of Python unittest Framework
The Python unittest framework is a standard module for unit testing in Python. It provides a set of tools and conventions for writing and running tests. The unittest framework is designed to make it easy to write small, isolated tests that verify the behavior of individual parts of a program.
It supports the creation of test fixtures and the automatic discovery of test cases. Unittest is a powerful tool that can be used for testing various aspects of Python code, from individual functions to complex class hierarchies.
Why use the Python unittest Framework?
The benefits of using the Python unittest framework can be broken down into the following topics:
- Early Issue Identification
- Increased Software Stability
- Reusability
- Code Coverage
- Reporting
Unittest helps to identify issues early in the development process. By testing code units, such as functions and methods, developers can catch issues before they become larger problems. This can reduce the time and effort required for debugging, which can be especially important in larger codebases.
By ensuring that changes to the codebase don't break existing functionality, unittest increases software stability. This can help reduce the likelihood of defects in Python applications, leading to a better user experience and increased customer satisfaction.
By adhering to the conventions of the unittest framework, developers can write more modular and easier-to-maintain code. This can lead to more efficient development processes and a better overall codebase.
Overall, the Python unittest framework is an essential tool for developers who want to ensure code quality and reduce the likelihood of defects in their Python applications.
Unittest includes a coverage.py tool that measures the code execution during unit testing, enabling developers to assess the quality of their code. The tool generates a report that identifies the covered and uncovered lines of code, displaying the percentage of code coverage and the total number of lines of code.
The report offers valuable insights into the adequacy of unit testing and identifies areas that need more attention. With this information, developers can enhance their test coverage, track the progress of unit testing, and ensure continuous improvement. The report is customizable and can be integrated with various Continuous Integration (CI) systems to automate the testing and reporting processes.
Unittest comes with reporting functionalities, enabling developers to create comprehensive reports on the outcomes of their unit tests. The module features various classes that developers can utilize to generate reports in different formats, such as text, HTML, and XML. For example, these reports contain detailed information on the number of tests performed, the number of failures and errors, and the execution time of each test. The reports can also be saved to files for future reference.
Moreover, the TestRunner class allows developers to execute tests and create reports. This class enables developers to customize reporting behavior by modifying the output format or adding more information to the report. In summary, Python unittest provides powerful reporting functionalities that allow developers to scrutinize their unit test outcomes and identify areas in their code that require improvement.
How to install Python unittest Framework?
Here are the steps to install the Python unittest framework.
Step 1: Check if Python is installed on the system before installing Python unittest. This can be done by opening a terminal or command prompt and typing the python --version. If Python is not installed on the system, the official Python website can be visited to download and install it.

Step 2: Unittest is a testing framework with Python by default. So you don't need to install it separately. You can simply import it in your Python code using the following statement:import unittest.
Once you have imported the unittest module, you can use its classes and methods to write and run unit tests for your Python code.
In conclusion, just this is enough to enable you to benefit from the powerful testing framework that can help ensure the quality of their code and reduce the likelihood of defects in their applications.

2M+ Devs and QAs rely on LambdaTest
Deliver immersive digital experiences with Next-Generation Mobile Apps and Cross Browser Testing Cloud
Demonstration: Running Test using Python unittest Framework
The focus of this section is to demonstrate the usage of the Python unittest framework to create unit tests for LambdaTest eCommerce Playground. This website provides a safe environment for developers while performing automation testing with Selenium Python of their code and web applications.
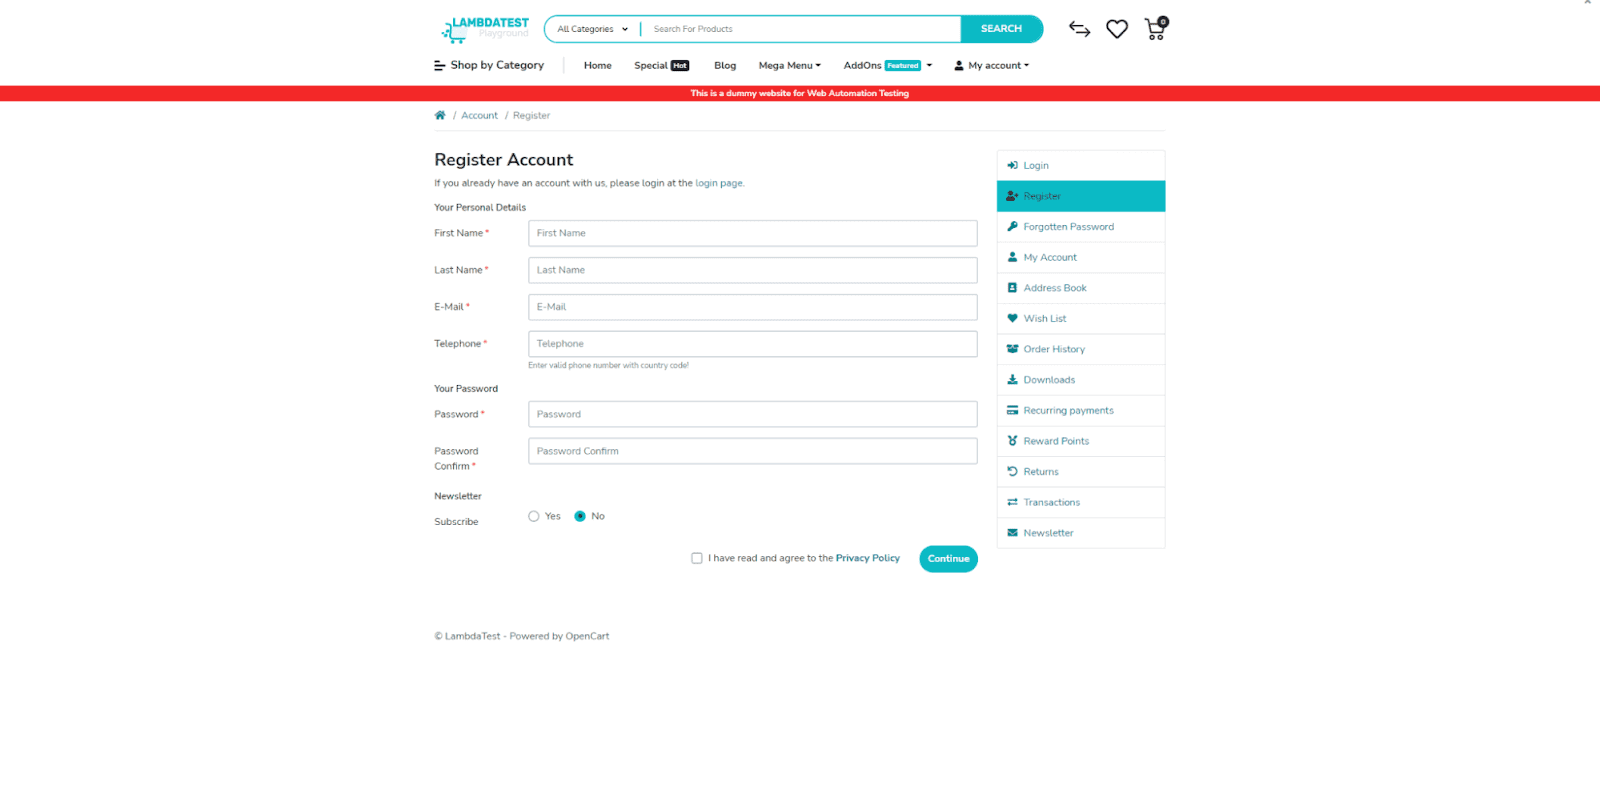
The main aim of this demonstration is to highlight how the Python unittest framework can be used to identify bugs, errors, and other issues while testing websites and applications. By using the unittest framework, you can save valuable time and resources in the long run by automating tests.
In the upcoming sections, we will guide you through the process of configuring and executing Python unittest tests. We will cover essential topics such as creating test cases, writing test methods, and executing tests using the unittest framework. By the end of this section, you will clearly understand how to use the Python unittest framework to perform website and application testing.
For this Python unittest tutorial, we will focus our testing on two areas:
- Validate that all the field labels are correctly presented.
- Validate the basic functionality of password, and confirm password fields.
Do not forget to download and install an IDE tool. Visual Studio Code (VSC) will be the IDE we will use in this blog. However, you are free to use your preferable IDE!
After installing the tools and frameworks as shown in the previous section, we should continue with the project setup with the following steps:
Create the project structure
Create the folders and files, as presented in the below image:
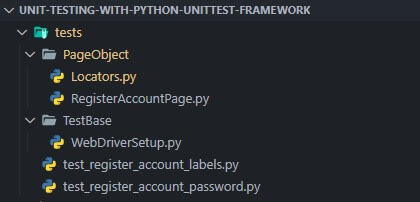
In this Playwright JavaScript tutorial, we are going to use the Page Object Model to organize our code better.
The Page Object Model is a design pattern commonly used in test automation to enhance the maintainability and scalability of automated tests. This design pattern helps to reduce code duplication and improve the clarity and readability of the code.
In the Page Object Model, each web application page is represented by a separate object. This object encapsulates the state and behavior of the page and provides methods that interact with the page's elements and functionality. Using the Page Object Model makes it possible to create more modular and maintainable tests that are easier to update and maintain.
The Page Object Model also provides a way to separate the test code from the page structure, making it easier to update the application's user interface without affecting the test code. Additionally, this design pattern can improve the efficiency of test execution by reducing the number of requests to the application server.
Subscribe to our LambdaTest YouTube Channel to catch up with the latest tutorials around Selenium testing, Cypress testing, and more.
Install Selenium library
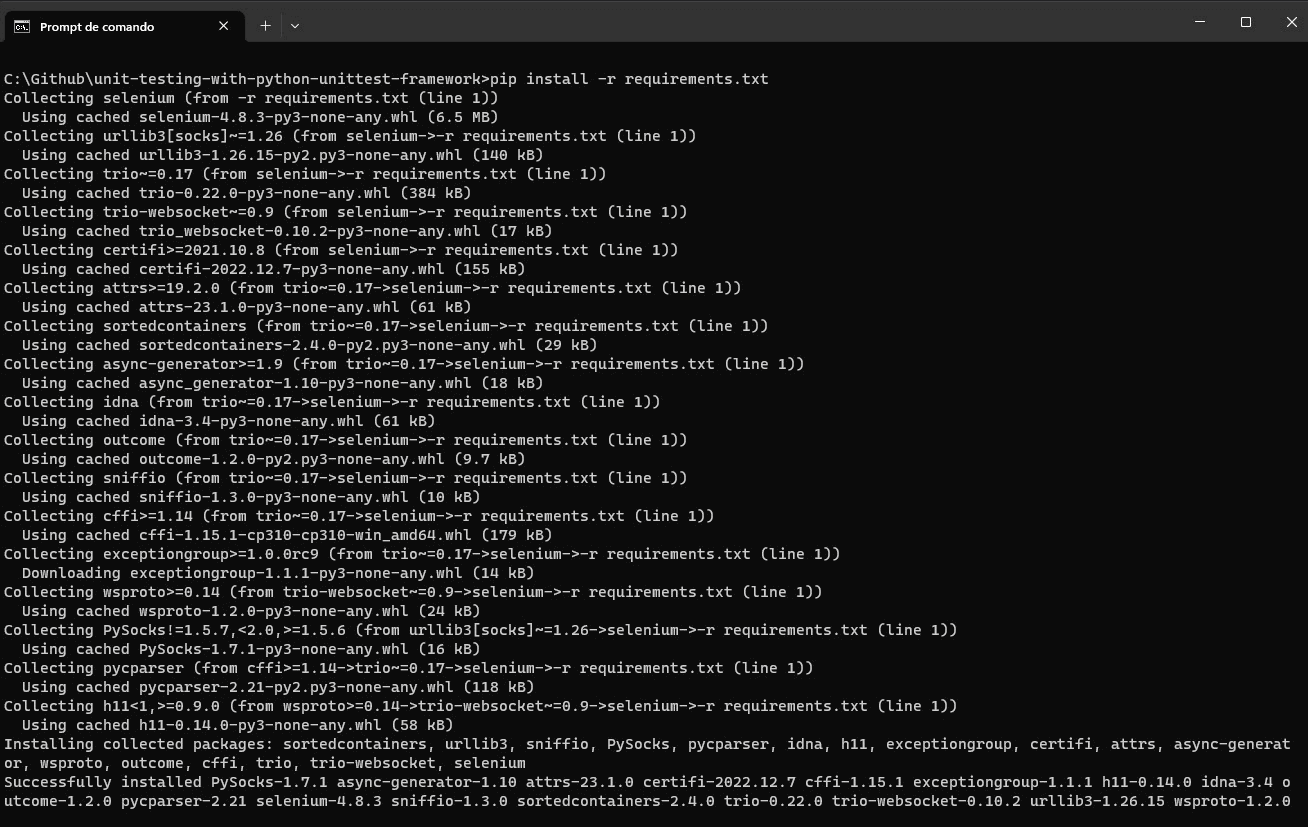
Selenium can be installed simply using the pip install manager. Pip is a package management system used to install/manage packages and libraries written in Python.
A "requirements.txt" file was generated to simplify the installation process. Inside the requirements.txt file is only the installation of the Selenium framework. However, it is always good practice to have it in your project.
pip install -r requirements.txtAfter executing the command, your cmd should seem like the one shown in the picture below:
Map the Locators
The Locators.py file will contain all the locators for labels, form fields, and password / confirm password error messages.
Implementation
class Locators(object):
    #Labels
    first_name_label = "//label[@for='input-firstname']"
    last_name_label = "//label[@for='input-lastname']"
    email_label = "//label[@for='input-email']"
    telephone_label = "//label[@for='input-telephone']"
    password_label = "//label[@for='input-password']"
    confirm_password_label = "//label[@for='input-confirm']"
    subscribe_label = "//div[@class='form-group row']//label[@class='col-sm-2 col-form-label']"


    #Form Fields
    first_name = "input-firstname"
    last_name = "input-lastname"
    email = "input-email"
    telephone = "input-telephone"
    terms = "//label[@for='input-agree']"
    password = "input-password"
    confirm_password = "input-confirm"
    continue_button = "//input[@value='Continue']"


    #Error Messages
    password_error_message = "//input[@id='input-password']/following-sibling::div"
password_confirm_error_message = "//input[@id='input-confirm']/following-sibling::div" 
Code Walkthrough
To each label, field, and error messages, we provide a string with the locator that can locate the object in the page.
There are different ways to locate elements in web pages, including using different locator strategies such as ID, Class Name, CSS Selector, and XPath. The choice of locator depends on the specific element and its attributes, as well as the structure and complexity of the web page.
The first_name_label locator is an XPath expression that finds the label element with a for attribute set to input-firstname. This is commonly used to identify the label associated with an input field.
The first_name locator is an ID attribute that identifies the input field with the ID input-firstname. This is often used to identify an element on a web page uniquely.
Create the Page file
The RegisterAccountPage.py file will use locators provided in Locators.py to return each object used inside the test cases.
from selenium.webdriver.common.by import By
from PageObject.Locators import Locators


class RegisterAccountPage(object):
    def __init__(self, driver):
        self.driver = driver


        self.first_name_label = driver.find_element(By.XPATH, Locators.first_name_label).text
        self.last_name_label = driver.find_element(By.XPATH, Locators.last_name_label).text
        self.email_label = driver.find_element(By.XPATH, Locators.email_label).text
        self.telephone_label = driver.find_element(By.XPATH, Locators.telephone_label).text
        self.password_label = driver.find_element(By.XPATH, Locators.password_label).text
        self.confirm_password_label = driver.find_element(By.XPATH, Locators.confirm_password_label).text
        self.subscribe_label = driver.find_element(By.XPATH, Locators.subscribe_label).text


        self.first_name = driver.find_element(By.ID, Locators.first_name)
        self.last_name = driver.find_element(By.ID, Locators.last_name)
        self.email = driver.find_element(By.ID, Locators.email)
        self.telephone = driver.find_element(By.ID, Locators.telephone)
        self.terms = driver.find_element(By.XPATH, Locators.terms)
        self.password = driver.find_element(By.ID, Locators.password)
        self.confirm_password = driver.find_element(By.ID, Locators.confirm_password)
        self.continue_button = driver.find_element(By.XPATH, Locators.continue_button)
        self.new_page_title = driver.title

    def getFirstNameLabel(self):
        return self.first_name_label


    def getLastNameLabel(self):
        return self.last_name_label

    def getEmailLabel(self):
        return self.email_label

    def getTelephoneLabel(self):
        return self.telephone_label

    def getPasswordLabel(self):
        return self.password_label

    def getConfirmPasswordLabel(self):
        return self.confirm_password_label

    def getSubscribeLabel(self):
        return self.subscribe_label

    def getFirstName(self):
        return self.first_name

    def getLastName(self):
        return self.last_name

    def getEmail(self):
        return self.email

    def getTelephone(self):
        return self.telephone

    def getTerms(self):
        return self.terms

    def getPassword(self):
        return self.password

    def getConfirmPassword(self):
        return self.confirm_password

    def getContinueButton(self):
        return self.continue_button

    def getNewPageTitle(self):
        return self.new_page_title
Code Walkthrough
Step 1: Import By from the Selenium WebDriver library to get the elements. You should import it as below.

Step 2: To use the Locators.py, import it here as below.

Step 3: Then you should create a class; then, you will give the same name as the file RegisterAccountPage, which receives an object as a parameter. In Python, all classes have a function called __init__(), which is always executed when the class is initiated, so it works as a class constructor. You should have self and driver as parameters.
You should set the self.driver property with the received driver object.
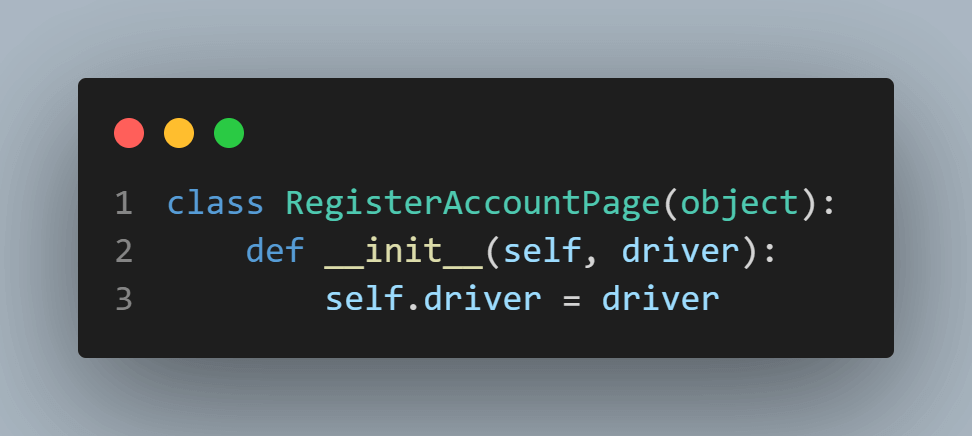
Step 4: Inside the __init__ method, you should locate each element. You should have a variable, i.e., self.first_name_label, and set the object to this variable using driver.find_element method with the proper way to locate the element.
For the First Name label, we will use By.XPATH to locate, and the locator from the Locators.py file will be Locators.first_name_label, which is the variable with the locator in the Locators.py file of the element you want to locate.
The .text, in the end, is needed when the element should return a text, nor the element itself.

To the First Name field, you can locate using the element's id, so you can use By.ID, and refer to the Locators.first_name variable that contains the element's locator.

You must do the same to all elements you will need in your tests on the page.
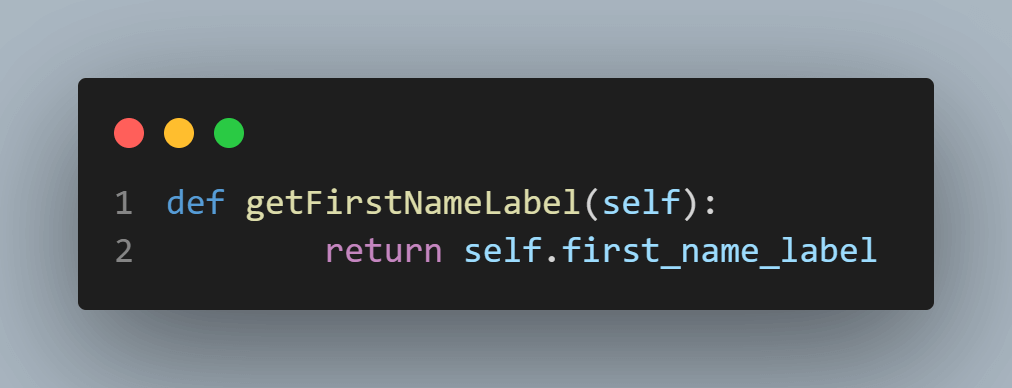
Step 5: You should define a function to return each element in this file. For example, to return the text of the First Name Label, you should create a method named getFirstNameLabel, passing the class instance as a parameter: self. Then, you must return the element you created in the previous step to self.first_name_label.
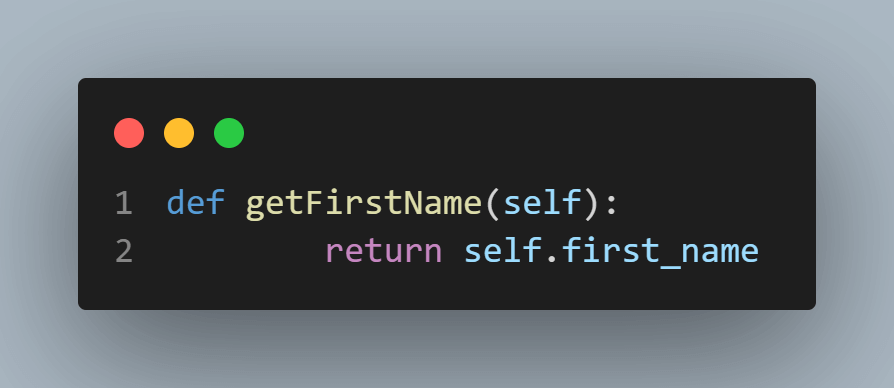
For example, you should do the same to return the First Name element to type in the field. Define a function called getFirstName passing the class instance as a parameter: self. Then, you must return the element you created in the previous step, self.first_name.
You must do the same to all elements you will need in your tests on the page.
Create the WebDriver Setup file
The WebDriverSetup.py file will contain all the configurations needed to configure and use the Selenium WebDriver.
import unittest
import os
from selenium import webdriver
from PageObject.RegisterAccountPage import RegisterAccountPage


class WebDriverSetup(unittest.TestCase):
def setUp(self):
username = os.getenv("LT_USERNAME")
accessToken = os.getenv("LT_ACCESS_KEY")
gridUrl = "hub.lambdatest.com/wd/hub"


options = webdriver.ChromeOptions()
options.browser_version = "latest"
options.platform_name = "Windows 11"
lt_options = {}
lt_options["username"] = username
lt_options["accessKey"] = accessToken
lt_options["build"] = "your build name"
lt_options["project"] = "your pmustname"
lt_options["name"] = "your test name"
options.set_capability('LT:Options', lt_options)

url = "https://"+username+":"+accessToken+"@"+gridUrl

self.driver = webdriver.Remote(
command_executor=url,
options=options
)
self.driver.get("https://ecommerce-playground.lambdatest.io/index.php?route=account/register")
self.driver.maximize_window()


self.register_account_page = RegisterAccountPage(self.driver)

def tearDown(self):
self.driver.quit()
Code Walkthrough
Step 1: You need to import all the libraries and frameworks you will need to use in this file. Unittest is the test framework you will use, os is the library that will help us get the username and accessToken configured in the environment variables, and webdriver is the library needed for Selenium WebDriver to use ChromeDriver to interact with the browser.
Finally, you will need to import the RegisterAccountPage you created in the previous step to instantiate the class at the end of the setup.

Step 2: You should create a class with the same name as the file WebDriverSetup and inform the WebDriver that you are using the unittest framework. You should do this by extending the unittest.TestCase class.
The unittest module is a built-in Python testing framework that provides various tools for writing and running tests. The TestCase class is a base class to create test cases for the WebDriver setup.
By inheriting from the TestCase class, the WebDriverSetup class gains access to various assertion methods and other testing utilities provided by the framework. The class can then define its methods for setting up the web driver instance and performing various tests.
Overall, this code is a starting point for creating web driver tests using the unittest framework in Python.

Step 3: After this, you should create your setup function, which should contain:
The configuration of the cloud grid and the instantiation of the driver.
The demonstration will be done on a cloud-based grid like LambdaTest, a digital experience testing platform that helps developers and testers to perform Python automation testing of their websites or web applications on over 3000+ real browsers and operating system combinations. While performing unittest testing on LambdaTest, you can run your automated unit tests in parallel across multiple browsers and OS combinations, reducing the overall test execution cycles.
Visit our support documentation to get started with Python unittest testing
To perform Selenium Python testing on the LambdaTest cloud grid, you need to use the capabilities to configure the environment where the test will run. In this Python unittest tutorial, we will run the tests with the following characteristics:
- Selenium 4
- OS: Windows 11
- Browser: Chrome
You can generate the capabilities code from the LambdaTest Capabilities Generator.
Then, you should get the “Username” and “Access Token” from your account in your LambdaTest Profile Section and set it as an environment variable.
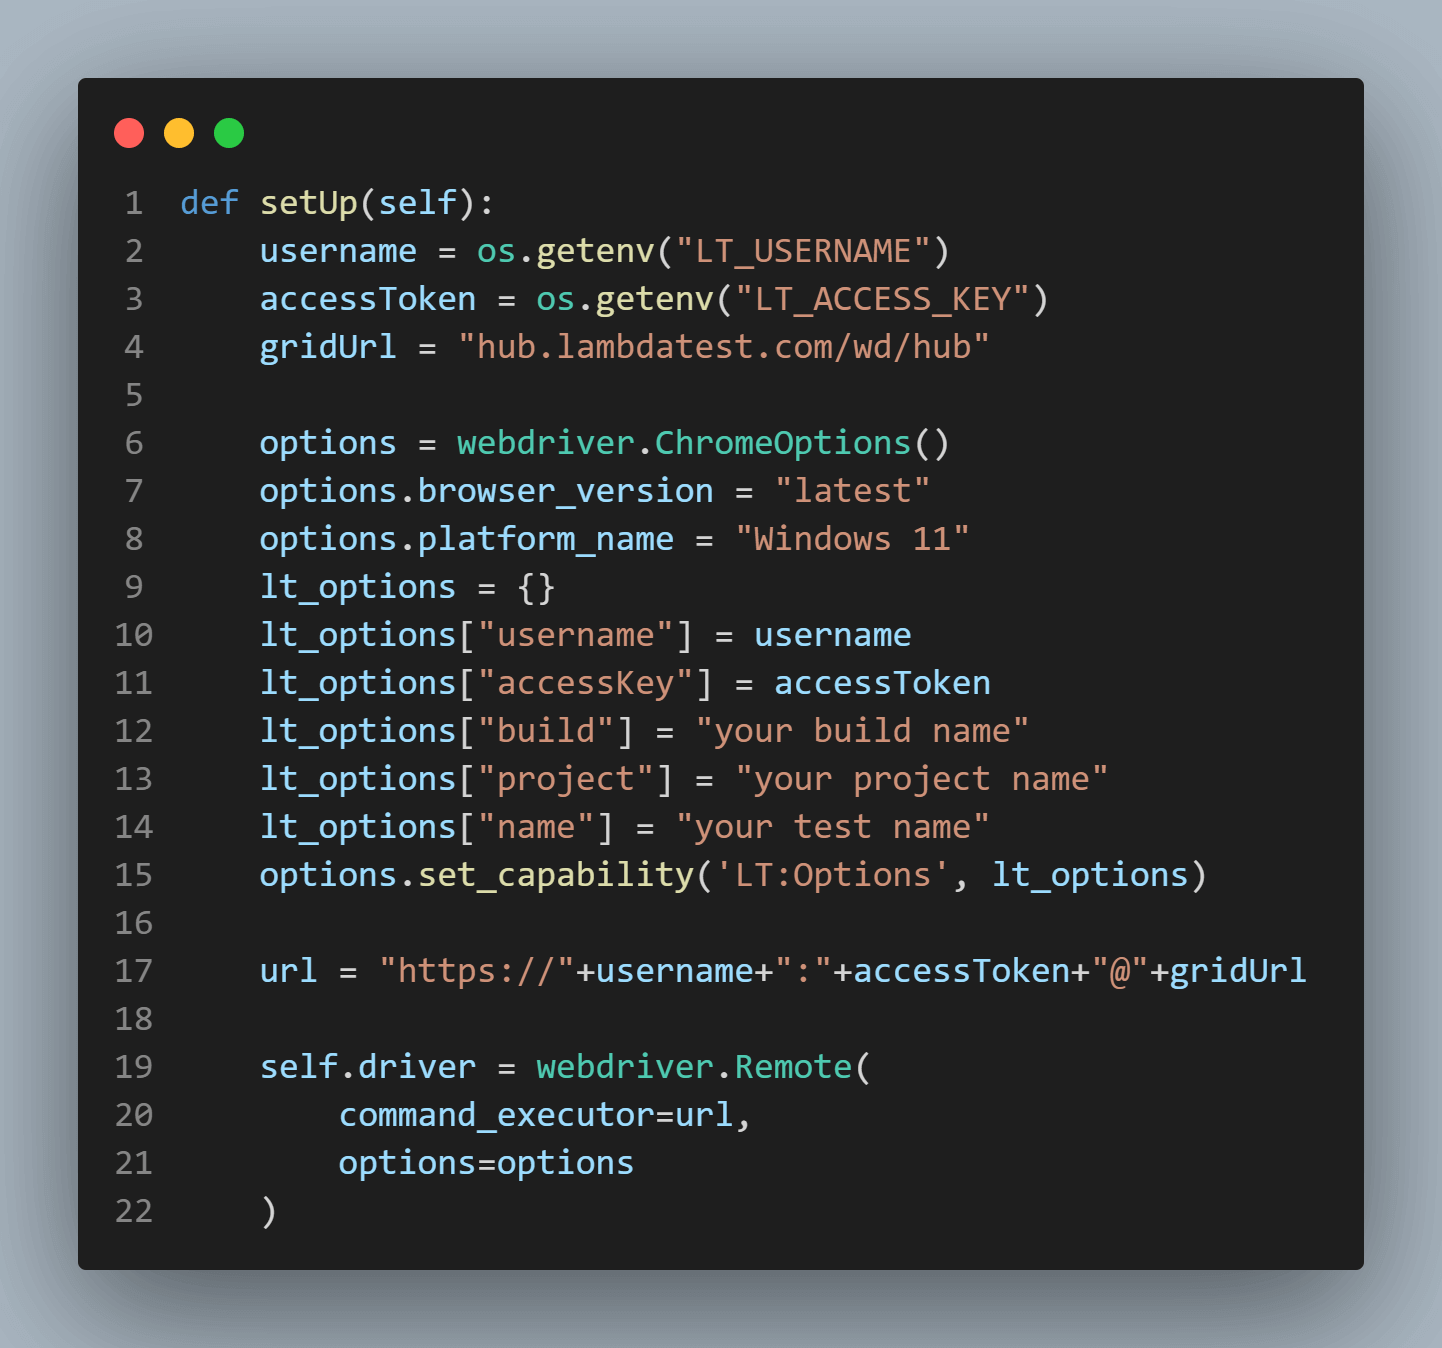
The calls to open and maximize the website are to be tested.

Instantiate the RegisterAccount page, passing the instantiation of the driver to the page.
self.register_account_page = RegisterAccountPage(self.driver)
Step 4: Inside the class, you should create a tearDown function to tell the unittest to close the driver when finishing the execution.
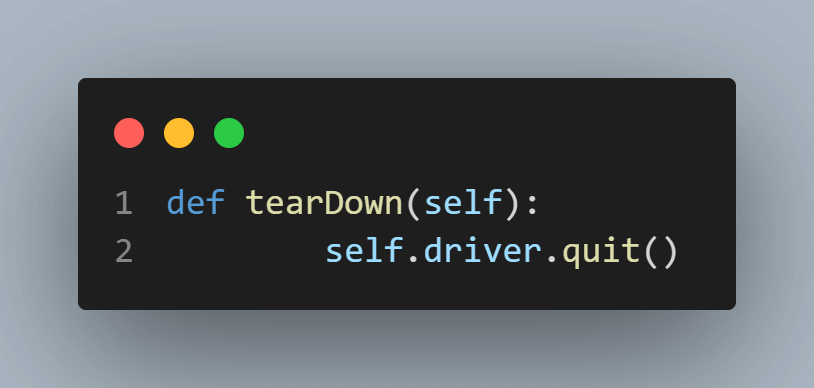
Now you have everything configured to start creating the tests.
Test Scenarios List
In the following sections, we will automate the below test scenarios:
- Validate First Name label
- Validate Last Name label
- Validate Email label
- Validate Telephone label
- Validate Password label
- Validate Confirm Password label
- Validate Subscribe label
- Validate Password Correct Confirmation
- Validate Password Not Filled
- Validate Password Less Than Minimum
- Validate Password Without Confirmation
- Validate Password Wrong Confirmation
| Test Scenario 1: Validate First Name Label |
|---|
This test scenario aims to validate the First Name field label to check if it is “First Name,” as expected.

The below code was created inside the test_register_account_labels.py file.
Implementation
import unittest
from TestBase.WebDriverSetup import WebDriverSetup


#This class will check the correct text to each label of the page
class TestFormLabels(WebDriverSetup):

def test_first_name_label(self):
self.assertEqual(self.register_account_page.getFirstNameLabel(), "First Name")


if __name__ == '__main__':
unittest.main()
Code Walkthrough
Step 1: You should import the necessary frameworks and libraries to create the test cases. In our case, you must import the unittest and WebDriverSetup class from the TestBase module.

Step 2: Define a class called TestFormLabels, which extends the WebDriverSetup class. The purpose of this class is to test the text labels on the registration form page of the LambdaTest website.

Step 3: Within the TestFormLabels class, there is a test method called test_first_name_label, our first test case using the assertEqual method from the unittest module to check that the actual text of the first name label on the registration form matches the expected text.
Important to mention that for the unittest to identify the tests inside a file, it should start with test_ or end with _test.

Step 4: The latest lines of code include the unittest.main() method, which runs the test cases defined in the script. This is how unittest understands that there are test cases inside this file and runs it.
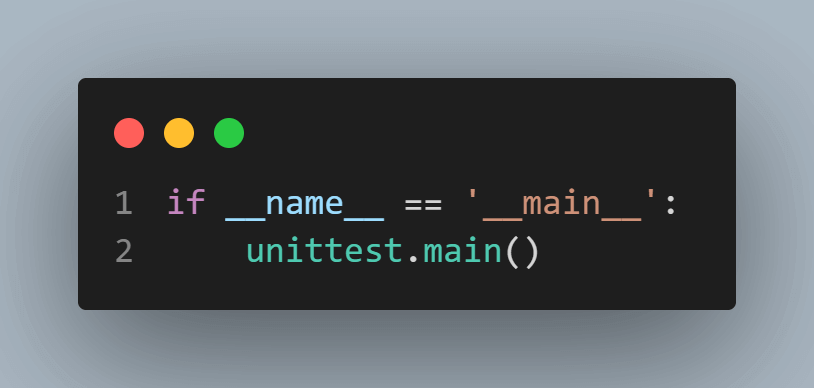
To run the test using unittest, you should go to the terminal, and inside the tests folder, run the below command:
python -m unittest test_register_account_labels.pyAll the tests inside the test_register_account_labels will be run. Running the tests, you could see the below result:

You can see that 1 test was run and passed, as expected.
Please do not consider these deprecated warnings that are thrown by Selenium. This comes from the communication done by the WebDriver.
| Test Scenario 2: Validate Last Name Label |
|---|
This test scenario goal is to validate the Last Name field label to check if it is “Last Name” as expected. The below code was created Inside the test_register_account_labels.py file, more directly, inside the TestFormLabels class.

Implementation
def test_last_name_label(self):
self.assertEqual(self.register_account_page.getLastNameLabel(), "Last Name")
Code Walkthrough
Step 1: You should create a new test method called test_last_name_label, which again uses the assertEqual method to check that the actual text of the label matches the expected text.

To run the tests using unittest, you should again run the below command:
python -m unittest test_register_account_labels.pyAll the tests inside the test_register_account_labels will be run. By running the tests, we can see the below result:

You can see that two tests were run and passed, as expected.
| Test Scenario 3 - 7: Validate Email, Telephone, Password, Confirm Password, and Subscribe Labels |
|---|
This test scenario aims to validate the other fields' label to check if it is as expected. The below code was created Inside the test_register_account_labels.py file in the same way as before. To not be repetitive, we put all these together in the same section.
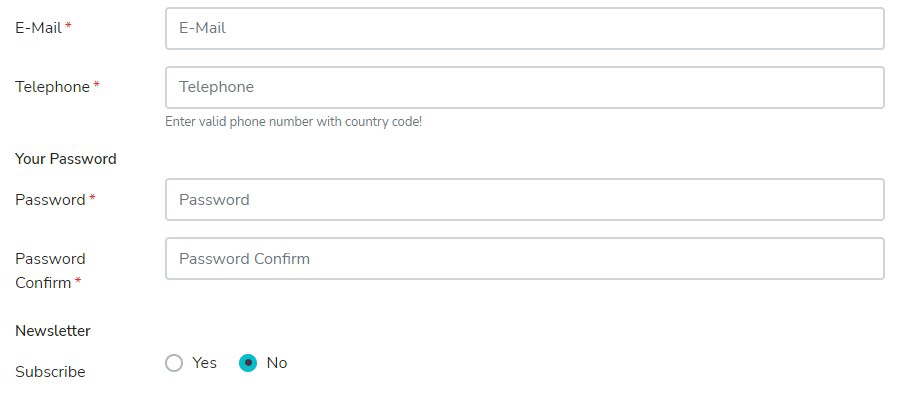
Implementation
def test_email_label(self):
self.assertEqual(self.register_account_page.getEmaileLabel(), "E-Mail")

def test_telephone_label(self):
self.assertEqual(self.register_account_page.getTelephoneLabel(), "Telephone")

def test_password_label(self):
self.assertEqual(self.register_account_page.getPasswordLabel(), "Password")

def test_confirm_password_label(self):
self.assertEqual(self.register_account_page.getConfirmPasswordLabel(), "Password Confirm")

def test_subscribe_label(self):
self.assertEqual(self.register_account_page.getSubscribeLabel(), "Subscribe")
Code Walkthrough
Step1: You need to create one new test method to each of the label fields that you want to validate. Each one uses the assertEqual method to check that the actual text of the label matches the expected text.
To run the tests using unittest, you should again run the below command:
python -m unittest test_register_account_labels.pyAll the tests inside the test_register_account_labels will be run. By running the tests, you could see the below result:

You can see that seven tests were run, and passed, as expected.
| Test Scenario 8: Validate Password Correct Confirmation |
|---|
This test scenario's goal is to validate that the register is confirmed when filling in the password and the confirm password correctly. The below code was created inside the test_register_account_password.py file.
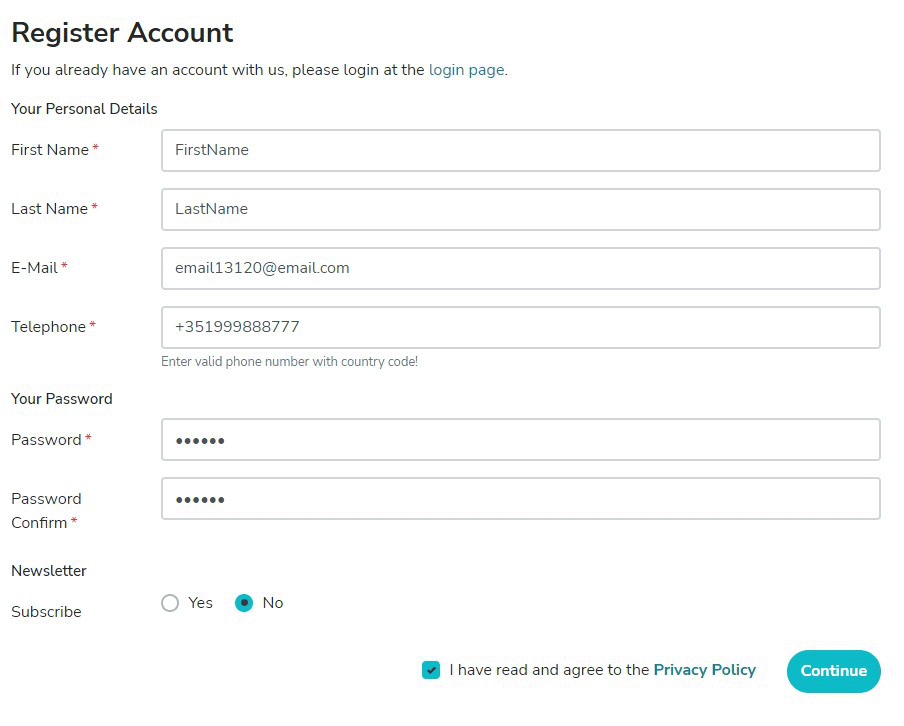
Implementation
import unittest
from TestBase.WebDriverSetup import WebDriverSetup
from selenium.webdriver.common.by import By
from PageObject.Locators import Locators


#This class will check specifically the behavior of the password and confirm password fields
class TestLambdaTestPlaygroundRegisterormPassword(WebDriverSetup):


def test_password_correct_confirmation(self):
first_name = self.register_account_page.getFirstName()
first_name.send_keys("FirstName")


last_name = self.register_account_page.getLastName()
last_name.send_keys("LastName")


email = self.register_account_page.getEmail()
email.send_keys("email13113@email.com")


telephone = self.register_account_page.getTelephone()
telephone.send_keys("+351999888777")

password = self.register_account_page.getPassword()
password.send_keys("123456")


password_confirm = self.register_account_page.getConfirmPassword()
password_confirm.send_keys("123456")


terms = self.register_account_page.getTerms()
terms.click()

continue_button = self.register_account_page.getContinueButton()
continue_button.click()


new_page_title = self.driver.title
self.assertEqual(new_page_title, "Your Account Has Been Created!")


if __name__ == '__main__':
unittest.main()
Code Walkthrough
Step 1: You should import the necessary frameworks and libraries to create the test cases. In our case, you must import the unittest and WebDriverSetup class from the TestBase module. You will need to get some specific elements inside this test file, so you need to import By from the Selenium WebDriver library and the Locators.py file.
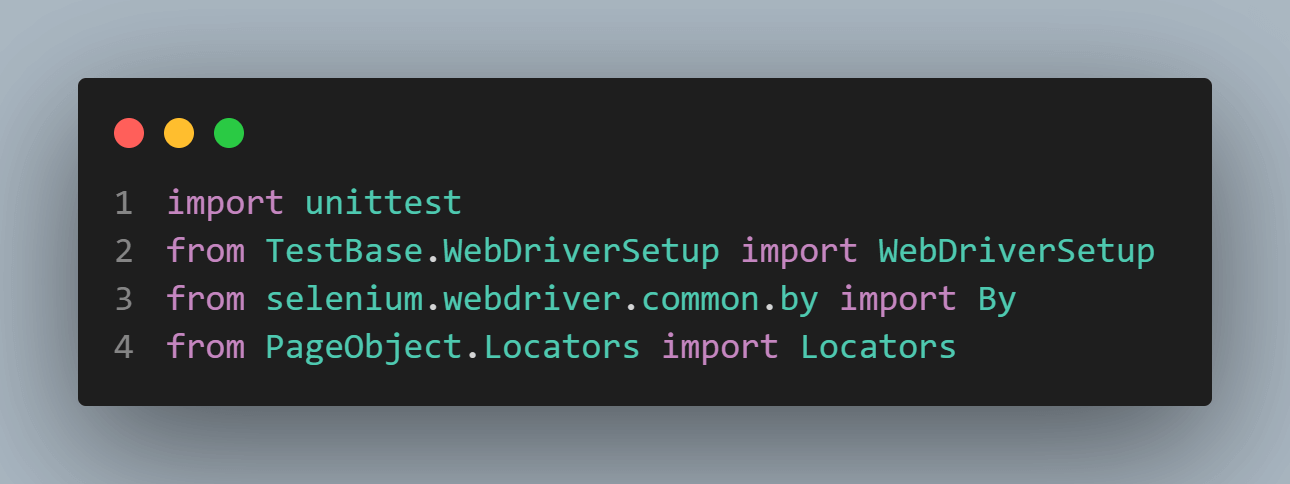
Step 2: Then, you should define a class called TestFormPassword, which extends the WebDriverSetup class. The purpose of this class is to test the password and confirm password fields on the registration form page of the LambdaTest website.

Step 3: Within the TestFormPassword class, there is a test function called test_password_correct_confirmation, our first test case.

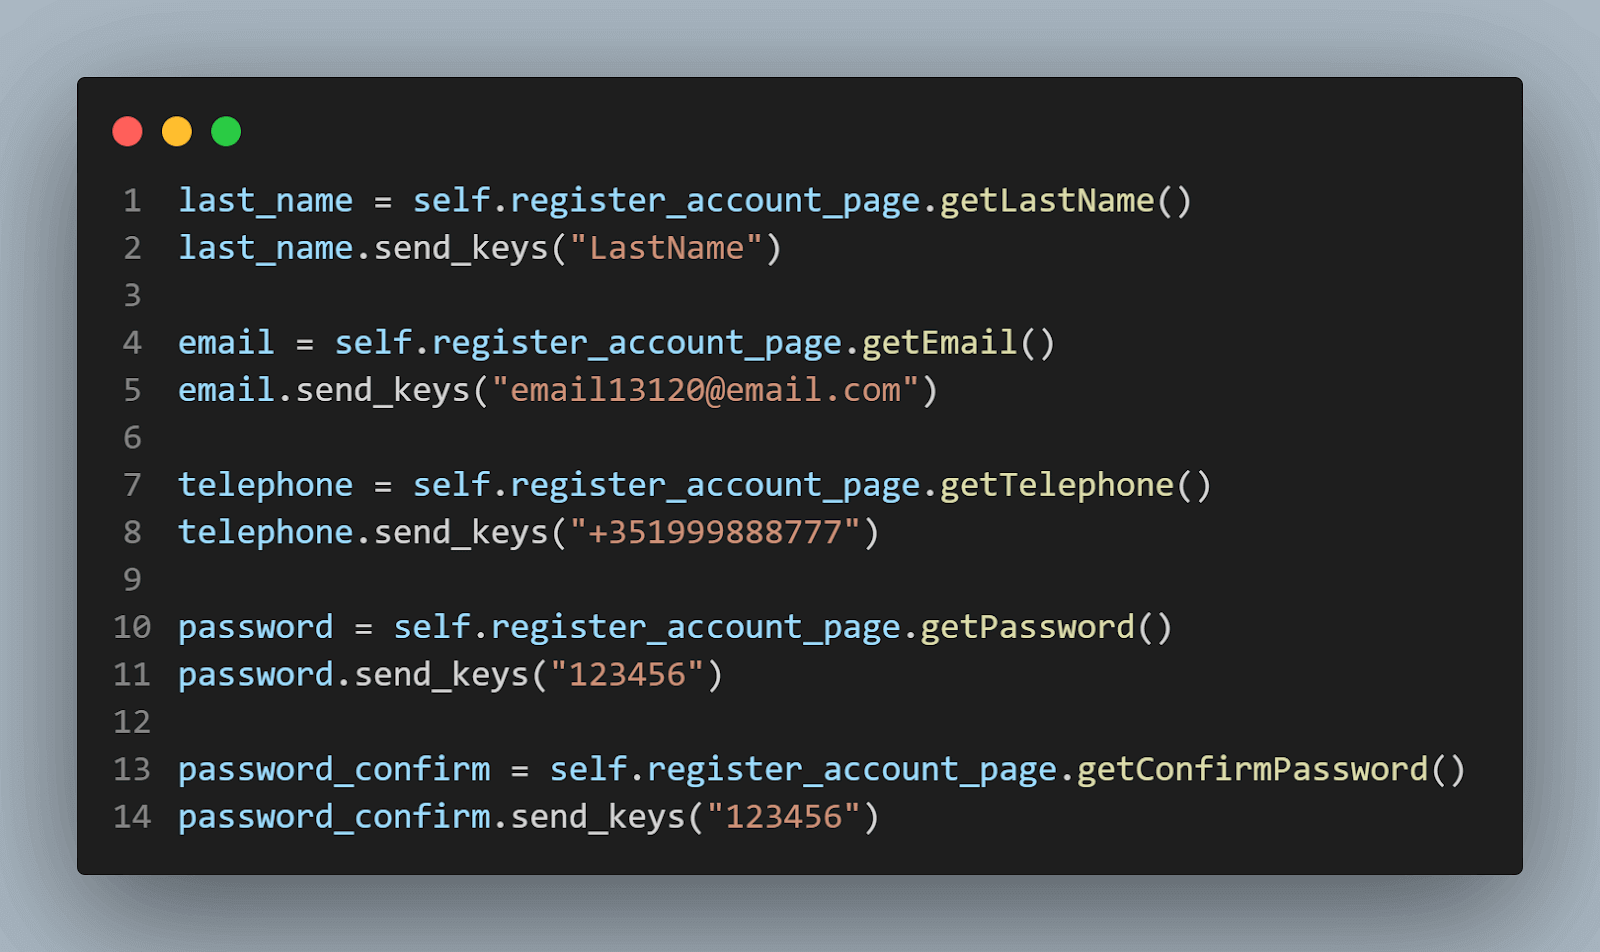
Step 4: Inside the test_password_correct_confirmation function, you will interact with the form elements. First, you will get the element using the RegisterAccountPage method called getFirstName; you will type inside this field using the send_keys method. In this example, you should type the string “FirstName”.

Step 5: Let’s repeat the above step to all the fields you want to type inside it.
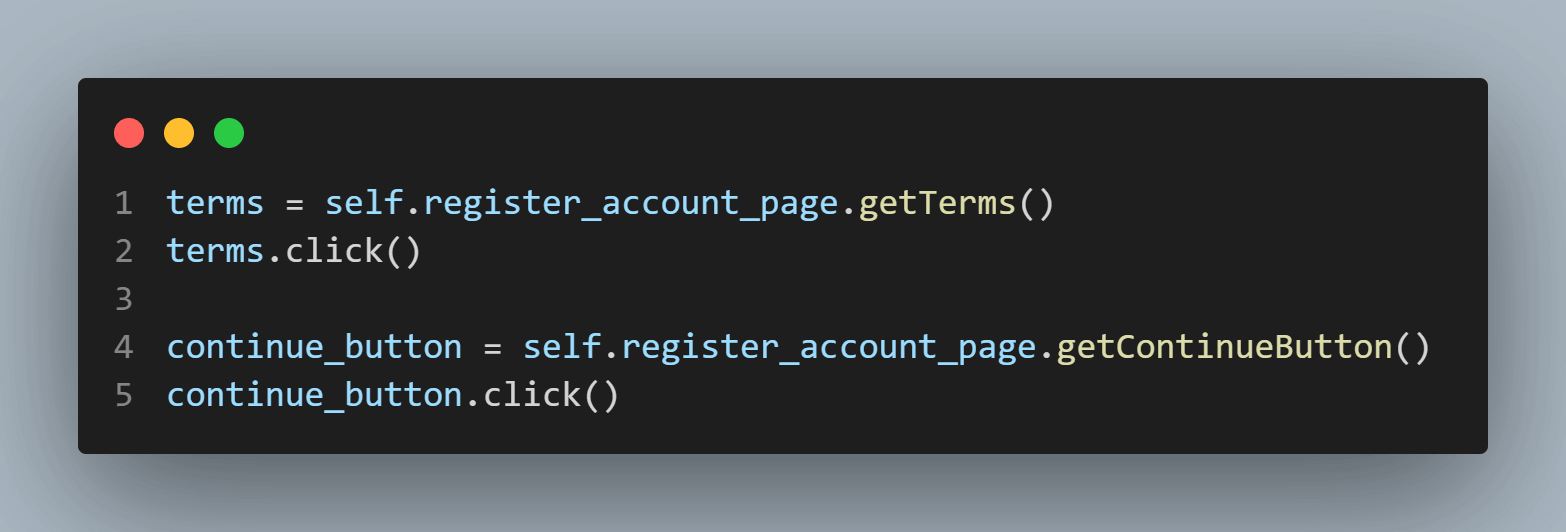
Step 6: Inside the test_password_correct_confirmation function, you will interact with the accept terms element and then finish clicking on the continue button. First, you will get the element using the RegisterAccountPage method called getTerms, and then you will click it using the click method. Then, you will do the same to the continue button using the getContinueButton from RegisterAccountPage and then call the click method to click on it.
Step 7: The expected result of this test is to open a new page and check the browser title. So, you need to get the browser title using self.driver.title and save it on the new_page_title variable. With this, you can assert that this title is “Your Account Has Been Created!”.

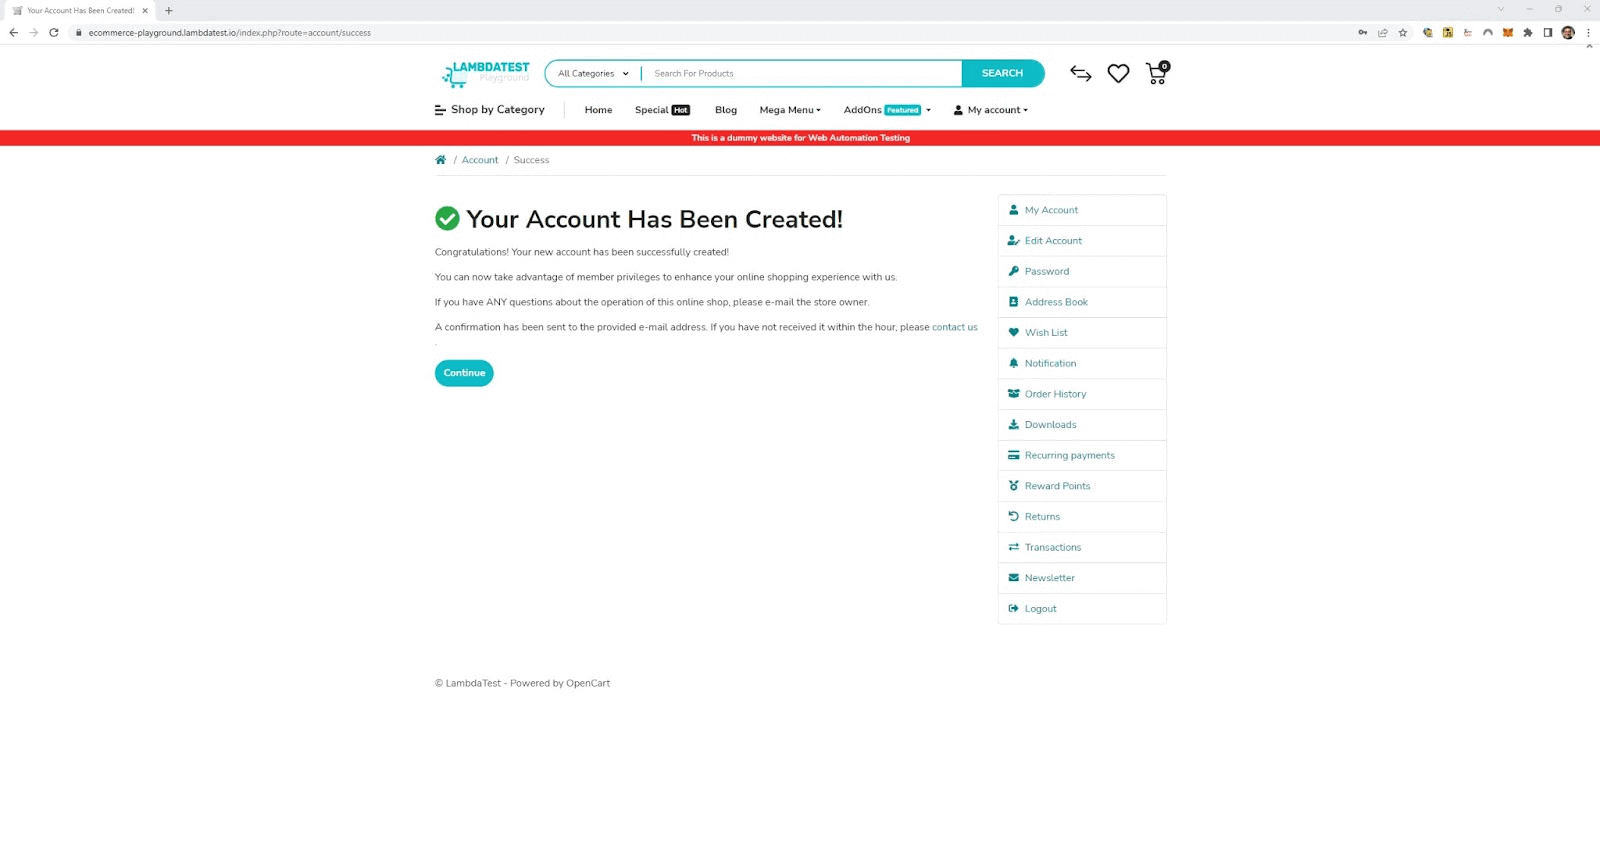
Important to mention that you can only create one account by email. So, if you need to run this test more than once, you must change the used email.
Step 8: The latest lines of code include the unittest.main() method, which runs the test cases defined in the script. This is how unittest understands that there are test cases inside this file and runs it.
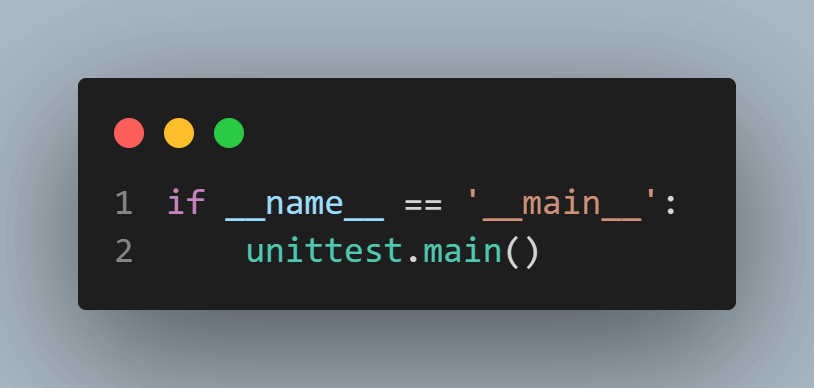
You can run the tests as before by just running the below command.
python -m unittest test_register_account_password.pyAll the tests inside the test_register_account_password will be run. By running the tests, you could see the below result:

You can see that 1 test was run and passed, as expected.
Please do not consider these deprecated warnings that Selenium throws again and again. This comes from the communication done by the WebDriver.
| Test Scenario 9: Validate Password Not Filled |
|---|
This test scenario's goal is to validate that an error is presented when clicking on the continue button without filling in the password field. The below code was created Inside the test_register_account_password.py file, more directly, inside the TestFormPassword class.

Implementation
def test_password_not_filled(self):
continue_button = self.register_account_page.getContinueButton()
continue_button.click()


self.password_error_message = self.driver.find_element(By.XPATH, Locators.password_error_message).text


self.assertEqual(self.password_error_message, "Password must be between 4 and 20 characters!")
Code Walkthrough
Step 1: Within the TestFormPassword class, there is a test function called test_password_not_filled.
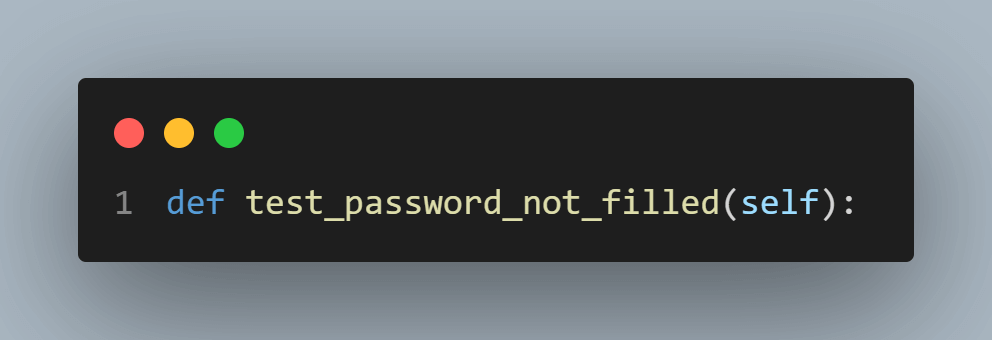
Step 2: Inside the test_password_not_filled function, you will interact with the form elements. First, you will get the element using the RegisterAccountPage method called getContinueButton, and then you should click using the click method.

Step 3: After clicking the button, an error message will be shown below the password field. You should locate the element here using the self.driver.find_element, choosing the By.XPATH method, pointing to the Locators.password_error_message. In the end, you should use .text to get the message's text.

Unlike the other elements, this error message can only be located inside the test case because it is only available after clicking the continue button.
Step 4: Finally, you can assert that this message is correctly presented.

You can run the tests as before, just running the below command:
python -m unittest test_register_account_password.pyAll the tests inside the test_register_account_password will be run. By running the tests, you could see the below result:

Two tests were run, and passed, as expected.
| Test Scenario 10: Validate Password Less Than Minimum |
|---|

This test scenario aims to validate that an error is presented when clicking the continue button filling the password field with fewer characters than the minimum allowed. The below code was created Inside the test_register_account_password.py file, more directly, inside the TestFormPassword class.
Implementation
 def test_password_less_than_minimum(self):
password = self.register_account_page.getPassword()
password.send_keys("123")

continue_button = self.register_account_page.getContinueButton()
continue_button.click()


self.password_error_message = self.driver.find_element(By.XPATH, Locators.password_error_message).text
self.assertEqual(self.password_error_message, "Password must be between 4 and 20 characters!")
Code Walkthrough
Step 1: Within the TestFormPassword class, there is a test function called test_password_less_than_minimum.

Step 2: Inside the test_password_less_than_minimum function, you should interact with the form elements. First, you will get the element using the RegisterAccountPage method called getPassword, and then you will type inside this field using the send_keys method. In this example, you should type the string “123”.

Step 3: Continuing within the test_password_less_than_minimum function, you should get the element using the RegisterAccountPage method called getContinueButton, and then click using the click method.

Step 4: Again, when clicking on the button, an error message will be presented. You should locate the element here, as you did in the previous testing, and get its text.

Step 5: Finally, you can check that this message is correctly presented.

You can run the tests as before just by running the below command.
python -m unittest test_register_account_password.pyAll the tests inside the test_register_account_password will be run. By running the tests, you could see the below result:

You can see that three tests were passed, as expected.
| Test Scenario 11: Validate Password Without Confirmation |
|---|
This test scenario's goal is to validate that an error is presented when clicking on the continue button filling the password field correctly but not filling in the confirmation password field. The below is created inside the test_register_account_password.py file, more directly, inside the TestFormPassword class.

Implementation
 def test_password_without_confirmation(self):
password = self.register_account_page.getPassword()
password.send_keys("123456")

continue_button = self.register_account_page.getContinueButton()
continue_button.click()


self.password_confirm_error_message = self.driver.find_element(By.XPATH, Locators.password_confirm_error_message).text
self.assertEqual(self.password_confirm_error_message, "Password confirmation does not match password!")
Code Walkthrough
Step 1: Within the TestFormPassword class, there is a test function called test_password_without_confirmation.

Step 2: Inside the test_password_without_confirmation function, you should get the password field, as you did in the previous test, and then type “123456”.

Step 3: Continuing within the test_password_without_confirmation function, you should click the continue button as you did before.

Step 4: Again, when clicking on the button, an error message will be presented. You should locate the element here, as you did in the previous testing, and get its text.

Pay attention that now the message is regarding the confirmation password, which is no longer related to the password field, so it is a new element that should be retrieved.
Step 5: Finally, you can check that this message is correctly presented.

You can run the tests as before just by running the below command.
python -m unittest test_register_account_password.pyAll the tests inside the test_register_account_password will be run. Running the tests, you could see the below result:

You can see that four tests were run, and passed, as expected.
| Test Scenario 12: Validate Password WrongConfirmation |
|---|
This test scenario aims to validate that an error is presented when using a confirmation password different from the provided password. The below code was created inside the test_register_account_password.py file, more directly, inside the TestFormPassword class.

Implementation
def test_password_wrong_confirmation(self):
password = self.register_account_page.getPassword()
password.send_keys("123456")


password_confirm = self.register_account_page.getConfirmPassword()
password_confirm.send_keys("12345")

continue_button = self.register_account_page.getContinueButton()
continue_button.click()


self.password_confirm_error_message = self.driver.find_element(By.XPATH, Locators.password_confirm_error_message).text
self.assertEqual(self.password_confirm_error_message, "Password confirmation does not match password!")
Code Walkthrough
Step 1: Within the TestFormPassword class, there is a test function called test_password_wrong_confirmation

Step 2: Inside the test_password_wrong_confirmation function, you should type the string “123456” in the password field and “12345” in the confirmation password field.

Step 3: Continuing within the test_password_wrong_confirmationfunction function, you should click on the continue button.

Step 4: Again, when clicking on the button, an error message will be presented. You should locate the element here, as you did in the previous testing, and get its text.

Step 5: Finally, you can check that this message is correctly presented.

You can run the tests as before just by running the below command.
python -m unittest test_register_account_password.pyAll the tests inside the test_register_account_password will be run. By running the tests, you could see the below result:

You can see that five tests were run, and passed, as expected.
If you are a developer or a tester, you can take the first step towards becoming an automation testing expert and enhancing your Python skills with a Selenium Python 101 certification program.
Best Practices for Python Unit Testing
Unit testing is a critical aspect of software development that ensures individual components of a program function as intended. Here are some best practices for Python unit testing:
- Isolation and Independence:
- Clear and Descriptive Test Names:
- Small and Focused Tests:
- Use of Setup and Teardown Methods:
- Assertion Messages:
- Testing Edge Cases:
- Continuous Integration:
- Regular Test Execution:
- Code Coverage Analysis:
- Mocking and Stubbing:
- Readable and Maintainable Tests:
- Version Control Integration:
- Documentation of Test Cases:
Ensure that each test case is independent and doesn't rely on the state of other tests. This prevents cascading failures and makes it easier to pinpoint the source of issues.
Use descriptive names for your test cases. A well-named test provides clarity on what is being tested and helps in understanding failures.
Keep test cases small and focused on a specific functionality. This makes it easier to identify which part of the codebase is causing issues.
Leverage setup and teardown methods (e.g., setUp and tearDown in unittest) to establish a consistent testing environment. This ensures that tests start from a known state and clean up after execution.
Provide meaningful messages with assertions. When an assertion fails, a clear message helps developers understand the reason for the failure without diving deep into the test code.
Include tests for edge cases and boundary conditions. This helps uncover potential issues in extreme scenarios that might not be evident during regular testing.
Integrate unit tests into a continuous integration (CI) system. This ensures that tests are run automatically whenever changes are made to the codebase, catching issues early in the development process.
Run tests regularly, preferably before committing code changes. This practice helps identify issues early and prevents the accumulation of broken tests.
Monitor code coverage to ensure that your tests exercise a significant portion of your code. Tools like coverage.py can help identify areas of your code that lack test coverage.
Use mocking and stubbing judiciously to isolate the unit under test. Mock external dependencies to create controlled environments for testing without relying on external resources.
Write tests that are easy to read and maintain. Follow a consistent structure and use comments where necessary to explain complex scenarios or decisions.
Keep your unit tests in version control along with the rest of your code. This ensures that tests evolve with the codebase and are available for historical reference.
Provide documentation for complex or non-obvious test cases. This is particularly useful for developers who may not be familiar with the specific nuances of the code being tested.
Conclusion
Unit testing is a very important component of software development that verifies that code performs as intended. By creating clear and effective unit test cases, developers can detect issues early in development, saving valuable time and resources.
This blog provided a comprehensive overview of unit testing, highlighting its significance and the principles of Test Driven Development (TDD). The blog also explored the anatomy of a unit test and guided the writing of concise and transparent test cases.
The blog delved into the benefits of the Python unittest Framework and its installation process. In the demonstration section, the blog used the Page Object Model to create the project structure for testing a website and presented 12 different test scenarios. The presented test scenarios demonstrated how the unittest Framework could be used to test various aspects of a website, including validation of input fields and verification of correct confirmation messages.
Incorporating unit testing into the software development process and utilizing tools like the Python unittest Framework can enhance the quality and reliability of code, leading to better user experiences and increased customer satisfaction.
Delve into our top Unit Testing Interview Questions guide, designed to help you excel in unit testing interviews. It covers a wide range of topics, from syntax to advanced techniques, with detailed solutions.
About author
Paulo is a Quality Assurance Engineer with more than 15 years of experience in Software Testing. He loves to automate tests for all kind of applications (both backend and frontend) in order to improve the team’s workflow, product quality, and customer satisfaction. Even though his main roles were hands-on testing applications, he also worked as QA Lead, planning and coordinating activities, as well as coaching and contributing to team member’s development. Sharing knowledge and mentoring people to achieve their goals make his eyes shine.
On this page
- Overview
- What is Unit Testing
- Importance of Unit Testing
- Difference between Pytest and Unittest
- Why PyUnit preferred for Unit testing
- Writing Effective Unit Tests
- Getting Started with Python unittest Testing
- Demonstration: Running Test using Python unittest Framework
- Best Practices
- Frequently Asked Questions (FAQs)
Frequently asked questions
- General
Did you find this page helpful?
Author's Profile

Paulo Oliveira
Paulo is a Quality Assurance Engineer with more than 15 years of experience in Software Testing. He loves to automate tests for all kind of applications (both backend and frontend) in order to improve the team’s workflow, product quality, and customer satisfaction. Even though his main roles were hands-on testing applications, he also worked as QA Lead, planning and coordinating activities, as well as coaching and contributing to team member’s development. Sharing knowledge and mentoring people to achieve their goals make his eyes shine.
Reviewer's Profile

Harshit Paul
Harshit is currently the Director of Product Marketing at LambdaTest. His professional experience spans over 7 years, with more than 5 years of experience with LambdaTest as a product specialist and 2 years at Wipro Technologies as a certified Salesforce developer. During his career, he has been actively contributing blogs, webinars as a subject expert around Selenium, browser compatibility, automation testing, DevOps, continuous testing, and more.
More Hubs
Try LambdaTest Now !!
Get 100 minutes of automation test minutes FREE!!


