A Detailed Guide to WebdriverIO Assertions
- Learning Hub
- A Detailed Guide to WebdriverIO Assertions
OVERVIEW
Verification and validation are integral to software testing because it ensures that the final product meets the requirements. It reduces the possibility of defects and failure of the product. You will come across several automation testing frameworks that will help you automate the process and allow you to verify at each step. It is an important aspect of test automation as it increases the ROI by the early discovery of bugs.
Selenium is one such framework that has been in the market for almost a decade, but the evolution of frameworks such as WebdriverIO, Playwright, and Cypress is increasing daily. WebdriverIO is a framework that can play a unified solution for testing needs.
WebdriverIO can be used for all the functions that Selenium can do. It can be integrated with many popular test automation tools, plugins, services, and reporting like Appium, VSCode Extension, LambdaTest, etc.
The WebdriverIO test runner comes with a built-in WebdriverIO Assertion library that allows you to make WebdriverIO Assertions about different parts of a browser or elements within a (web) application. It extends the functionality of Jest Matchers with additional matchers optimized for end to end testing.
You will look into these WebdriverIO Assertion types in more detail in this WebdriverIO tutorial.
Before looking into WebdriverIO Assertions, let’s quickly look into what test assertions are and a quick recap of the WebdriverIO setup and configuration.
What are Test Assertions?
Assertion is an essential step in the test automation process where you compare/match the expected result with the actual result. This means checking at different steps to verify that the application behaves as expected.
Let's say Peter wants to purchase a product by navigating to a website, entering the product name in the search bar, clicking on Search, selecting the product from the grid, adding to the cart, checkout, and making the payment.
We will look into this example step-by-step using LambdaTest eCommerce Playground.
Step-by-step test approach:
| Step No# | Action | Verification |
|---|---|---|
| 1 | "Navigate to eCommerce Playground Website. e.g., https://ecommerce-playground.lambdatest.io/. | 1. Verify the user is navigated to the eCommerce website. 2. Verify page title is Your Store. |
| 2 | Enter the product name in the search bar. e.g., HTC Touch HD. | |
| 3 | Click on the Search button. | 1. Verify the user is redirected to the Search result on the page. 2. Verify the page title is ‘Search - HTC Touch HD’. 3. Verify on the search result page ‘HTC Touch HD’ product is shown. |
| 4 | Click on the first product, ‘HTC Touch HD’. | 1. Verify users are navigated to the ‘HTC Touch HD’ product details page. 2. Verify page title is ‘HTC Touch HD’ 3. Verify Availability is shown as ‘In Stock’ 4. Verify the ‘Add to Cart’ button is enabled. |
| 5 | Click on the ‘Add to Cart’ button. | Verify product is successfully added to the cart. |
| 6 | Click on the ‘Cart’ icon. | 1. Verify the Cart side panel is open. 2. Verify the checkout button is shown to the user. |
| 7 | Click on the ‘Checkout’ button. | 1. Verify the user is redirected to the Checkout page. 2. Verify product details are shown in the right side pane. Since you didn’t log into the application on the right-hand side, you will also see the Registration/Login/Guest flow. |
The above test scenario explains how you can add assertions for each step as a checkpoint to ensure no issues/errors when navigating the website.
In the below section of this WebdriverIO Assertions tutorial, you will get a quick recap of WebdriverIO, you will take a deep dive into WebdriverIO Assertions.
Quick Recap of WebdriverIO
WebdriverIO is a test automation tool used for full end-to-end testing or unit and component testing in the browser. WebdriverIO interacts with elements when it appears; this auto-wait is natively available. It natively supports mobile devices, smart TVs, or other IoT devices through Appium.
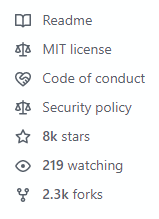
When writing this WebdriverIO Assertions tutorial, WebdriverIO has over 8k Star, 2.3k Fork, and 417 contributors on GitHub, which speaks to how popular the tool is and the people contributing towards its growth.
Accelerate JavaScript Automation with WebdriverIO. Try LambdaTest Now!
WebdriverIO Setup
Before we get into actual WebdriverIO Assertions, let's quickly set up the WebdriverIO and run the example tests to see it in action. Then you will start creating tests for each WebdriverIO Assertion.
In case you already have WebdriverIO installed on your machine, you can directly jump to the WebdriverIO Assertions section.
Getting Started
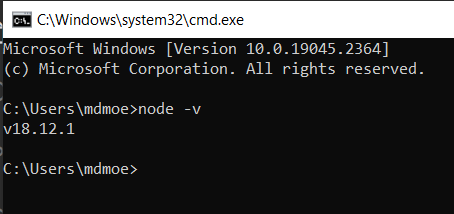
Step 1: You need to have Node.js installed on your machine. You can download it directly from the Node.js website and install it on your machine if you are not already using it. Once installed, check the version:
node -v
Step 2: Download and Install Visual Studio Code (this will help you write formatted code, but you can pick any text editor of your choice).
Step 3: Open Visual Studio Code.
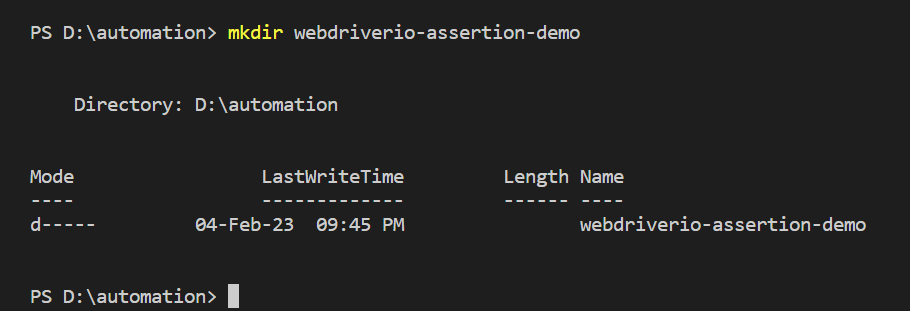
Step 4: Open your integrated Terminal and run the following command.
mkdir webdriverio-assertion-demo
Step 5: Open the directory.
cd webdriverio-assertion-demo
Step 6: Install the WebdriverIO.
You can install WebdriverIO by using npm or yarn. On your terminal type:
npm init wdio
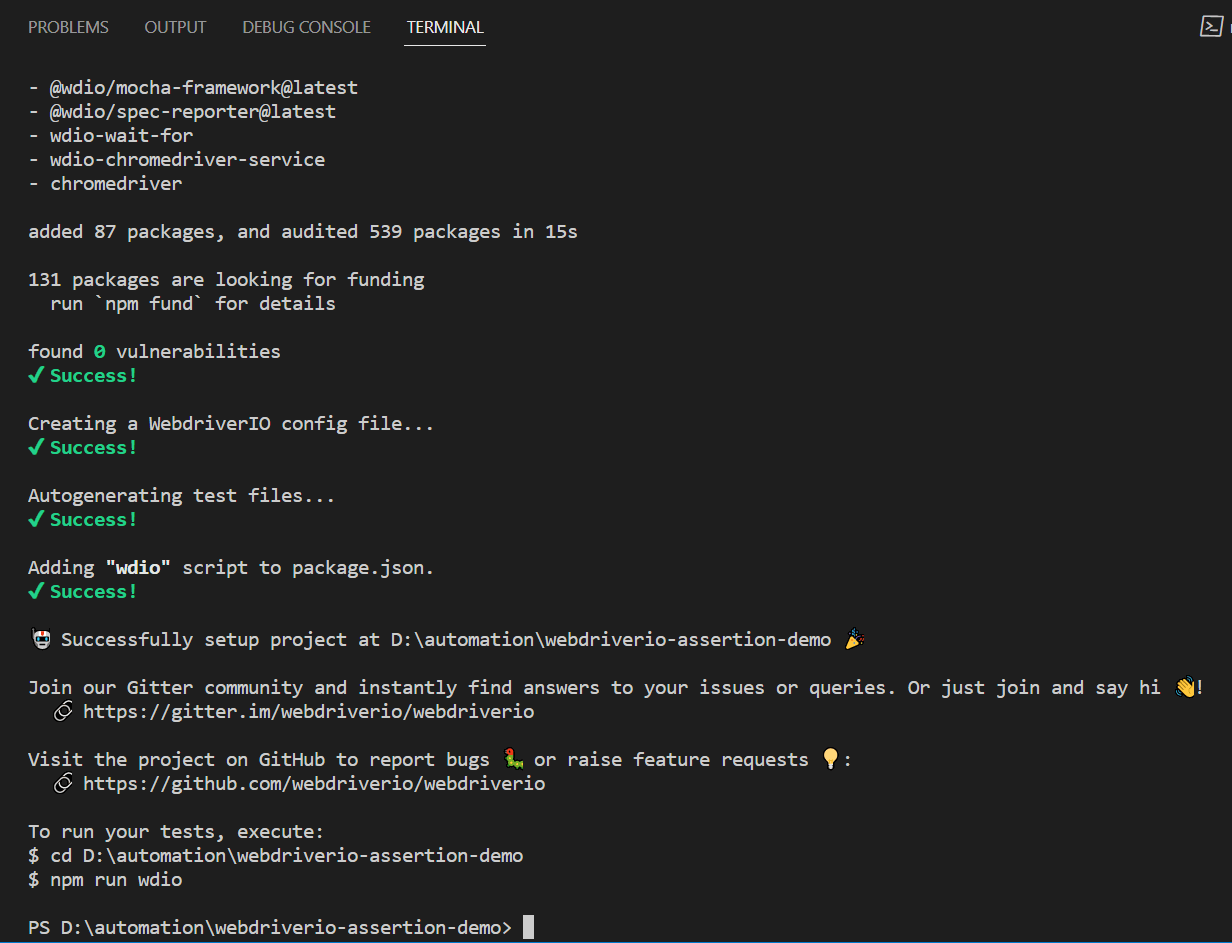
With the default configuration, the logging level is set to Info in the wdio.config.js file. This will show you the very detailed level of logs in the console. You can make the changes based on the need from the trace, debug, info, warn, error, and silent. Let's change the logging level to silent, so it only reports the required information.
logLevel: 'silent',Running the Example Test
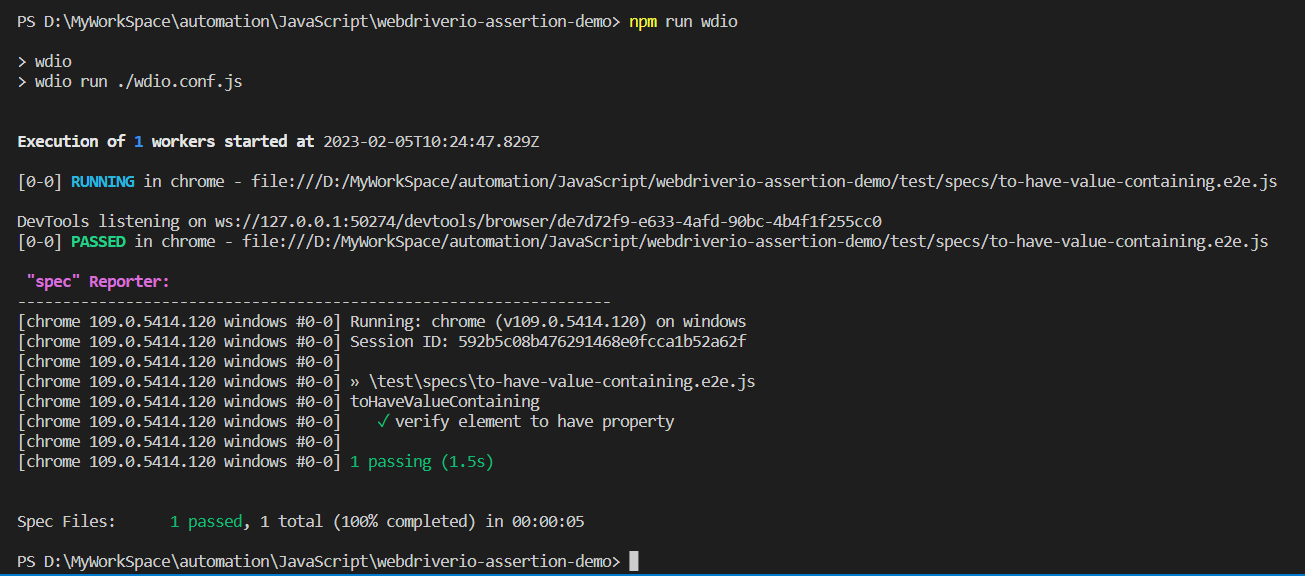
In this section of the WebdriverIO Assertions tutorial, we will run the example WebdriverIO test. Since we have installed WebdriverIO with default options, it created an example spec file named example.e2e.js. Let’s run the test:
npm run wdio
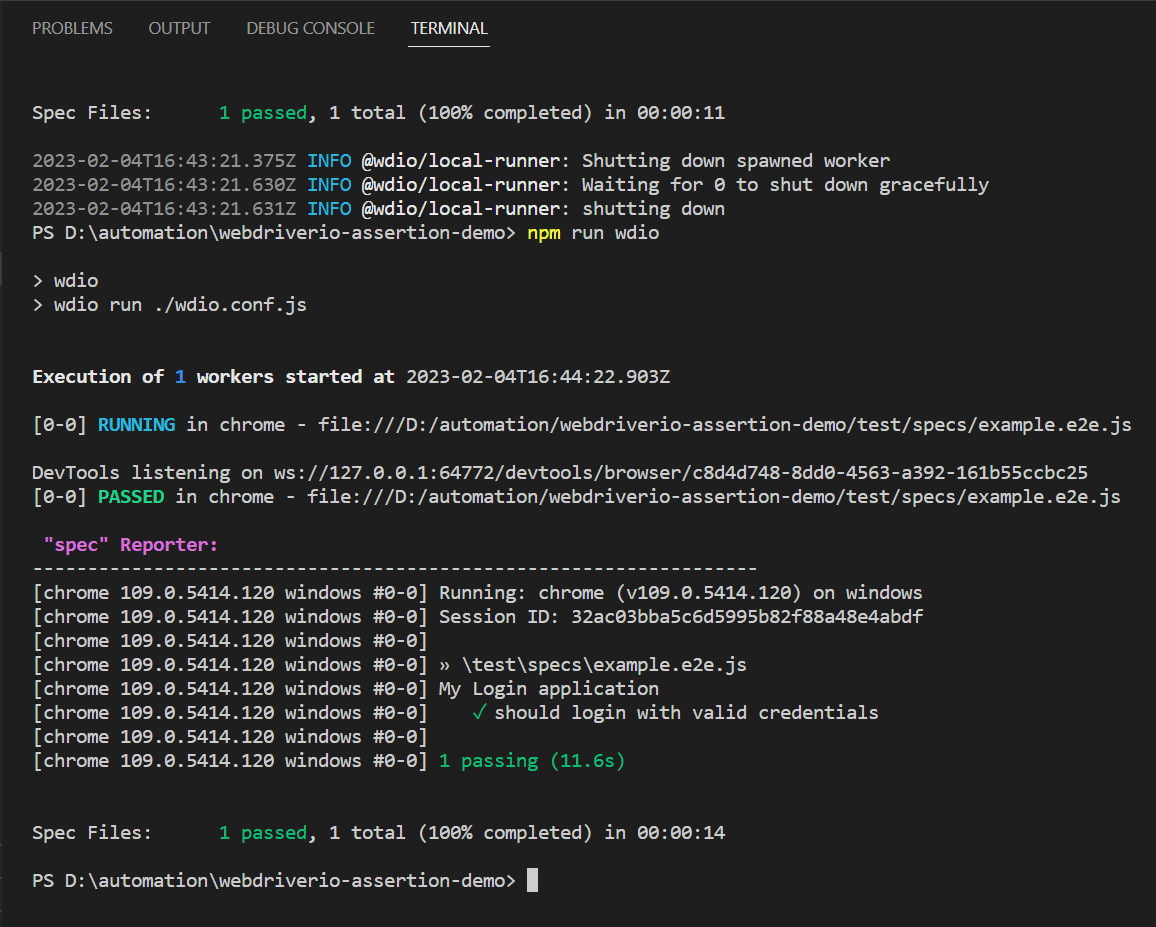
Delete the example test from the root directory. You will create a test for each type of WebdriverIO Assertion we will discuss in this WebdriverIO Assertion tutorial.
Clone the WebdriverIO Assertion Demo GitHub repository to follow the steps mentioned in the WebdriverIO Assertion tutorial.

WebdriverIO Assertions
In this section, let’s delve deeper into WebdriverIO Assertions. When writing tests, we must verify that actual values meet certain expected conditions. expect in WebdriverIO is having a large set of "matchers" that we can use to assert different conditions in the browser, element, or object. Matchers are methods available on expect, for example, expect().toEqual().
Browser Matchers
When we are doing expect operation on a browser, then browser matchers are used in such cases. Like when we want to verify the URL or Title of the page.
toHaveUrl
It’s used to verify if the browser is on a specific page URL.
Sample Usage:
await browser.url('https://ecommerce-playground.lambdatest.io/');
await expect(browser).toHaveUrl('https://ecommerce-playground.lambdatest.io/');
Parameters:

Implementation:
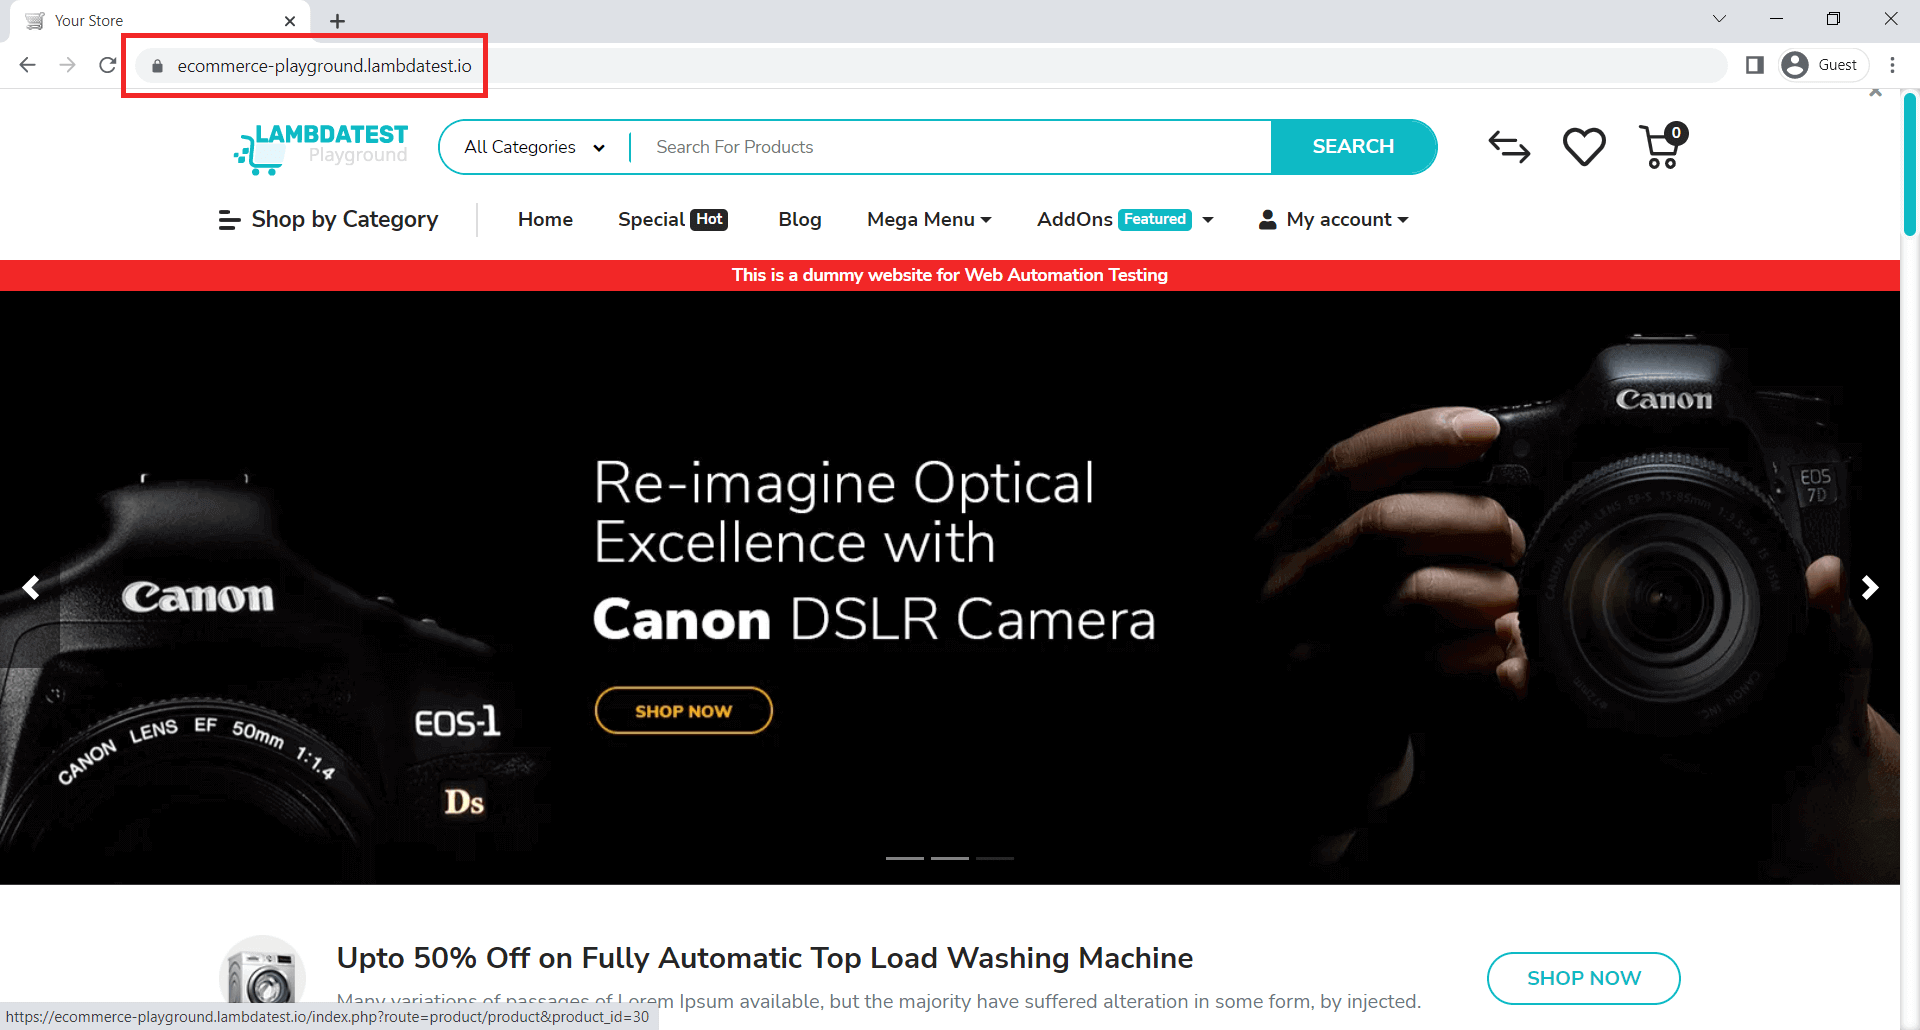
Here we are going to verify if the URL has: https://ecommerce-playground.lambdatest.io/
describe('toHaveURL', async () => {
    it('verify user is directed to right url', async () => {
        await browser.url('https://ecommerce-playground.lambdatest.io/');
        await expect(browser).toHaveUrl('https://ecommerce-playground.lambdatest.io/');
    });
});
Code Walkthrough:
Line 1: describe is a block where we describe the test suite and it will hold all the tests under it. A describe block can contain multiple it blocks, which are actual tests
Line 2: it is a block where we will write our test
Line 3: Navigate to the test URL
Line 4: expect the browser to have a URL to match the expected result
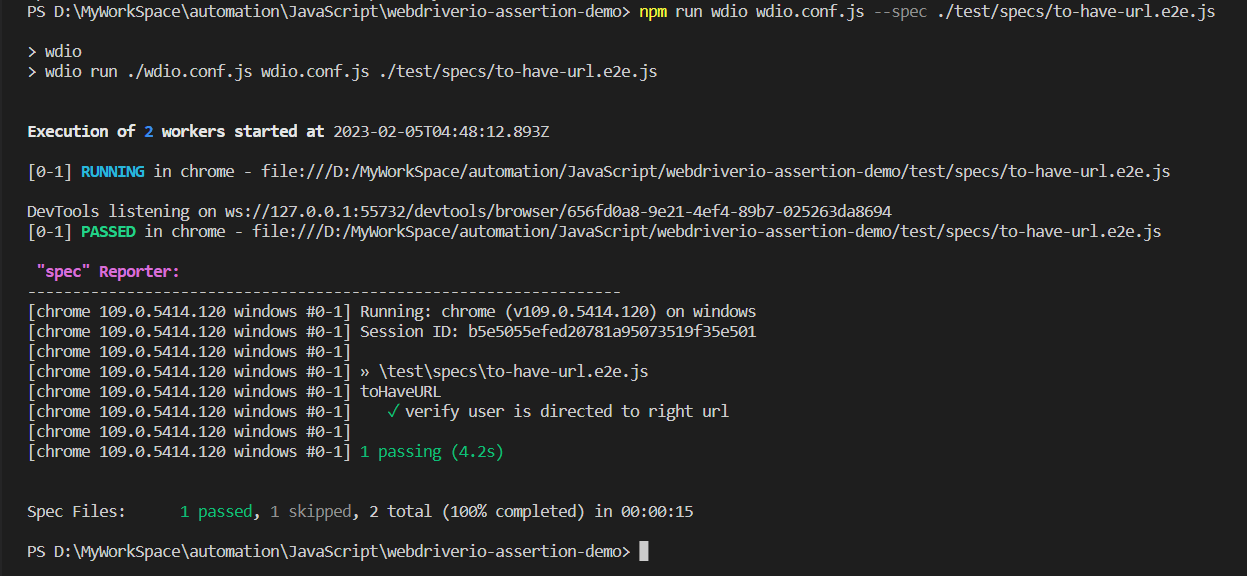
Execution:
toHaveUrlContaining
It is used to verify if the URL contains a value. When we are on a web page and want to verify if we are on the right page, URL value is one of the expected conditions to be verified.
Sample Usage:
await browser.url('https://ecommerce-playground.lambdatest.io/');
await expect(browser).toHaveUrlContaining('ecommerce');
Parameters:

Implementation:
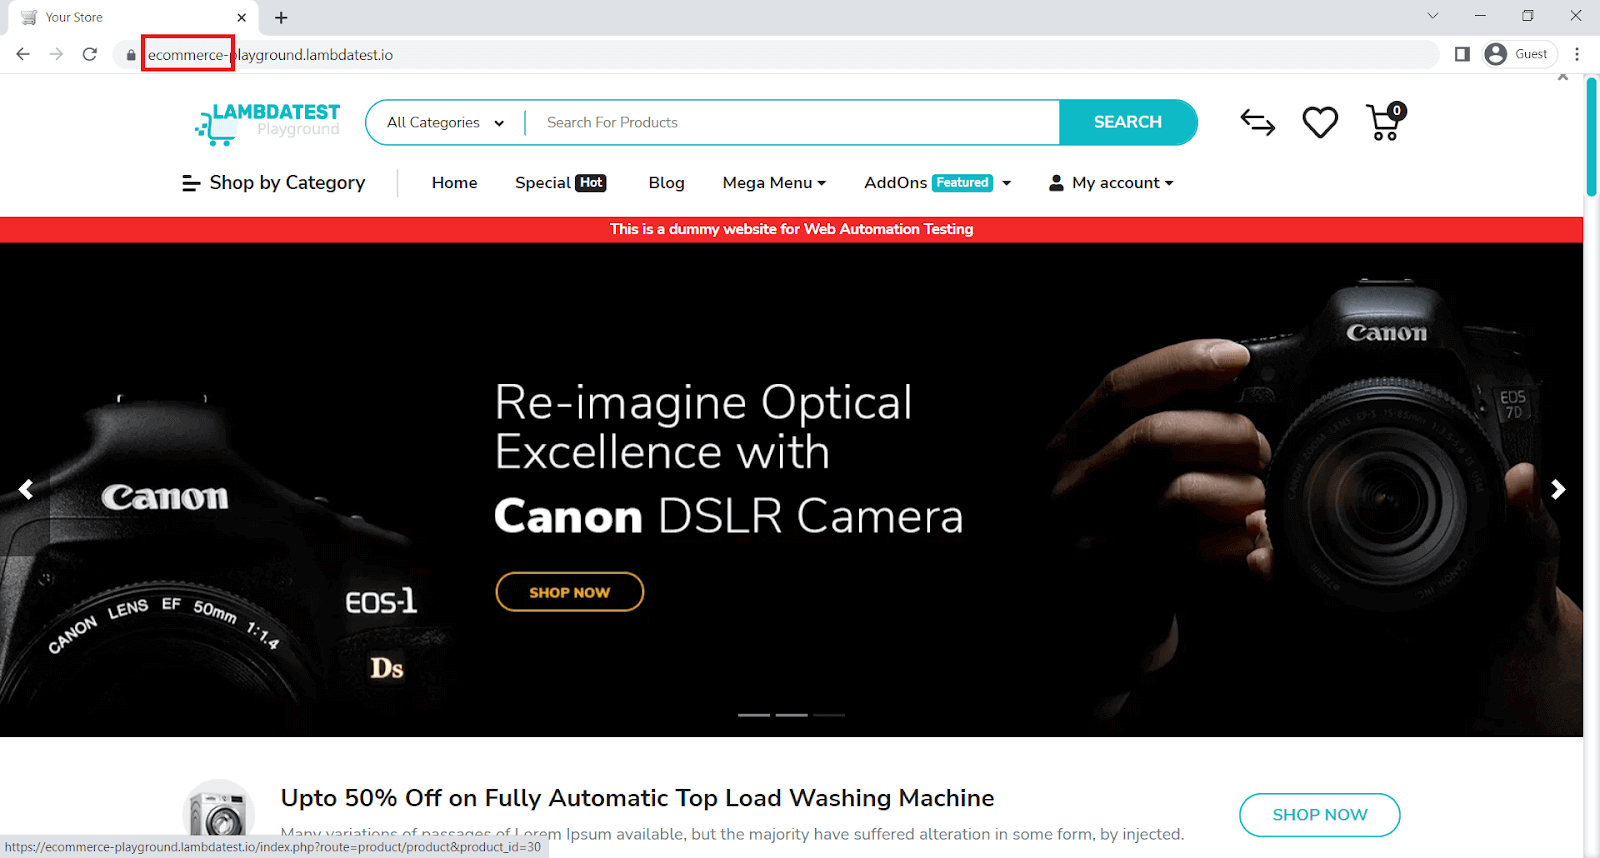
Here, we will verify if the URL contains ecommerce value
describe('toHaveUrlContaining', async () => {
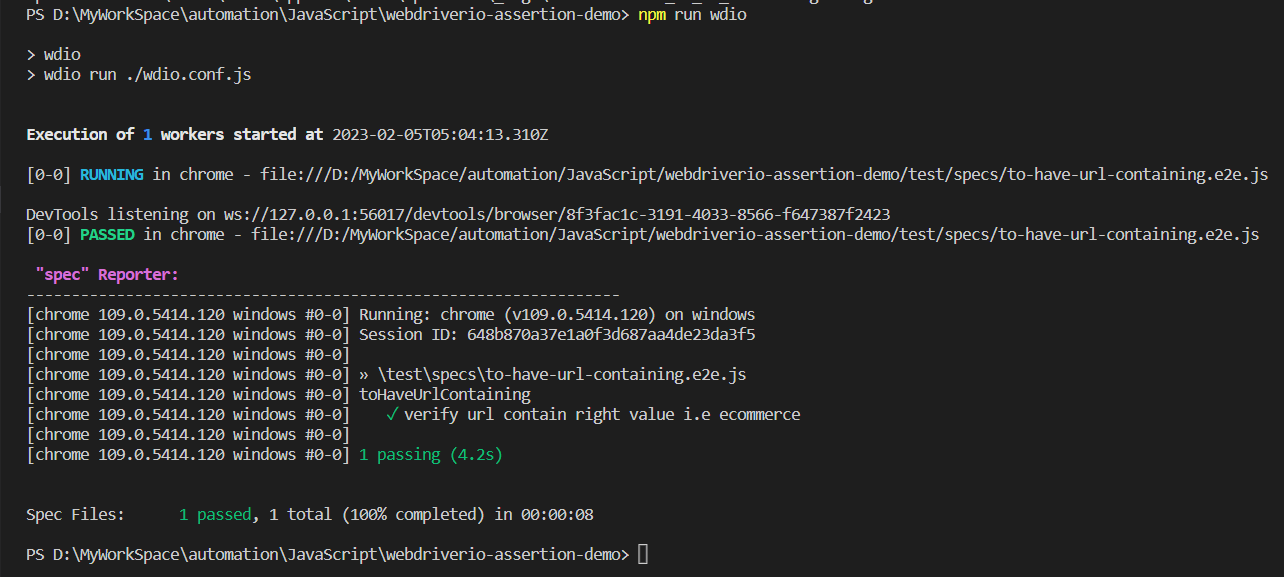
    it('verify url contain right value i.e ecommerce', async () => {
        await browser.url('https://ecommerce-playground.lambdatest.io/');
        await expect(browser).toHaveUrlContaining('ecommerce');
    });
});
Code Walkthrough:
Line 4: expect the browser URL value to match it with the expected value
Execution:
toHaveTitle
It is used to check specific page title. When your test application has a unique page title, in that case, you can make use of this expect condition.
Sample Usage:
await browser.url('https://ecommerce-playground.lambdatest.io/');
await expect(browser).toHaveTitle('Your Store');
Parameters:

Implementation:
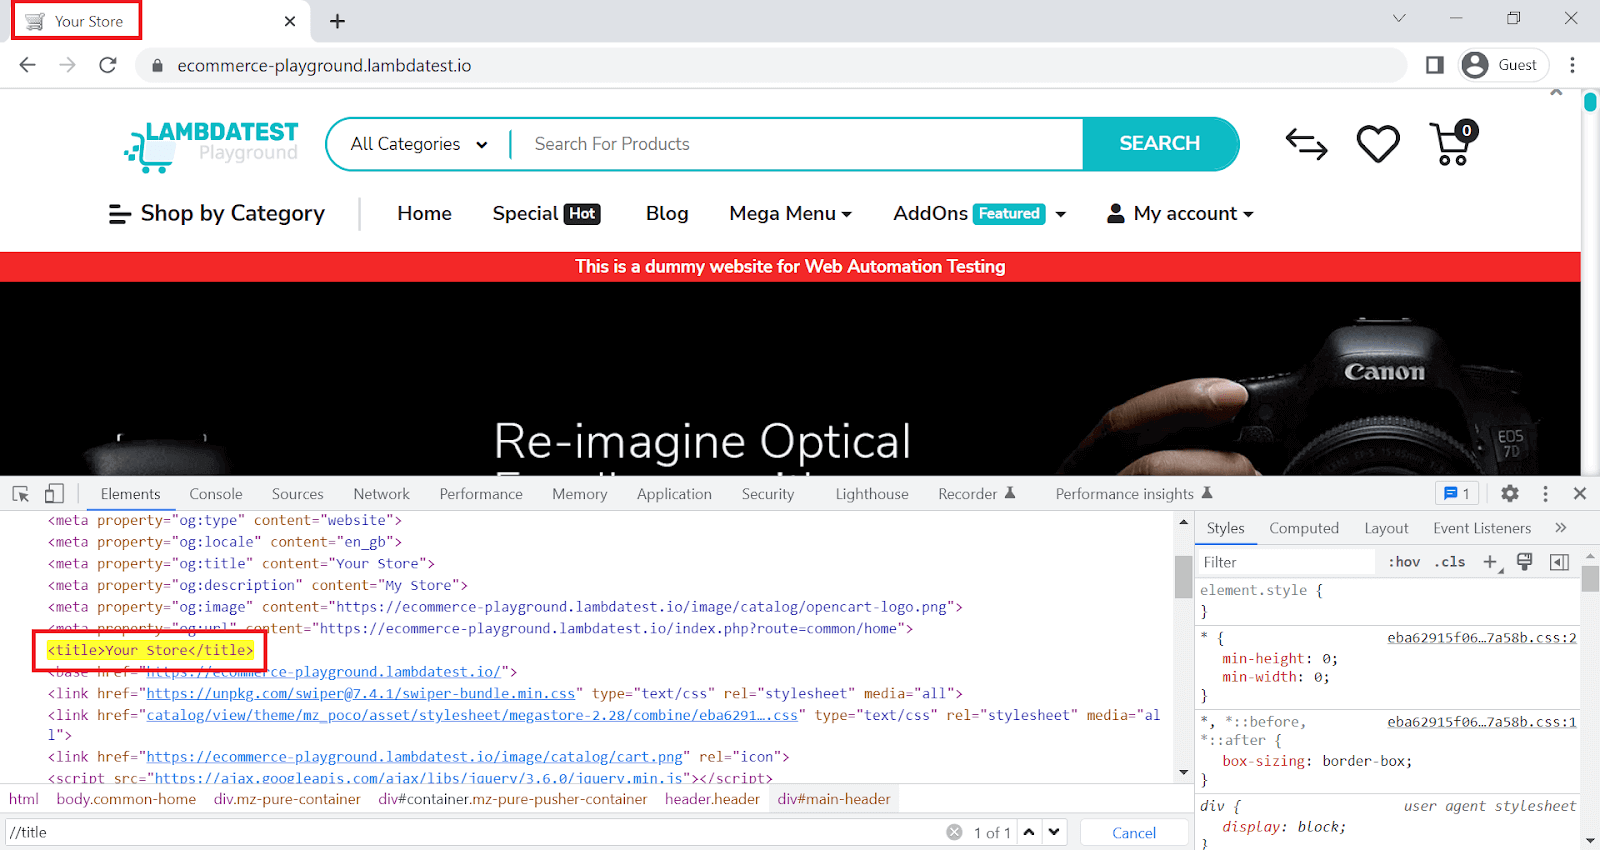
Here, we will verify the page title.
describe('toHaveTitle', async () => {
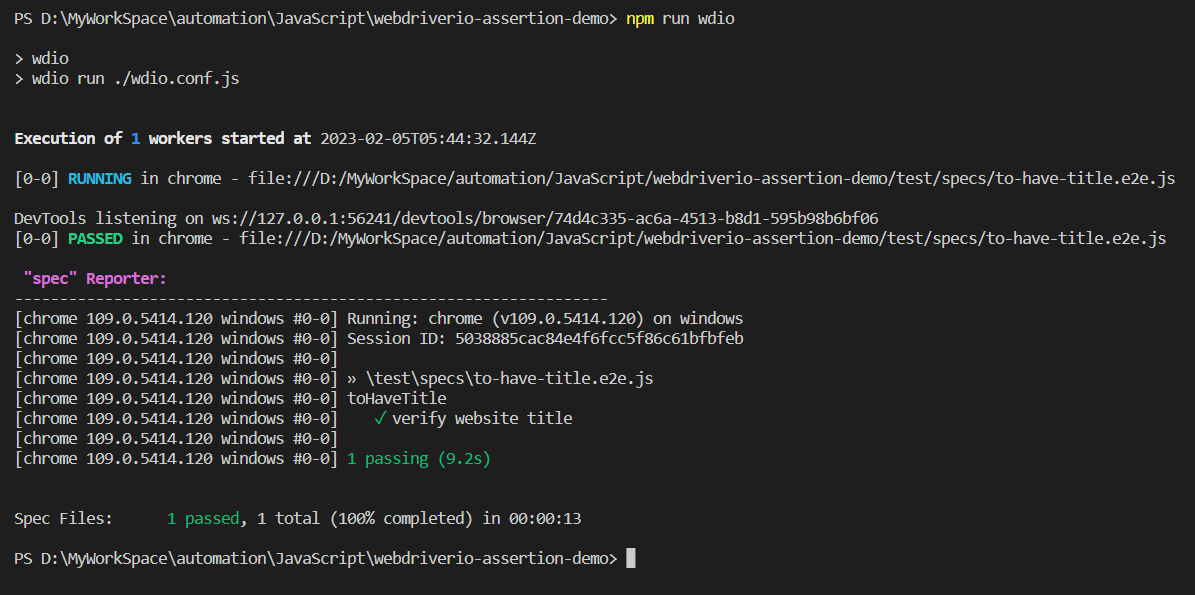
    it('verify website title', async () => {
        await browser.url('https://ecommerce-playground.lambdatest.io/');
        await expect(browser).toHaveTitle('Your Store');
    });
});
Code Walkthrough:
Line 4: expect the browser page title to match it with the expected results
Execution:
toHaveTitleContaining
It checks if the specific title contains the value.
Sample Usage:
await browser.url('https://ecommerce-playground.lambdatest.io/');
await expect(browser).toHaveTitleContaining('Store');
Parameters:

Implementation:
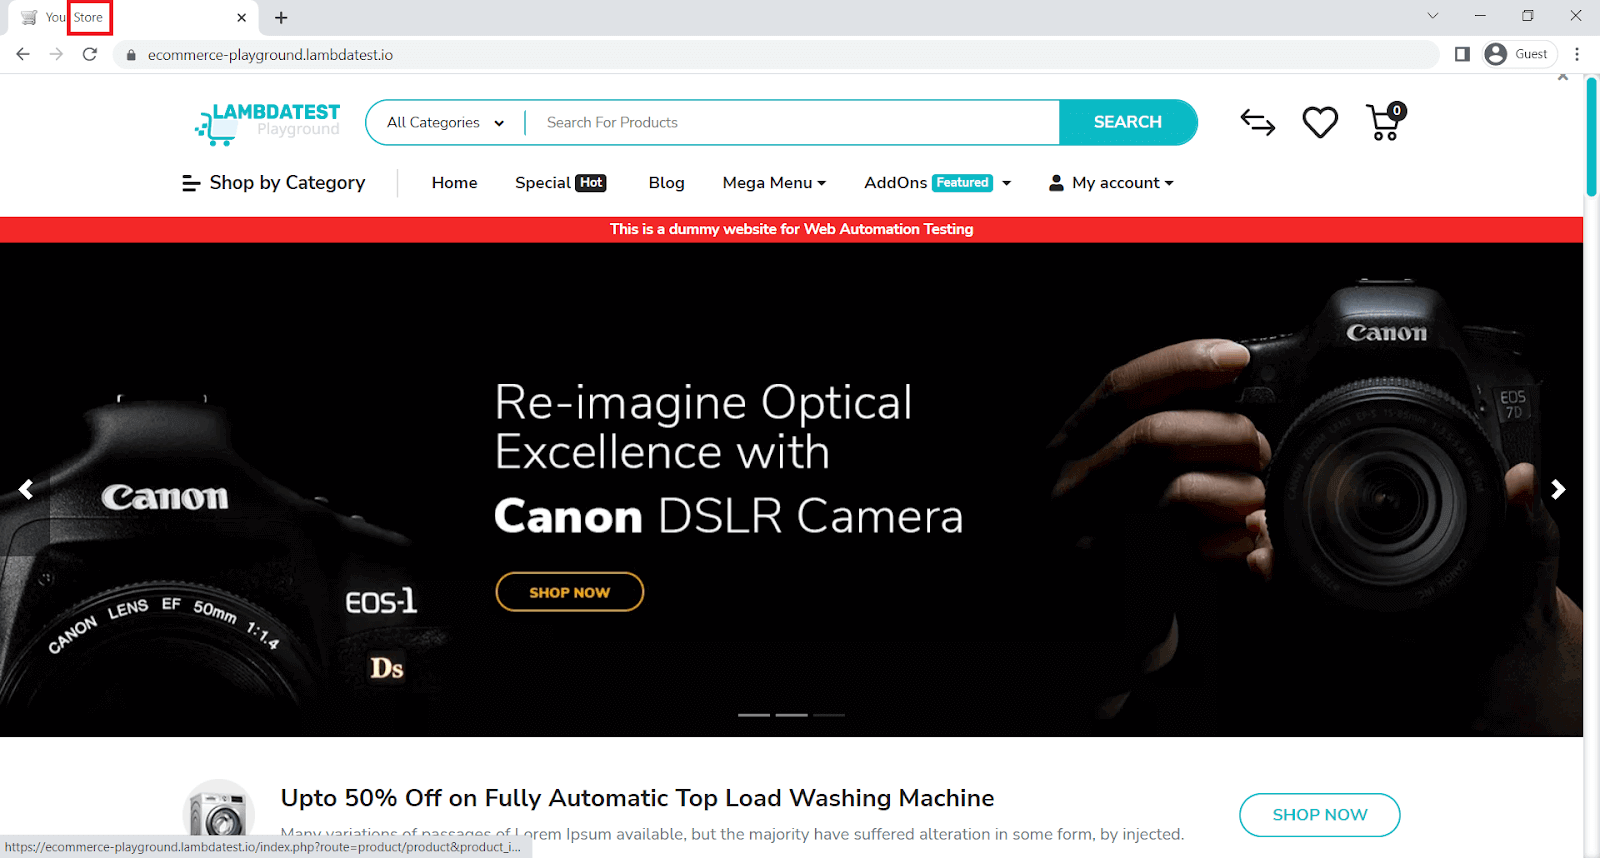
Here, we will verify if the title contains a value.
describe('toHaveTitleContaining', async () => {
    it('verify website title contains a value', async () => {
        await browser.url('https://ecommerce-playground.lambdatest.io/');
        await expect(browser).toHaveTitleContaining('Store');
    });
});
Code Walkthrough:
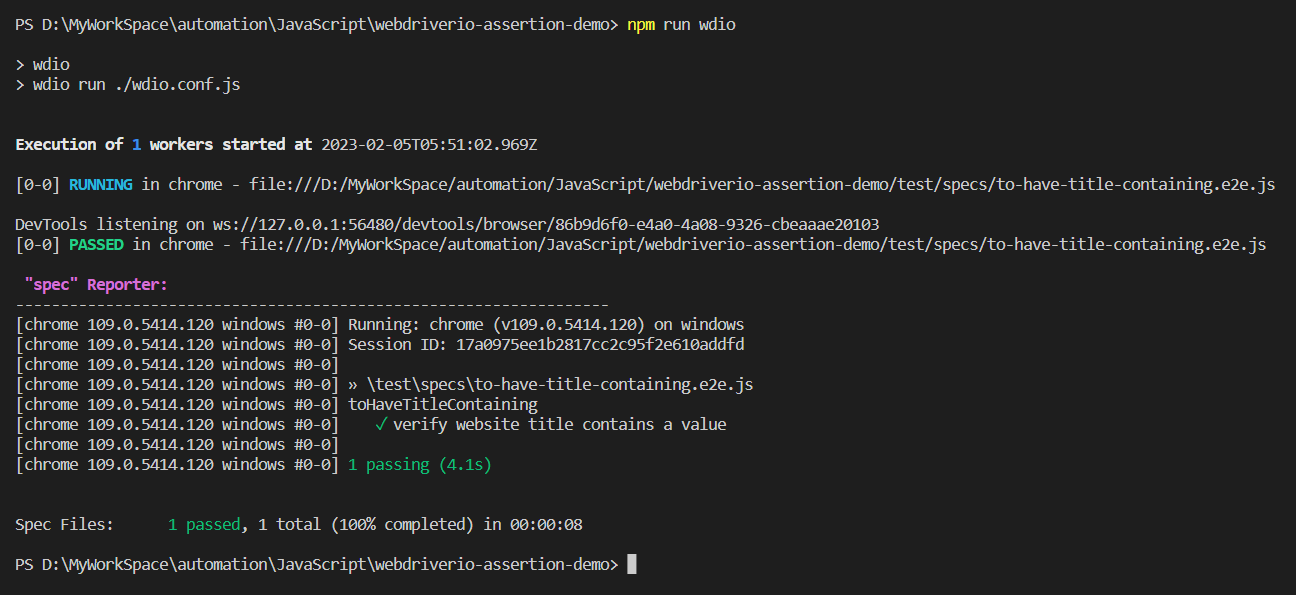
Line 4: expect the browser page title contains a value, which matches with the expected value.
Execution:
Element Matchers
When you expect operation on an element, element matchers are used. When you want to verify an element exists, displayed, have text, etc.
toBeDisplayed
When toBeDisplayed is used as expect condition, it internally calls isDisplayed on a given element.
Sample Usage:
const elem = await $('.icon-left.both.text-reset')
await expect(elem).toBeDisplayed()
Parameters:

Implementation:
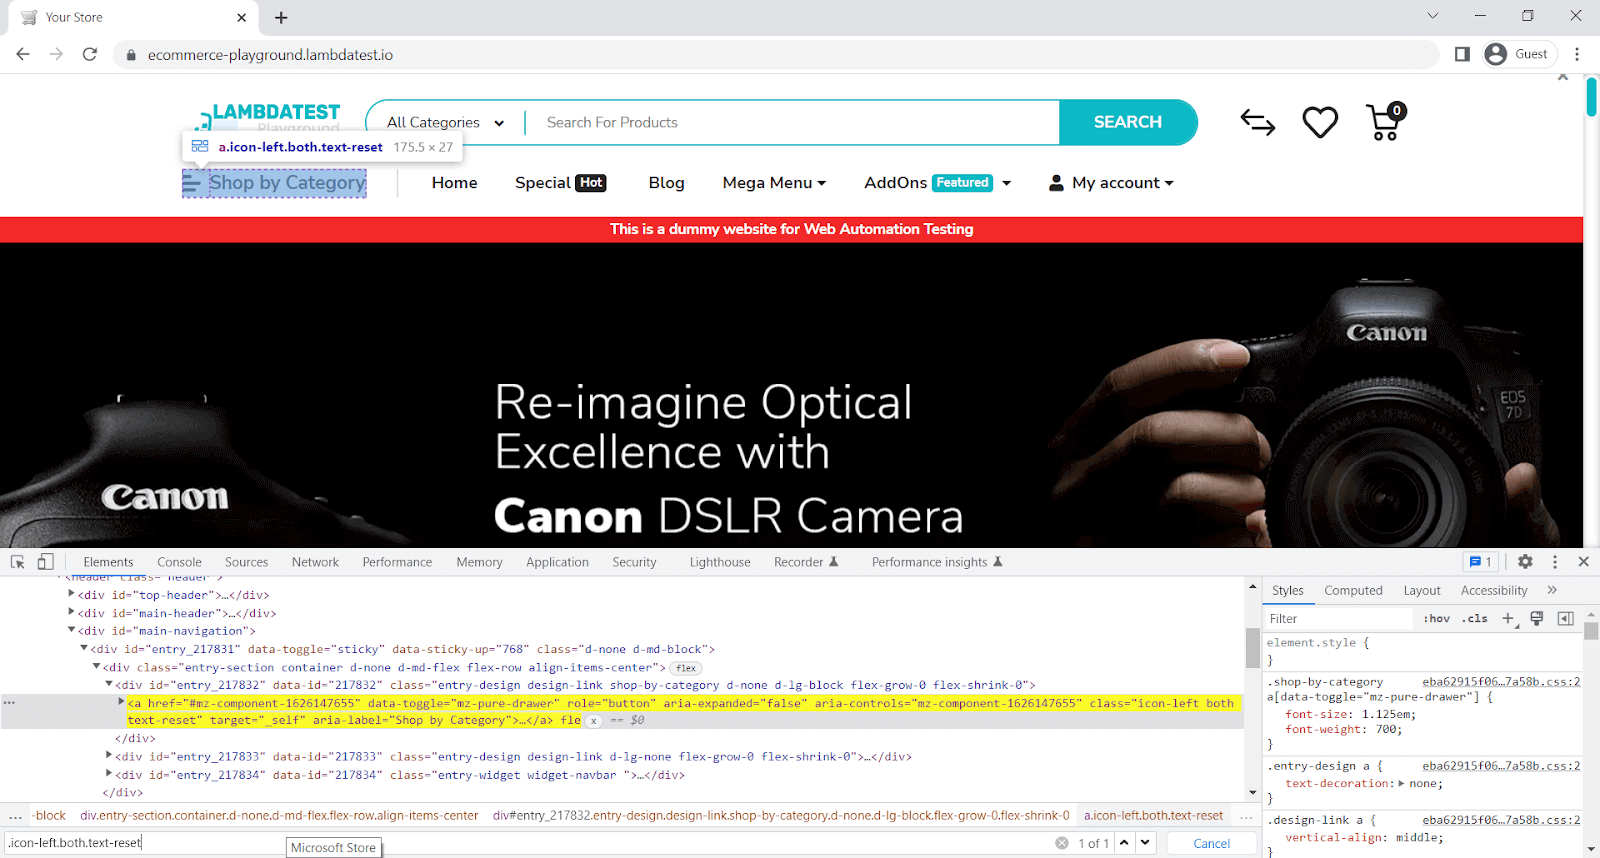
Here, we will verify Shop by Category is displayed.
describe('toBeDisplayed', async () => {
    it('verify element is displayed', async () => {
        await browser.url('https://ecommerce-playground.lambdatest.io/');
        const elem = await $('.icon-left.both.text-reset')
        await expect(elem).toBeDisplayed()
    });
});
Code Walkthrough:
Line 4: expect the element to be displayed and matched.
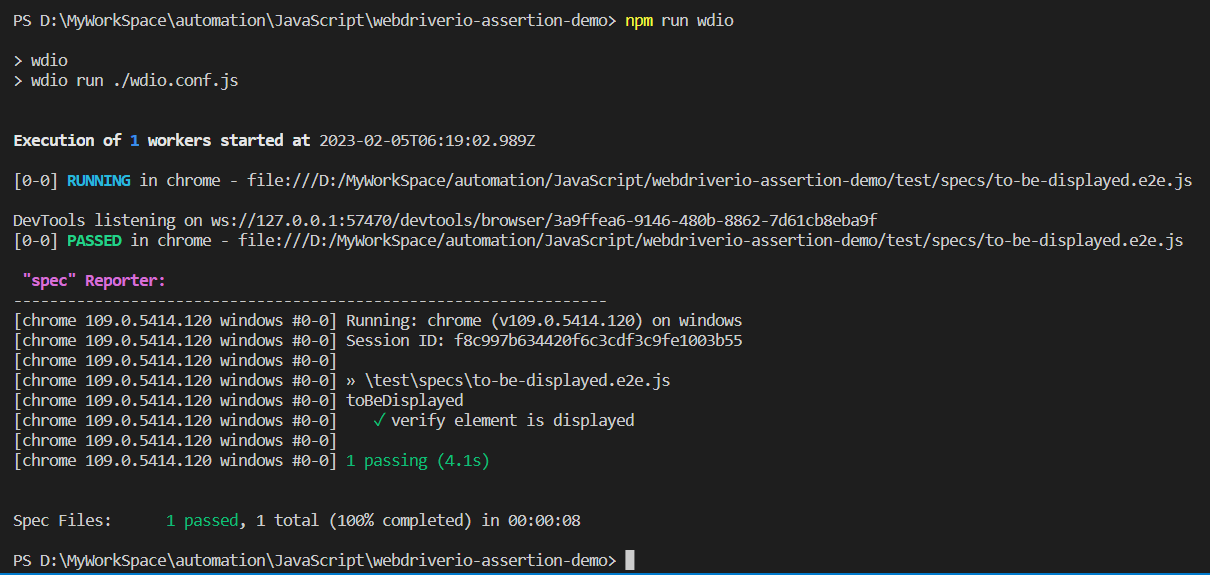
Execution:
toExist
When toExist is used as expect condition, which internally calls isExisting on a given element.
Sample Usage:
const elem = await $('.icon-left.both.text-reset')
await expect(elem).toExist()
Parameters:

Implementation:
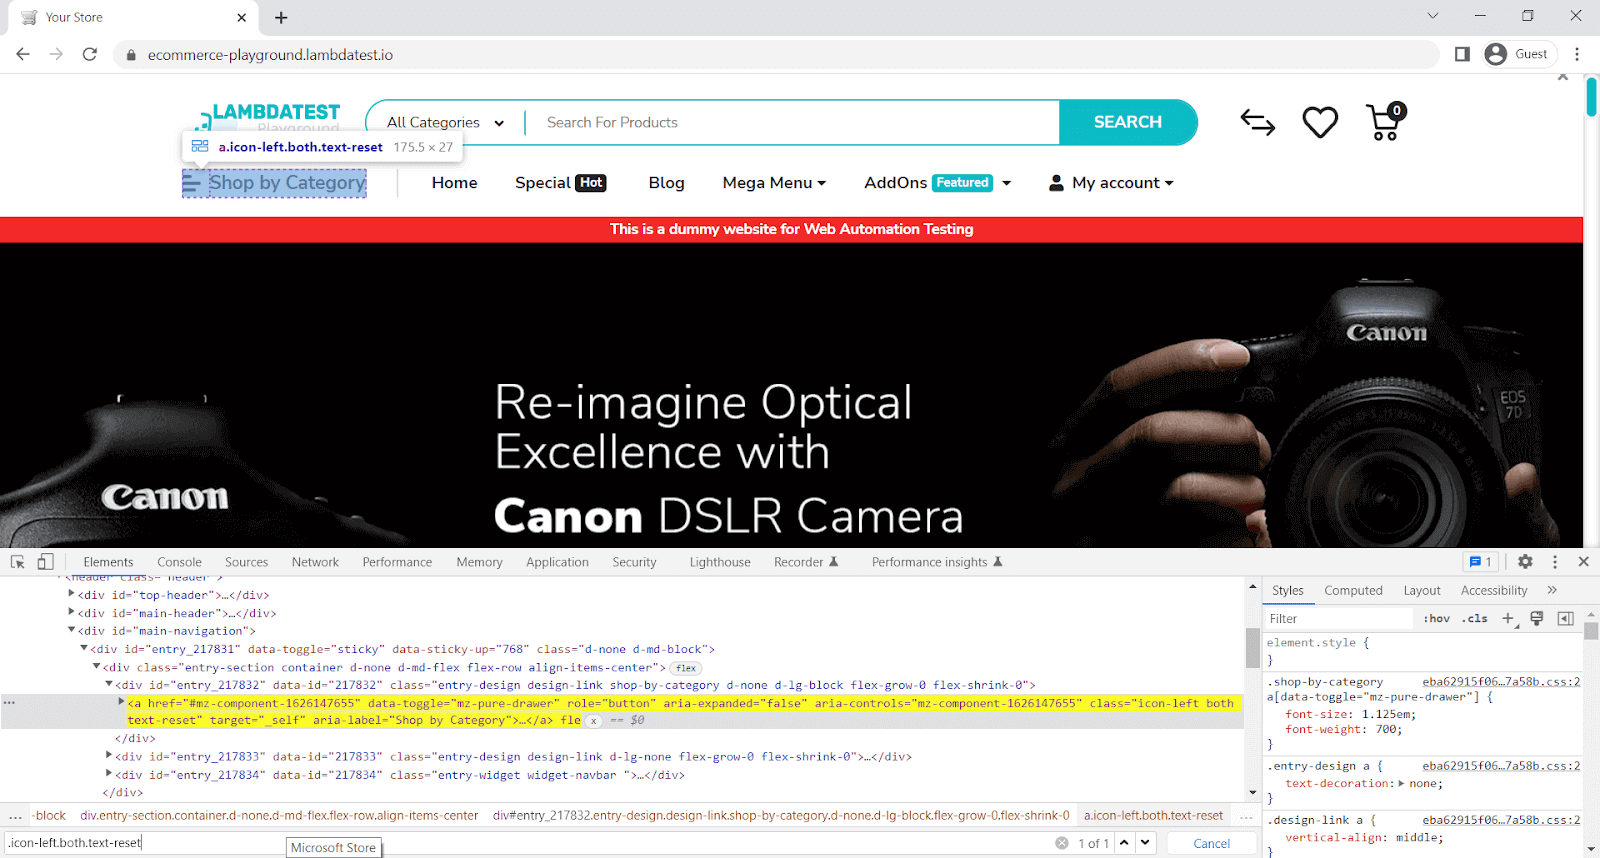
Here, we will verify whether Shop by Category exists or not.
describe('toExist', async () => {
    it('verify element exist', async () => {
        await browser.url('https://ecommerce-playground.lambdatest.io/');
        const elem = await $('.icon-left.both.text-reset')
        await expect(elem).toExist()
    });
});
Code Walkthrough:
Line 4: expect the element to exist on the page.
Execution
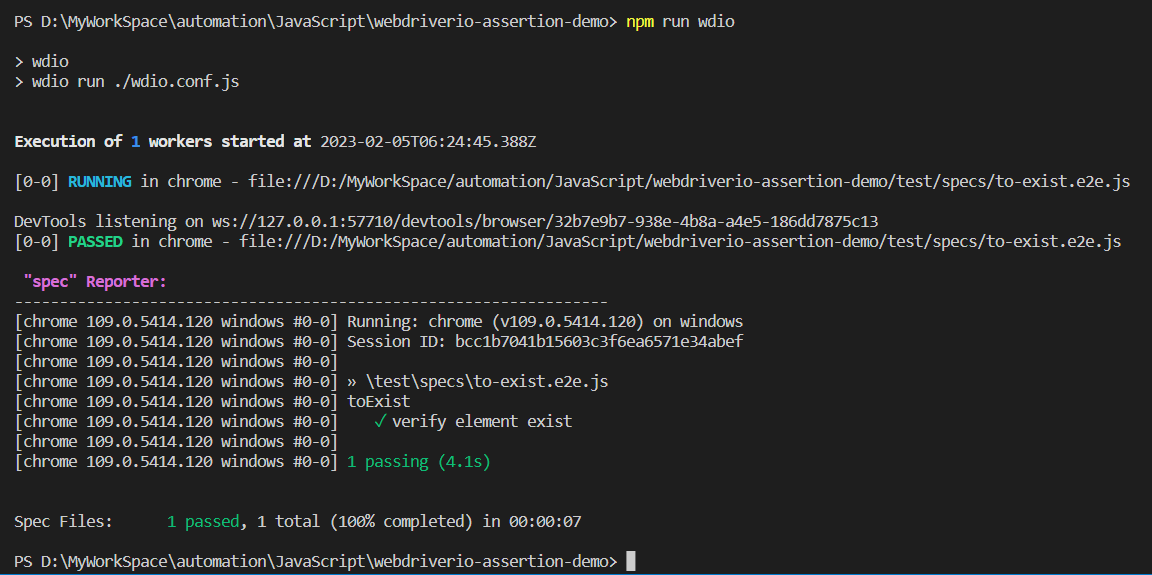
toBePresent
It's the same as toExist.
Sample Usage:
const elem = await $('.icon-left.both.text-reset')
await expect(elem).toBePresent()
Parameters:

Implementation:
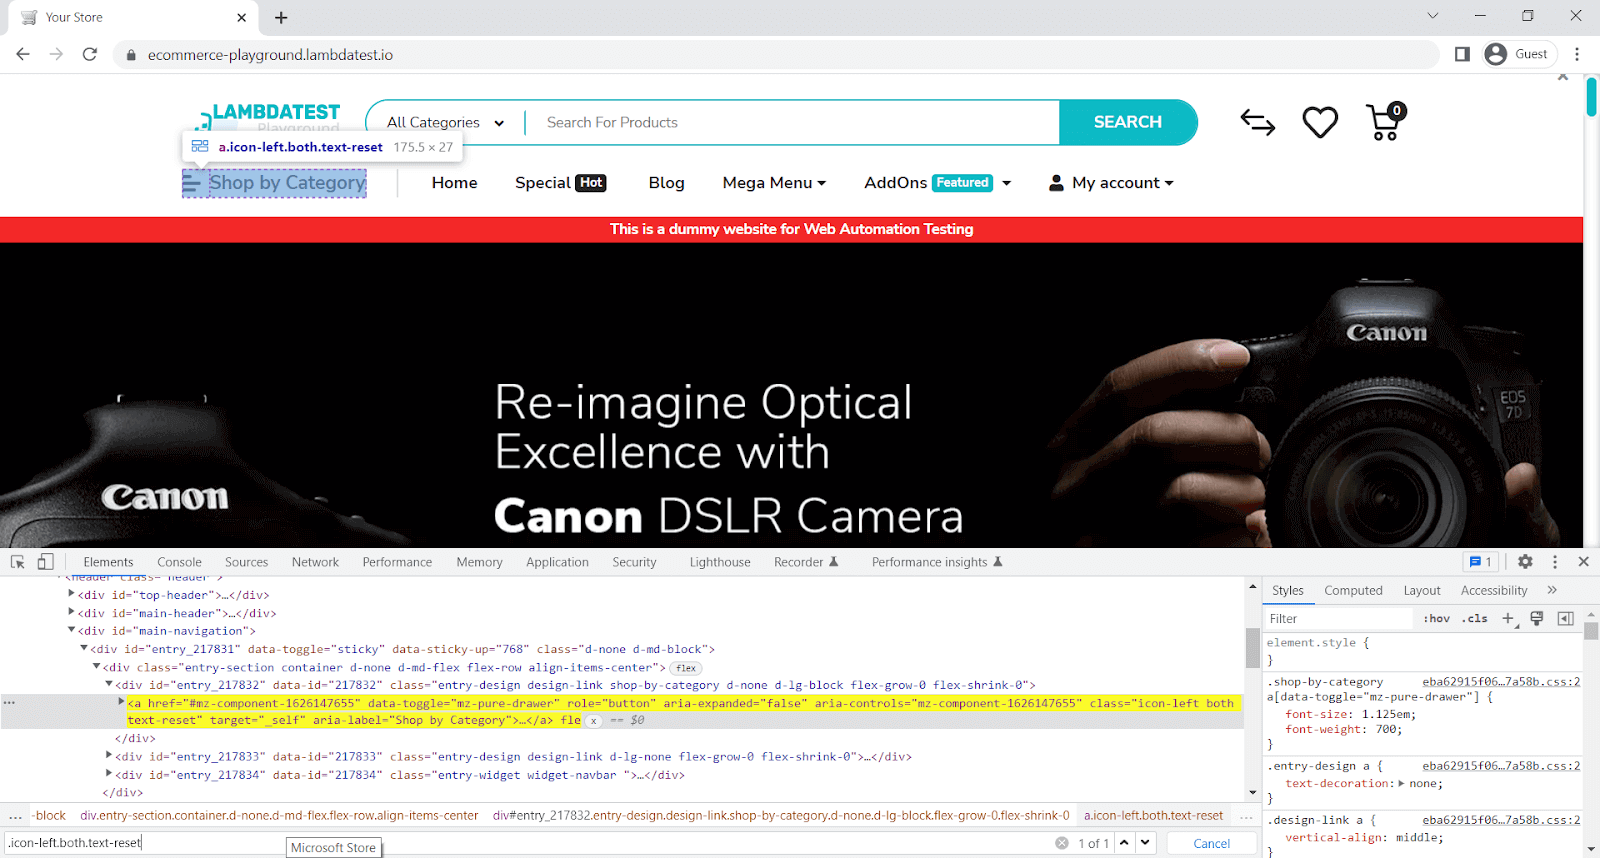
Here, we will verify Shop by Category is present.
describe('toBePresent', async () => {
    it('verify element is present', async () => {
        await browser.url('https://ecommerce-playground.lambdatest.io/');
        const elem = await $('.icon-left.both.text-reset')
        await expect(elem).toBePresent()
    });
});
Code Walkthrough:
Line 4: expect the element to be present on the page.
Execution:
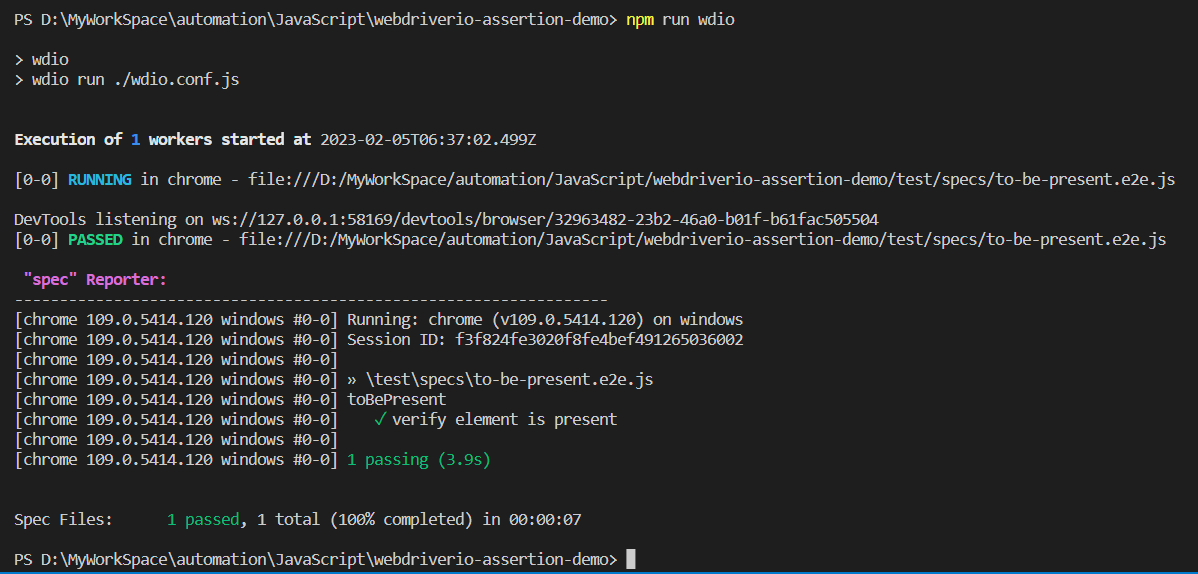
toBeExisting
It's the same as toExist.
Sample Usage:
const elem = await $('.icon-left.both.text-reset')
await expect(elem).toBeExisting()
Parameters:

Implementation:
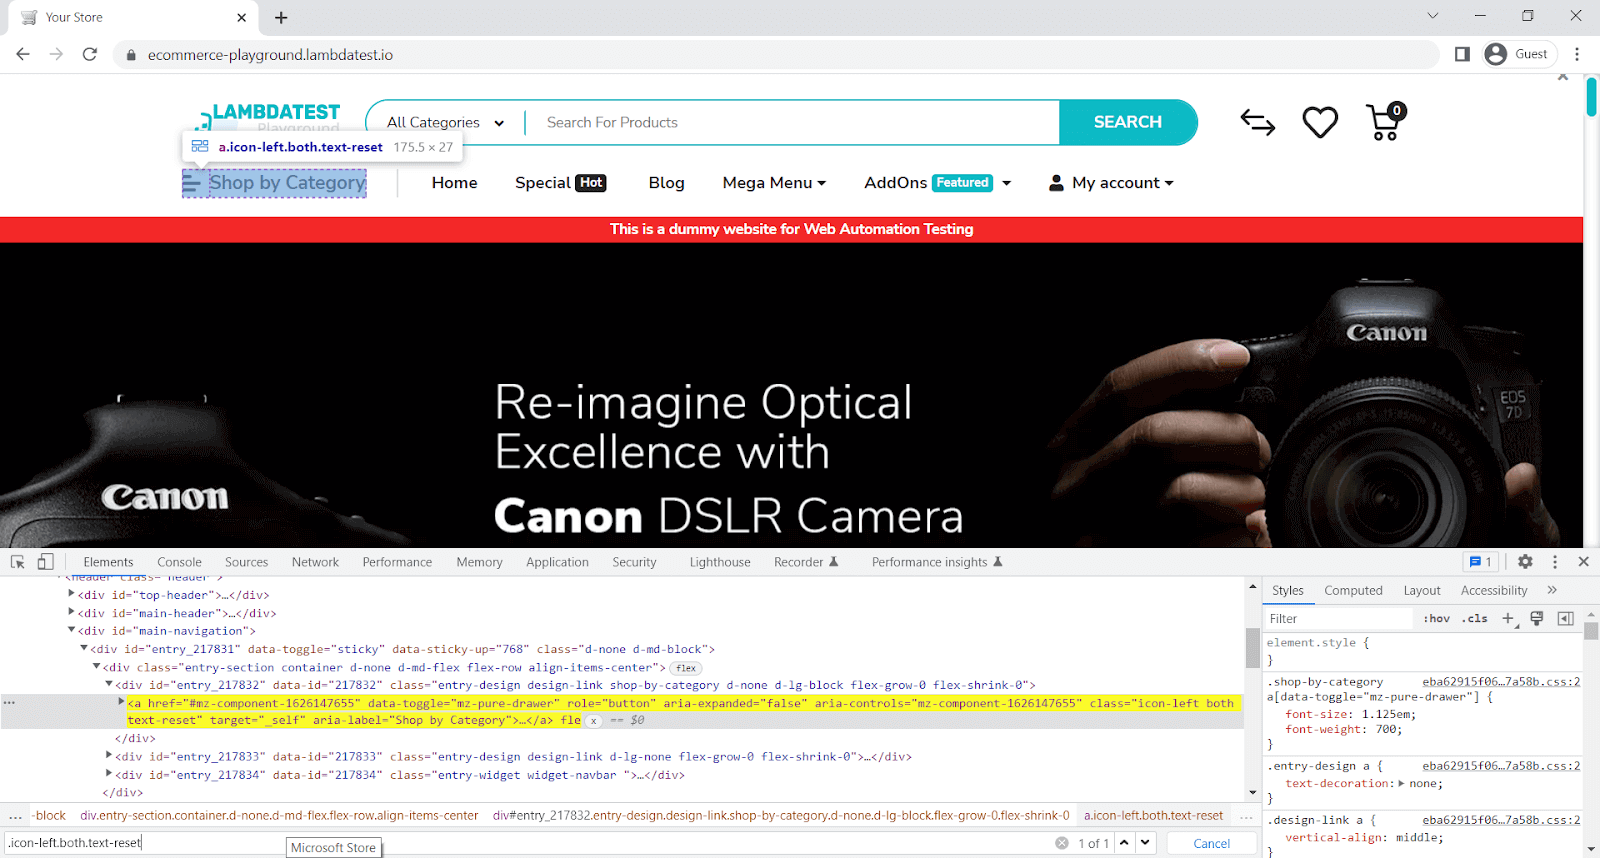
Here, we will verify Shop by Category exists on the page.
describe('toBeExisting', async () => {
    it('verify element is existing', async () => {
        await browser.url('https://ecommerce-playground.lambdatest.io/');
        const elem = await $('.icon-left.both.text-reset')
        await expect(elem).toBeExisting()
    });
});
Code Walkthrough:
Line 4: expect the element to be existing on the page.
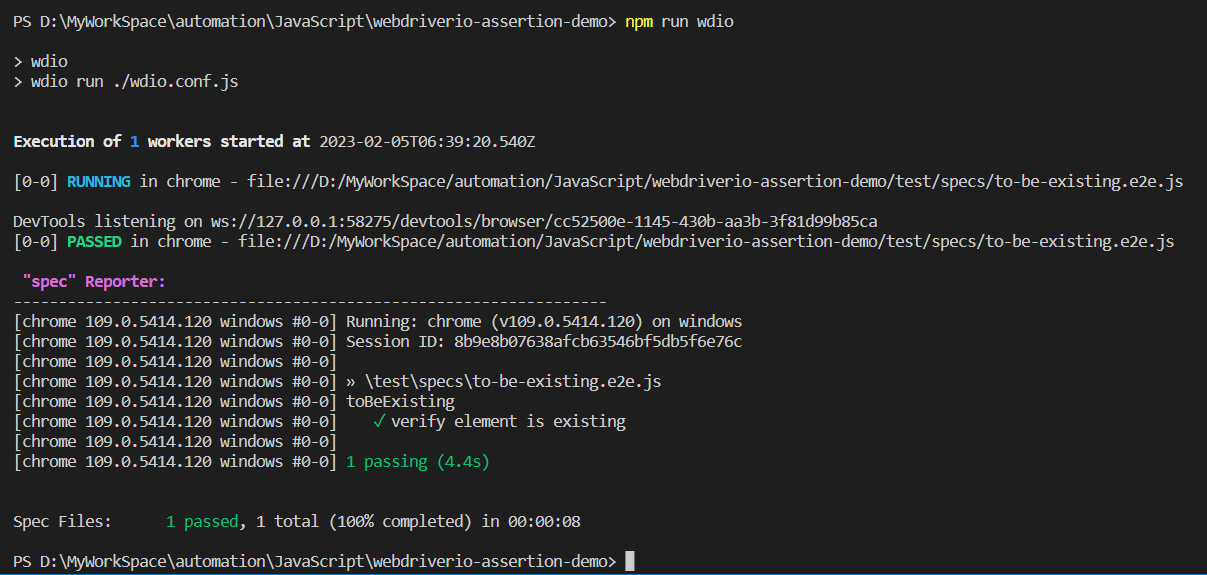
Execution:
toBeFocused
It’s used to check if the element has focus. It is only going to work when used in a web context.
Sample Usage:
const elem = await $('#input-lastname')
await expect(elem).toBeFocused()
Parameters:

Implementation:
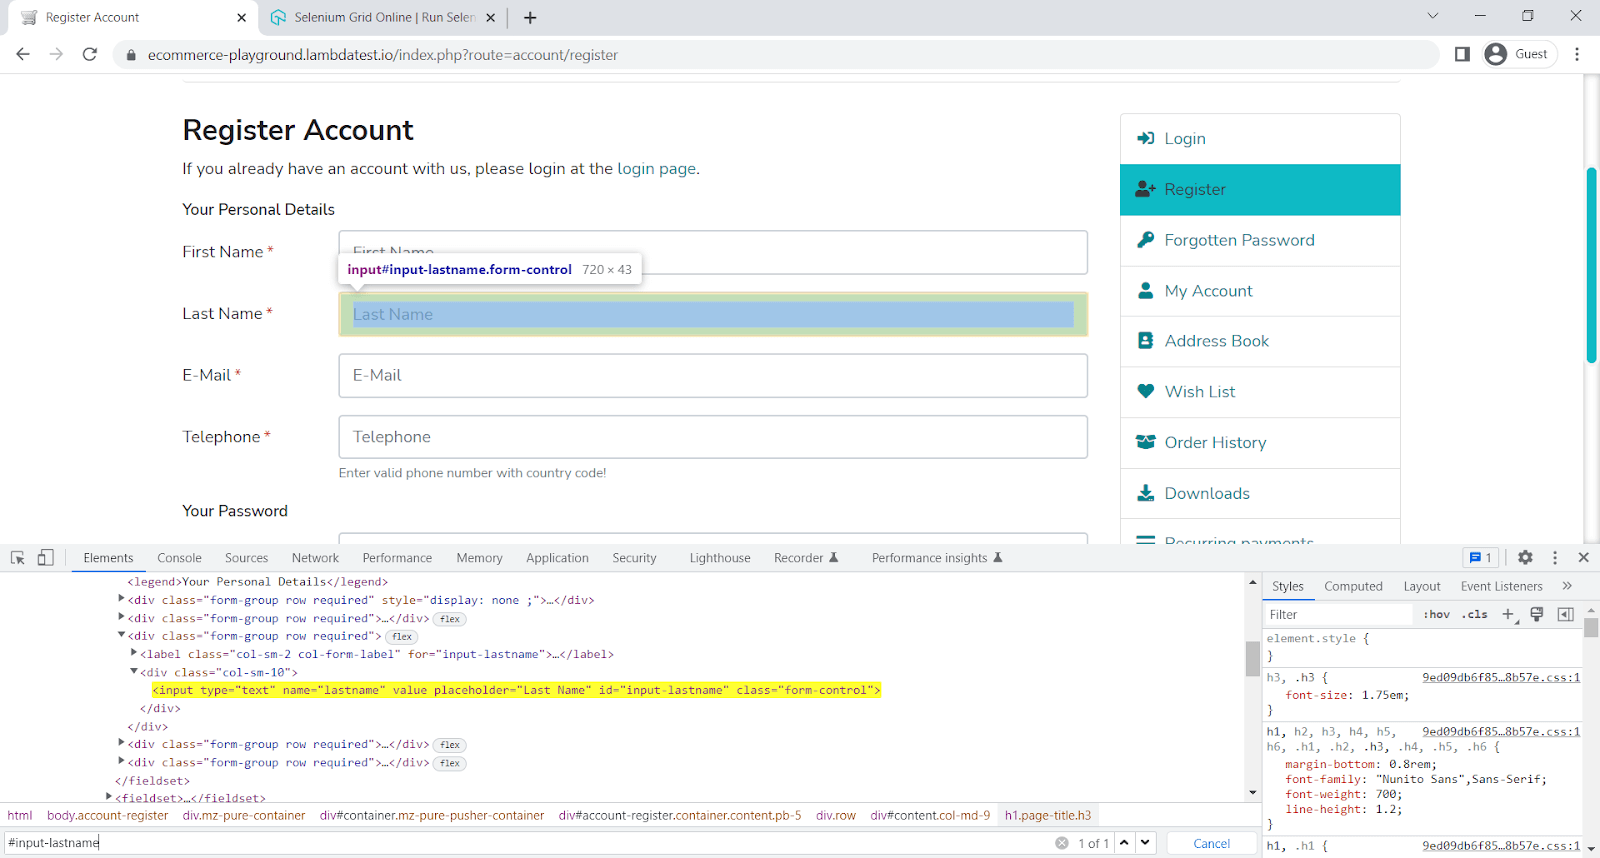
Here, we are going to verify if the element is in focus.
describe('toBeFocused', async () => {
    it('verify element is existing', async () => {
        await browser.url('https://ecommerce-playground.lambdatest.io/index.php?route=account/register');
        const elem = await $('#input-lastname')
        await elem.click()
        await expect(elem).toBeFocused()
    });
});
Code Walkthrough:
Line 5: Since the element is currently not in focus, we will first click on the field. This is just to bring the element into focus.
Line 6: expect the element to be in focus on the page.
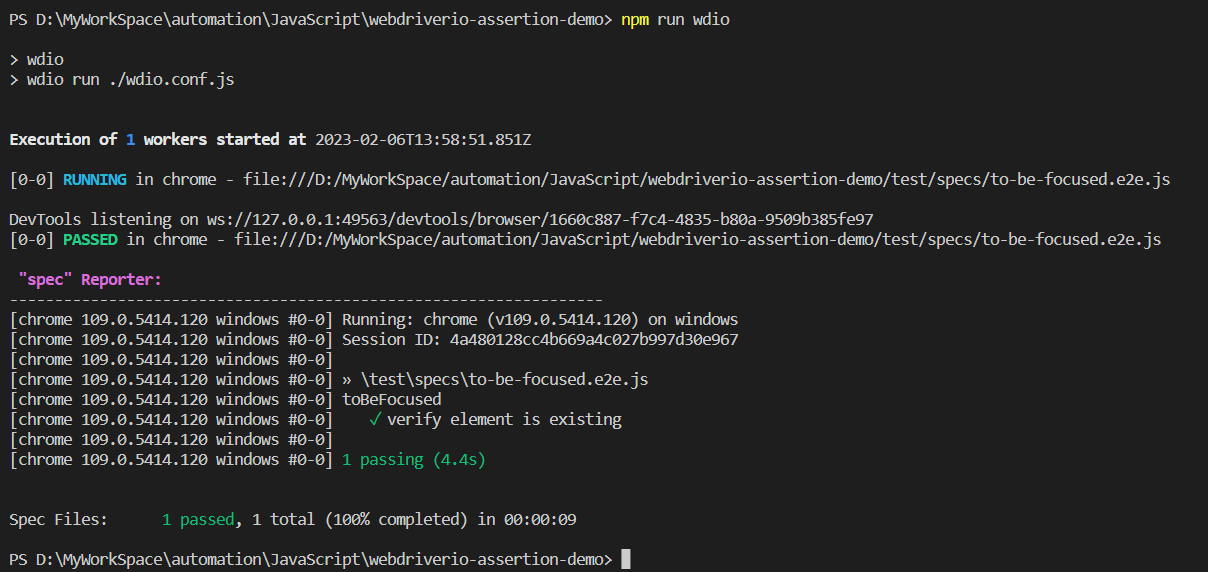
Execution:
toBeAttribute
It’s used to check if an element has a certain attribute with a specific value.
Sample Usage:
describe('const elem = await $("#input-newsletter-no")
await expect(elem).toHaveAttribute("type", "radio")
Parameters:

Implementation:
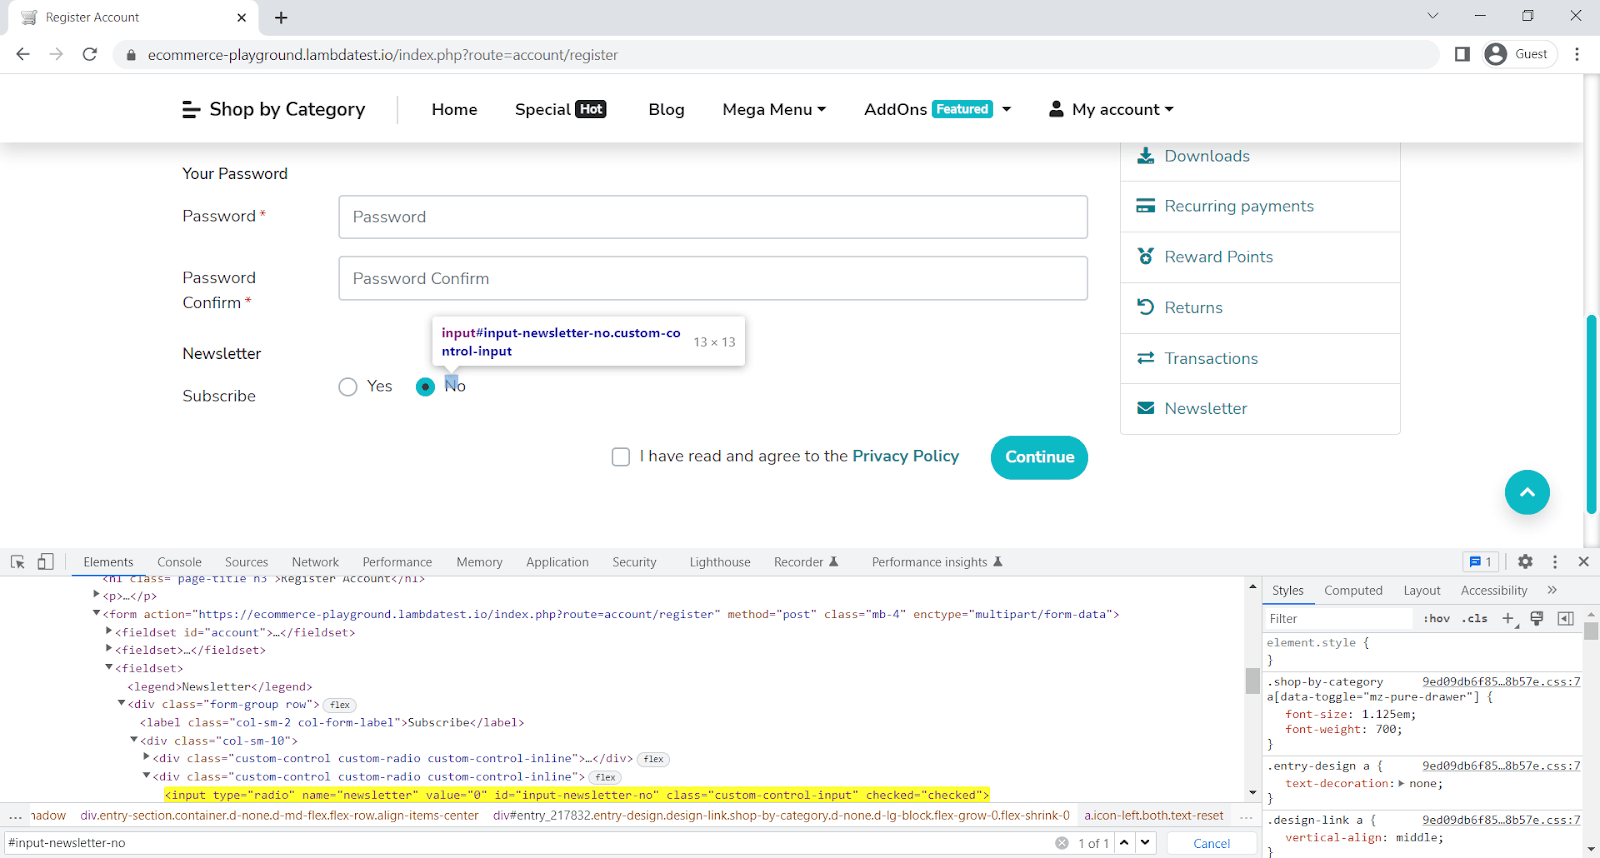
Here, we will verify if Newsletter Subscribe has a type attribute: a radio button.
describe('toHaveAttribute', async () => {
    it('verify element to have attribute', async () => {
        await browser.url('https://ecommerce-playground.lambdatest.io/index.php?route=account/register');
        const elem = await $("#input-newsletter-no")
        await expect(elem).toHaveAttribute("type", "radio")
    });
});
Code Walkthrough:
Line 4: expect the element to have a type attribute, which is a radio button.
Execution:
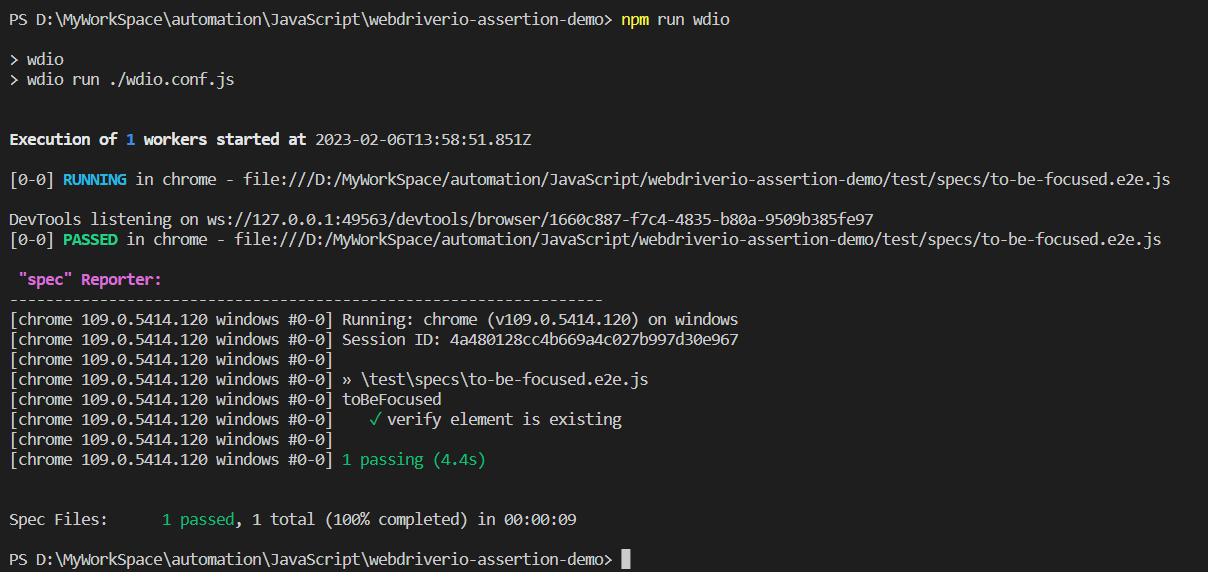
toBeAttr
It’s the same as toHaveAttribute.
Sample Usage:
const elem = await $("#input-newsletter-no")
await expect(elem).toHaveAttr("type", "radio")
Parameters:

Implementation:
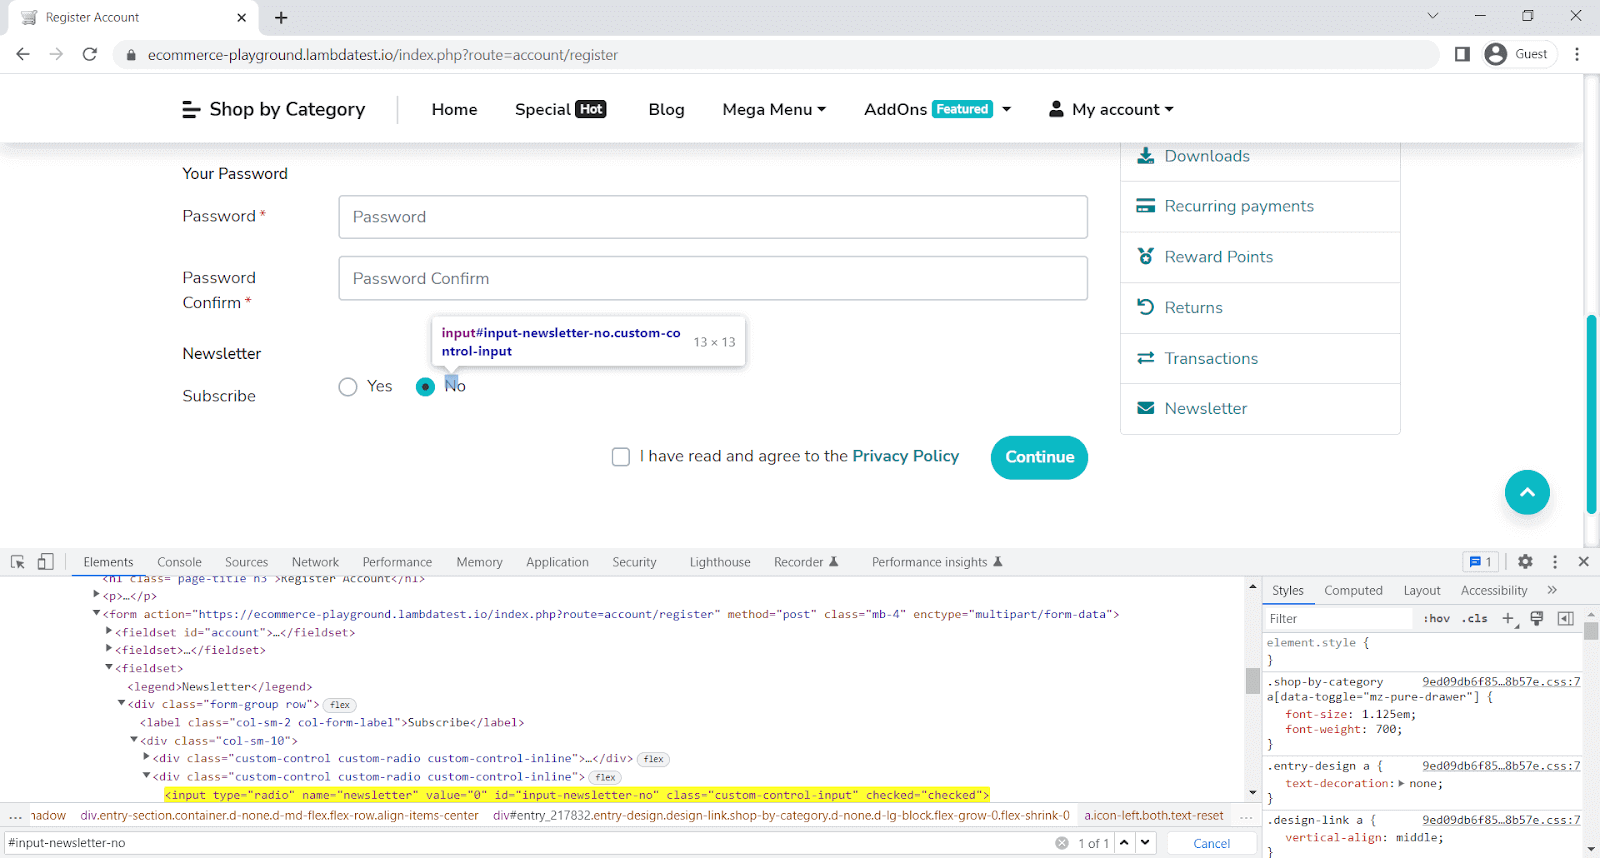
Here we will verify if Newsletter Subscribe has a type attribute, which is a radio button.
describe('toHaveAttr', async () => {
it('verify element to have attribute', async () => {
await browser.url('https://ecommerce-playground.lambdatest.io/index.php?route=account/register');
const elem = await $("#input-newsletter-no")
await expect(elem).toHaveAttr("type", "radio")
});
});
Code Walkthrough:
Line 4: expect the element to have a type attribute, which is a radio button.
Execution:

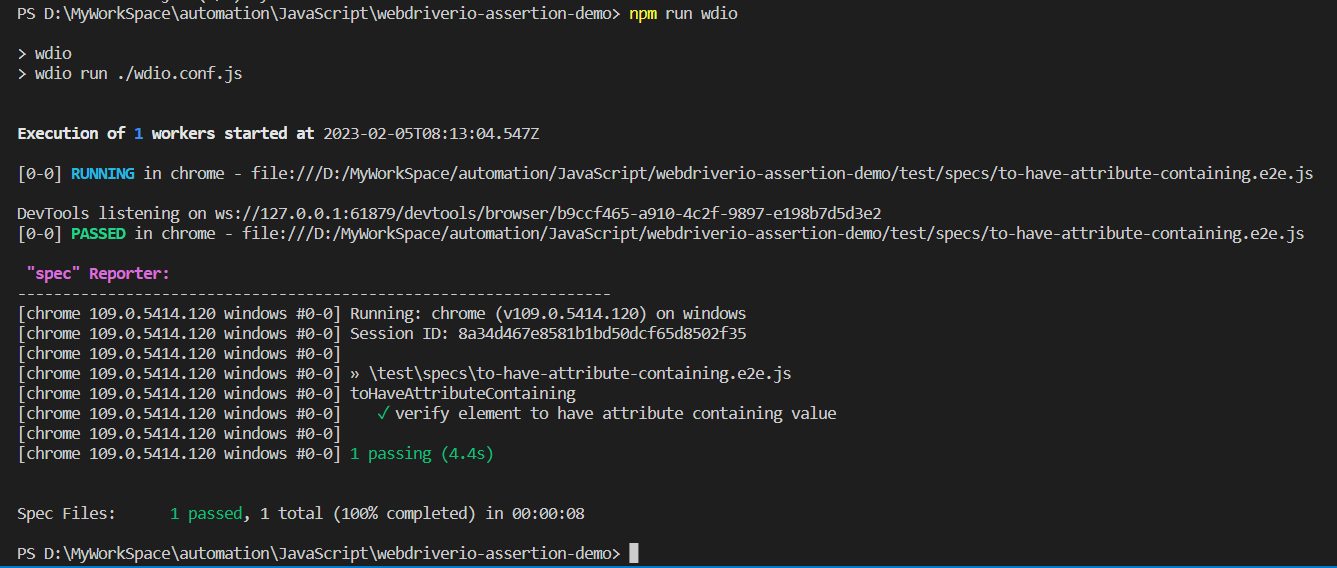
toHaveAttributeContaining
It’s used to check if an element has a certain attribute that contains a value.
Sample Usage:
const elem = await $("#input-newsletter-no")
await expect(elem).toHaveAttributeContaining("class", "control")
Parameters:

Implementation:
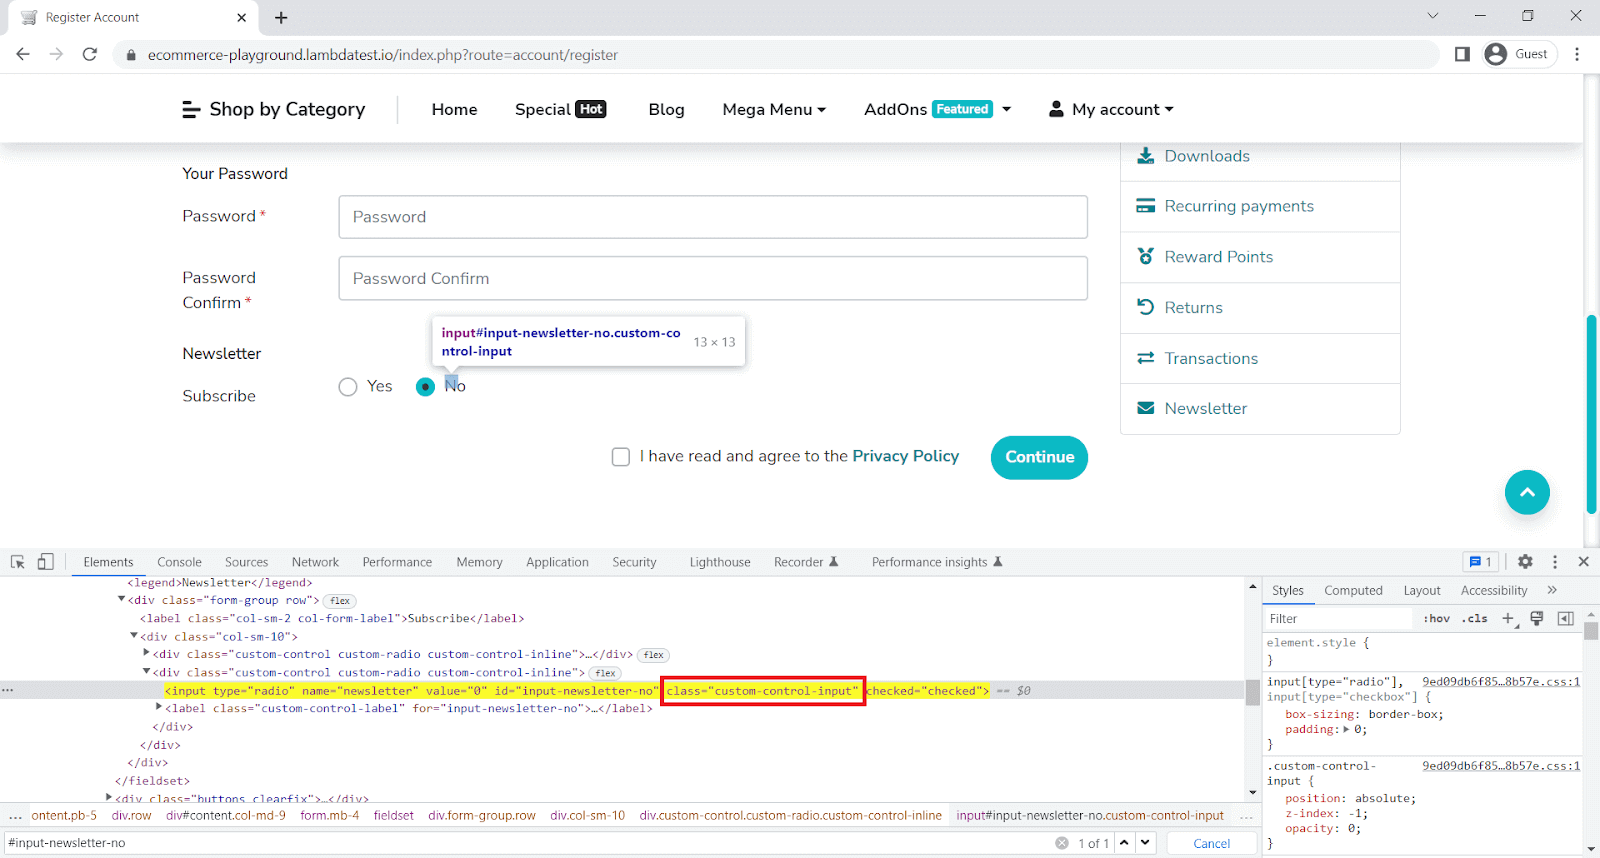
Here, we will verify if Newsletter Subscribe has a class attribute value, which is a control.
describe('toHaveAttributeContaining', async () => {
it('verify element to have attribute containing value', async () => {
await browser.url('https://ecommerce-playground.lambdatest.io/index.php?route=account/register');
const elem = await $("#input-newsletter-no")
await expect(elem).toHaveAttributeContaining("class", "control")
});
});
Code Walkthrough:
Line 4: expect the element to have a class attribute, which is control.
Execution:
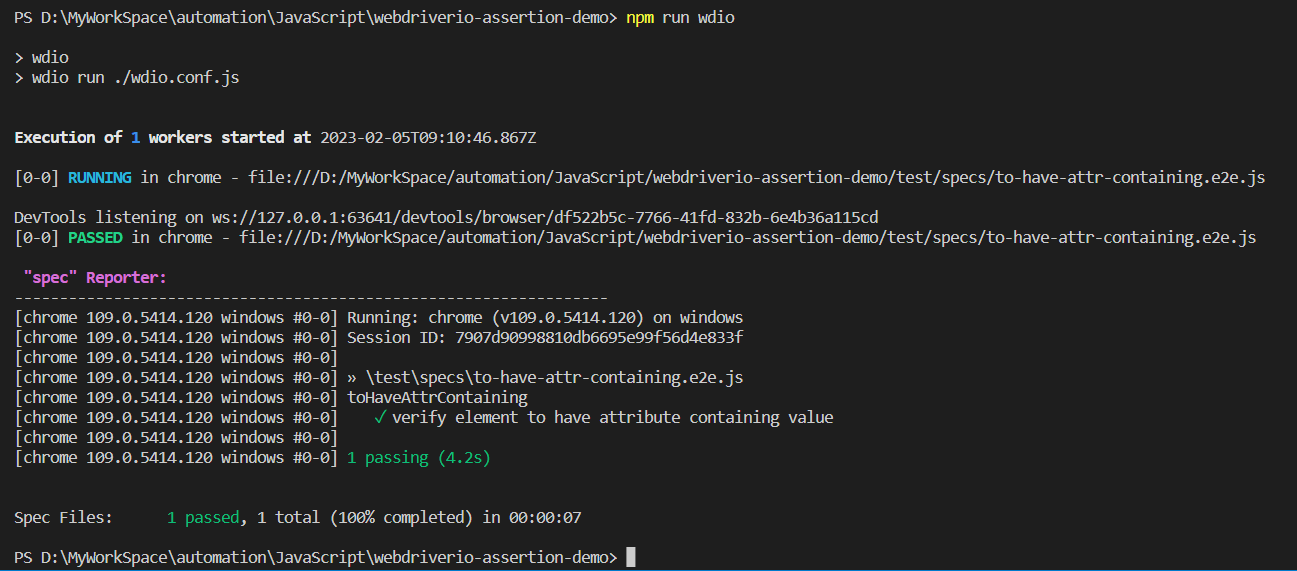
toHaveAttrContaining
It’s the same as toHaveAttributeContaining.
Sample Usage:
const elem = await $("#input-newsletter-no")
await expect(elem).toHaveAttrContaining("class", "control")
Parameters:

Implementation:
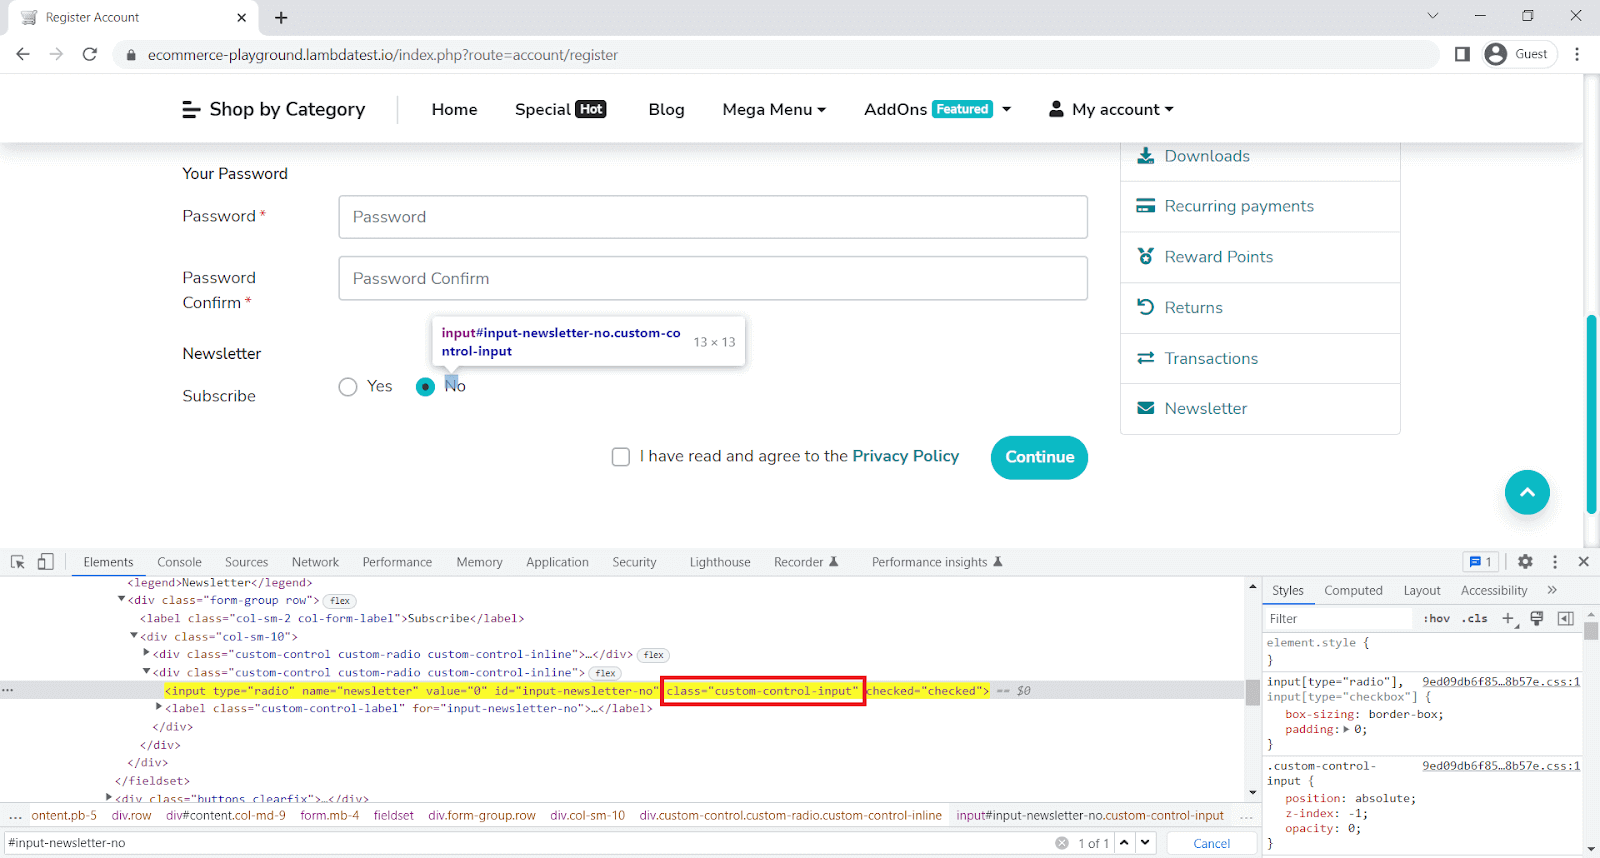
Here we will verify if Newsletter Subscribe has a class attribute value, which is a control.
describe('toHaveAttrContaining', async () => {
it('verify element to have attribute containing value', async () => {
await browser.url('https://ecommerce-playground.lambdatest.io/index.php?route=account/register');
const elem = await $("#input-newsletter-no")
await expect(elem).toHaveAttrContaining("class", "control")
});
});
Code Walkthrough:
Line 4: expect the element to have a class attribute, which is control.
Execution:
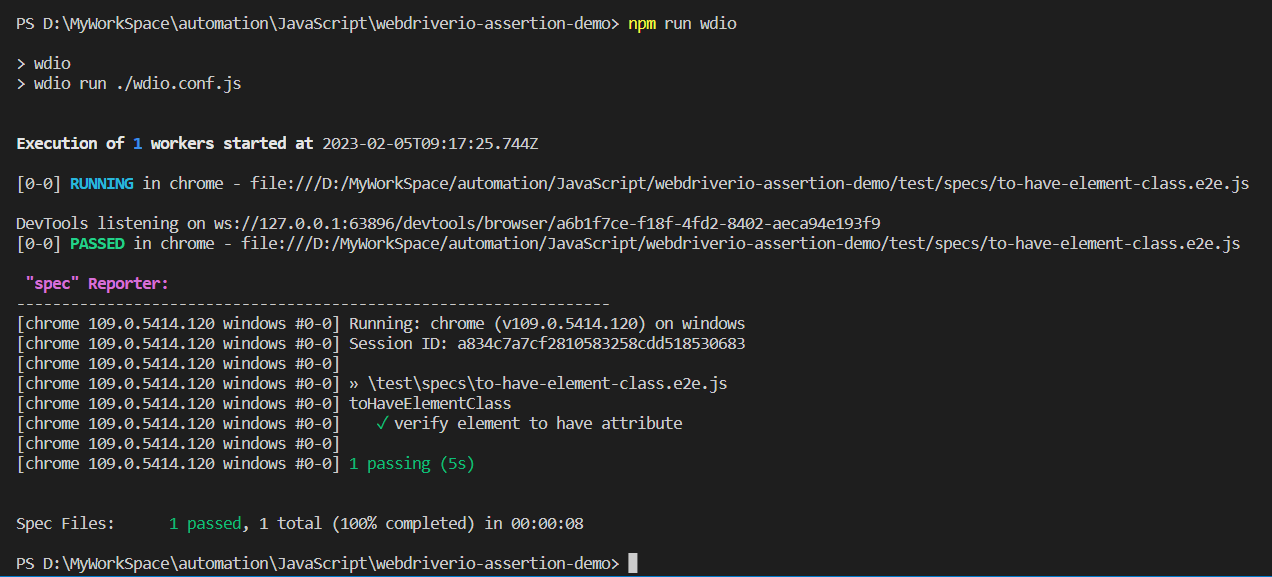
toHaveElementClass
It’s used to check if an element has a certain class name.
Sample Usage:
const elem = await $("#input-firstname")
await expect(elem).toHaveElementClass("form-control")
Parameters:

Implementation:
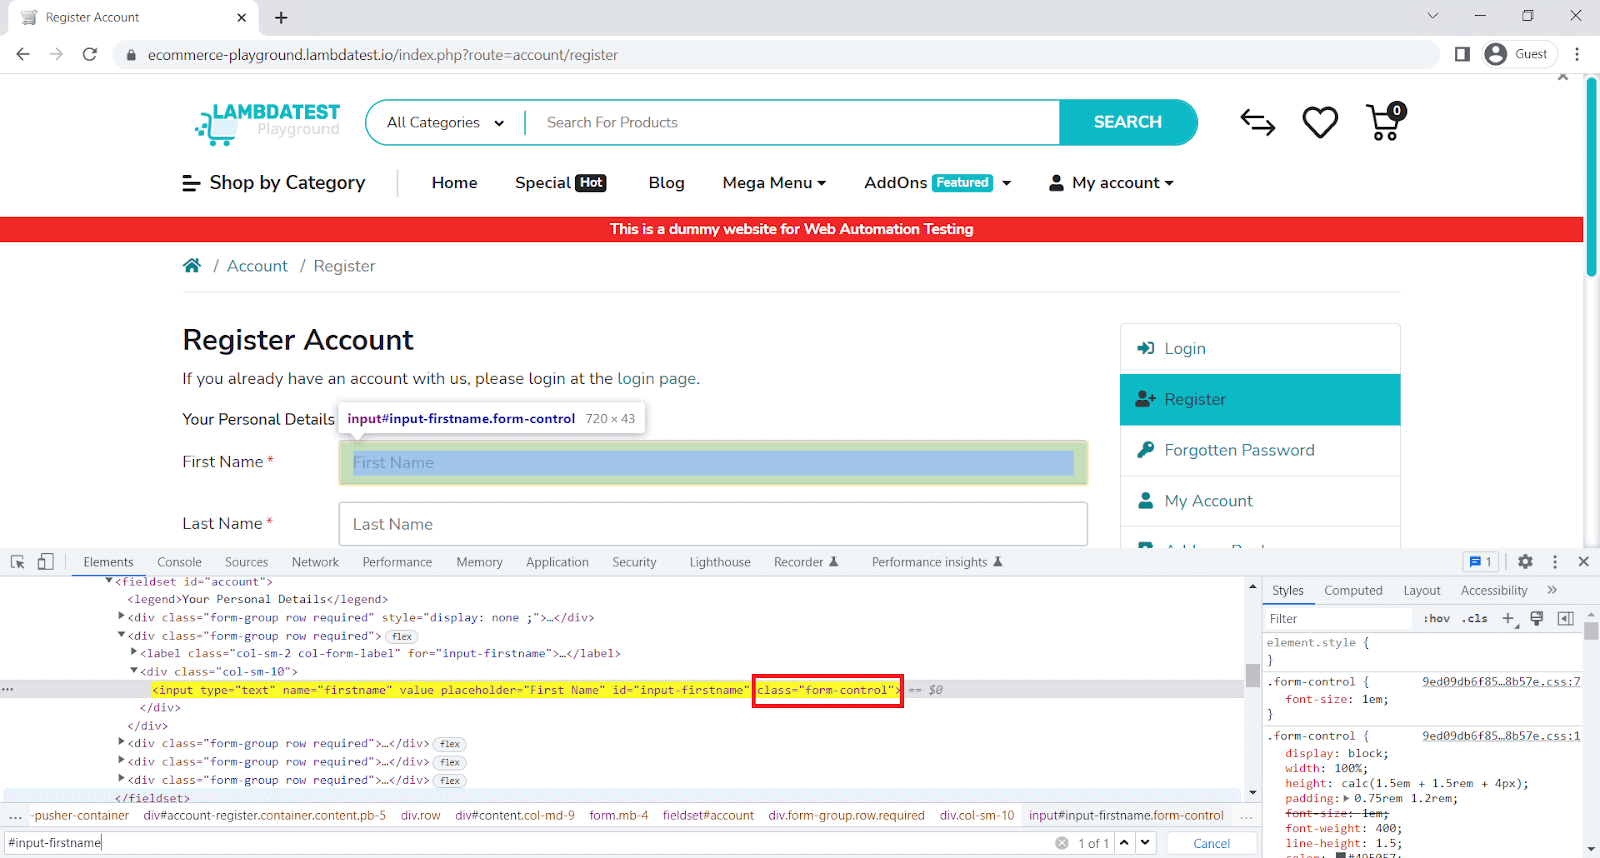
Here, we will verify if First Name has a class named form-control.
describe('toHaveElementClass', async () => {
it('verify element to have class', async () => {
await browser.url('https://ecommerce-playground.lambdatest.io/index.php?route=account/register');
const elem = await $("#input-firstname")
await expect(elem).toHaveElementClass("form-control")
});
});
Code Walkthrough:
Line 4: expect the element to have class name.
Execution:
toHaveElementClassContaining
It’s used to check if an element has a certain class name that contains provided value.
Sample Usage:
const elem = await $("#input-firstname")
await expect(elem).toHaveElementClassContaining("form")
Parameters:

Implementation:
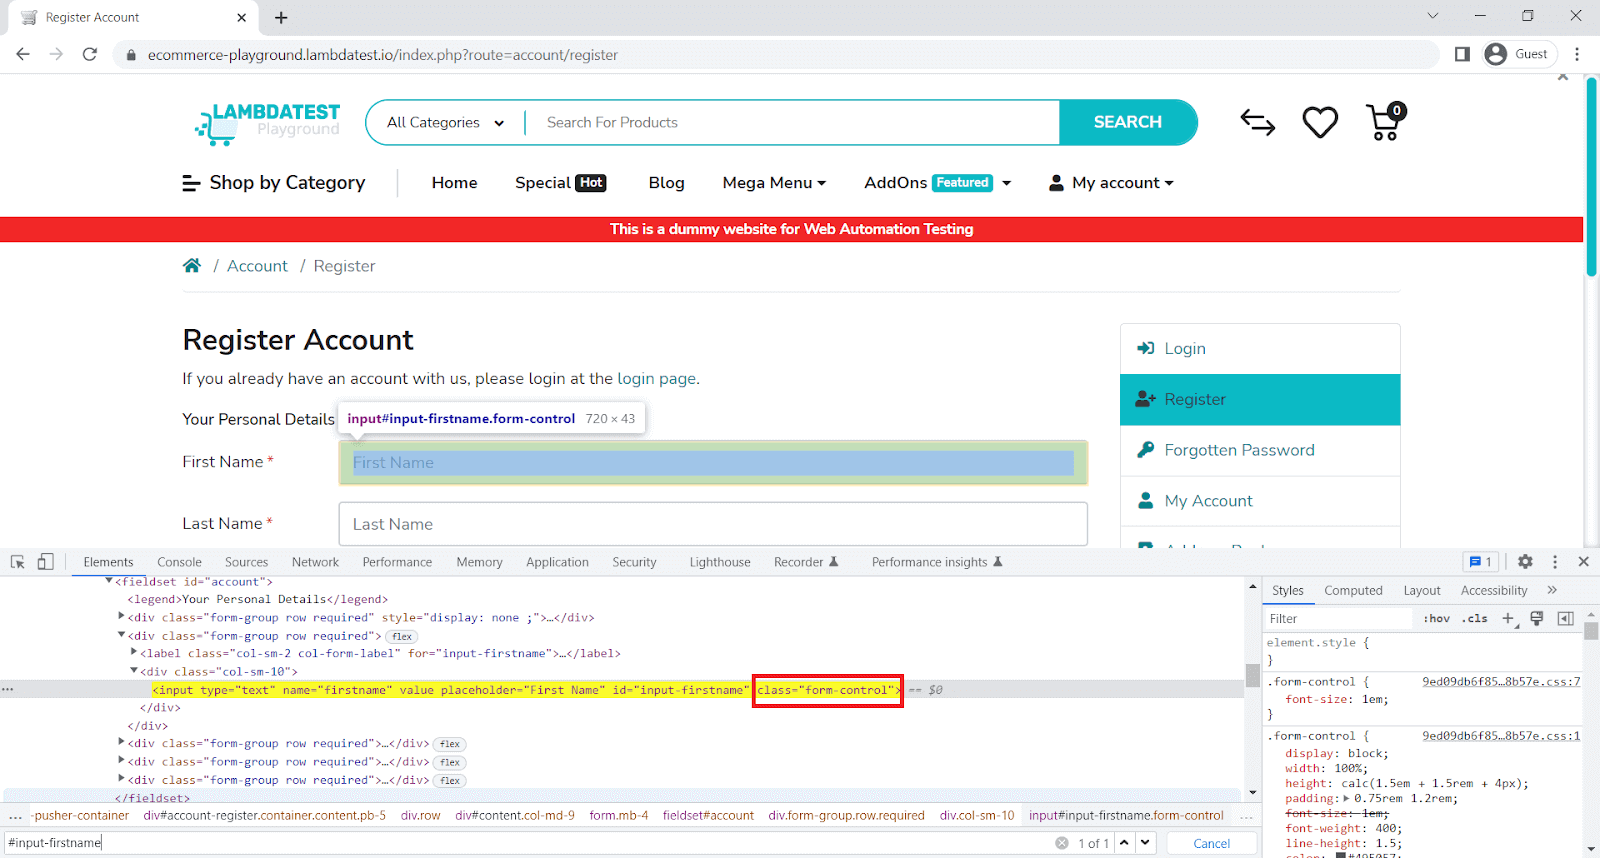
Here we will verify if First Name has a class containing a form.
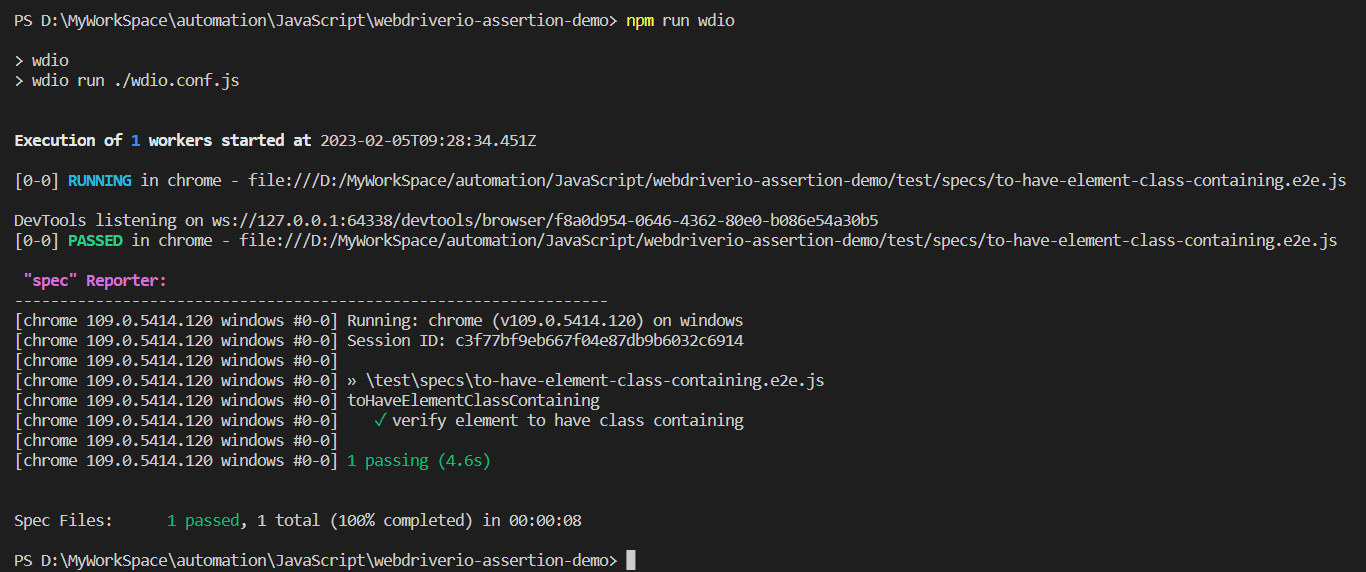
describe('toHaveElementClassContaining', async () => {
it('verify element to have class containing', async () => {
await browser.url('https://ecommerce-playground.lambdatest.io/index.php?route=account/register');
const elem = await $("#input-firstname")
await expect(elem).toHaveElementClassContaining("form")
});
});
Code Walkthrough:
Line 4: expect the element to have a class containing form.
Execution:
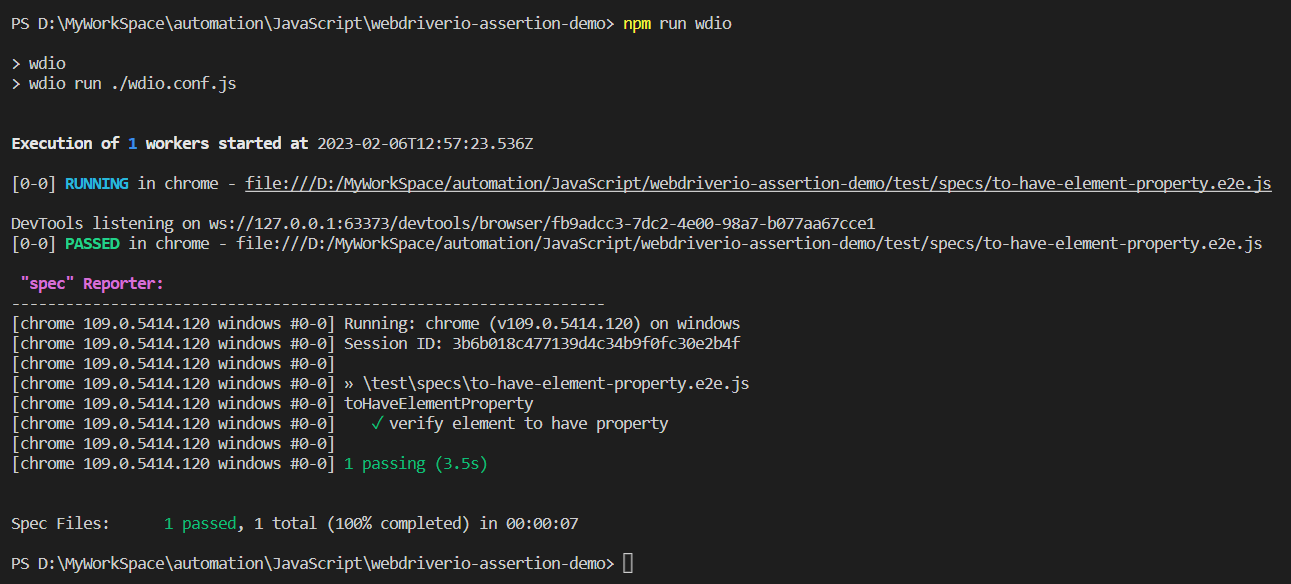
toHaveElementProperty
It’s used to check if an element has a certain property.
Sample Usage:
const elem = await $(".page-title.h3")
await expect(elem).toHaveElementProperty('tagName', 'H1')
await expect(elem).not.toHaveElementProperty('tagName', 'H2')
Parameters:

Implementation:
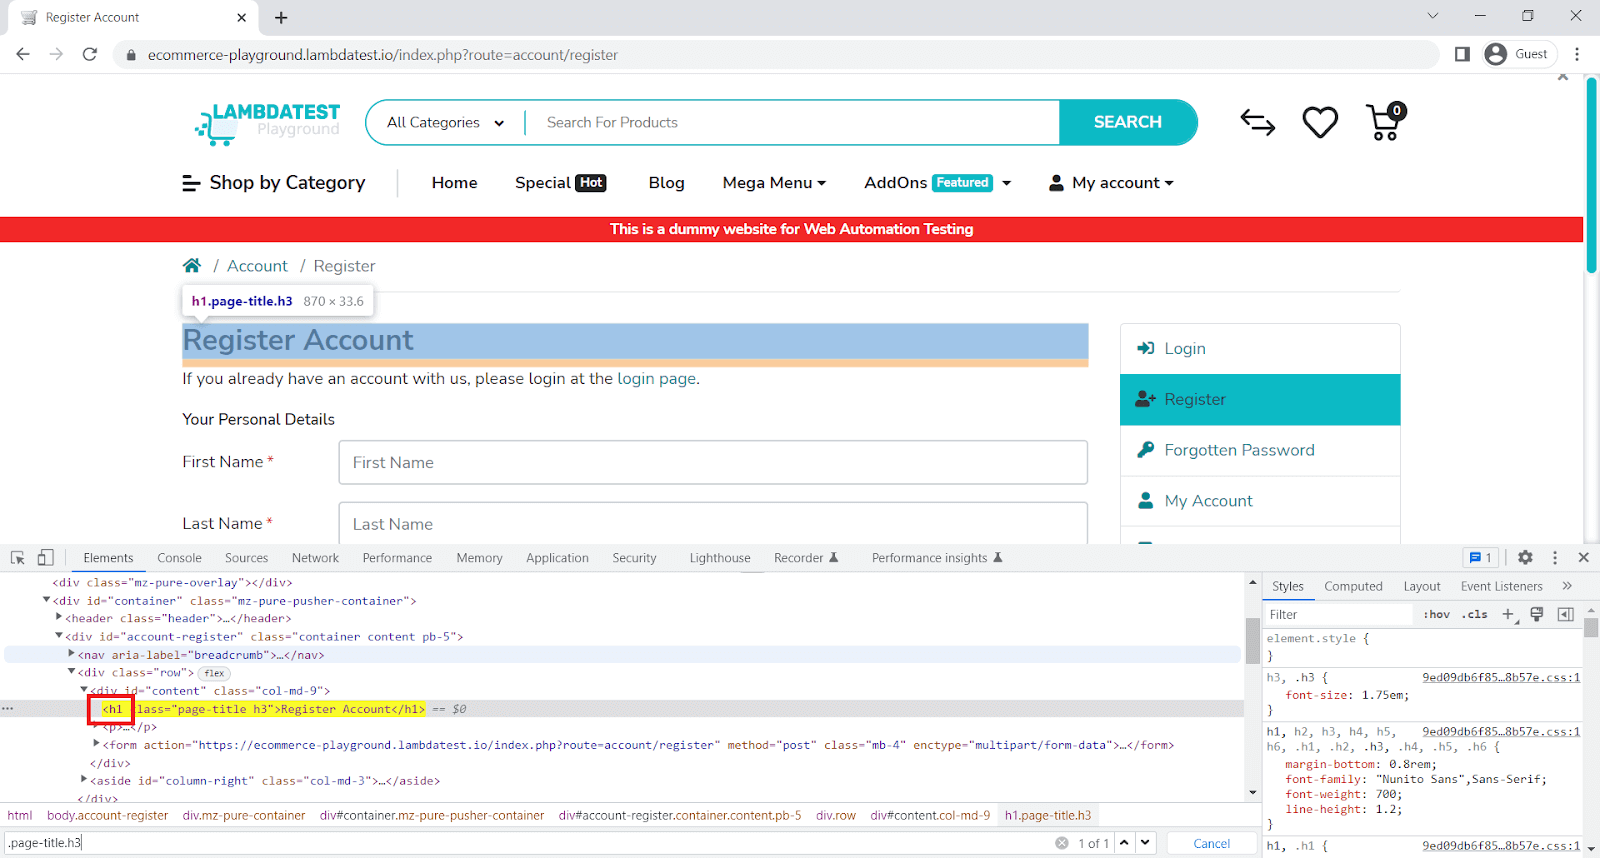
Here, we will verify if the Register Account has tagName H1.
describe('toHaveElementProperty', async () => {
it('verify element to have property', async () => {
await browser.url('https://ecommerce-playground.lambdatest.io/index.php?route=account/register');
const elem = await $(".page-title.h3")
await expect(elem).toHaveElementProperty('tagName', 'H1')
await expect(elem).not.toHaveElementProperty('tagName', 'H2')
});
});
Code Walkthrough:
Line 5: expect the element to have tagName H1.
Line 6: expect the element not to have tagName H2.
Execution:
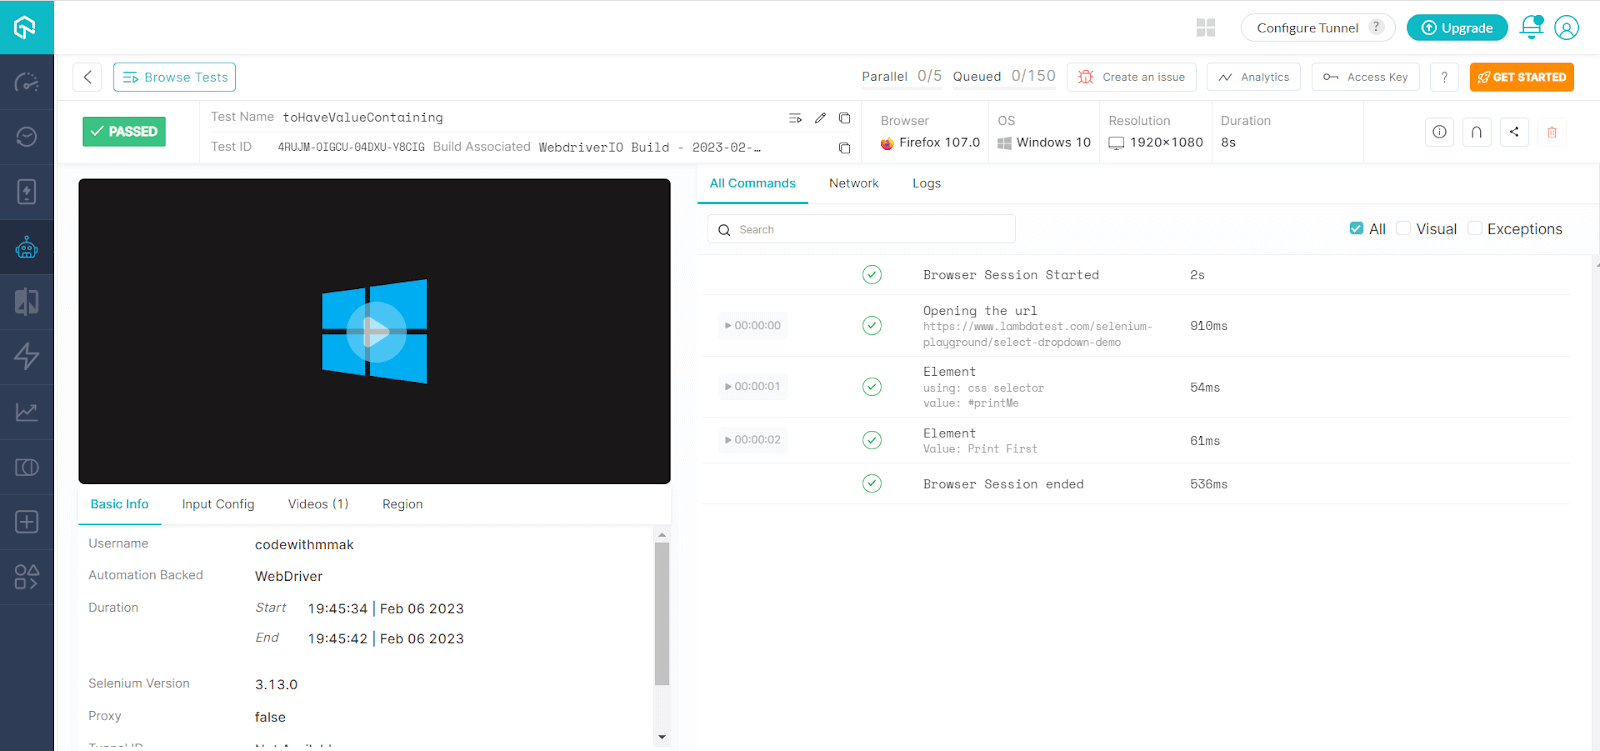
toHaveValue
It’s used to check if an input element has a certain value.
Sample Usage:
const elem = await $("#printMe")
await expect(elem).toHaveValue('Print First')
Parameters:

Implementation:
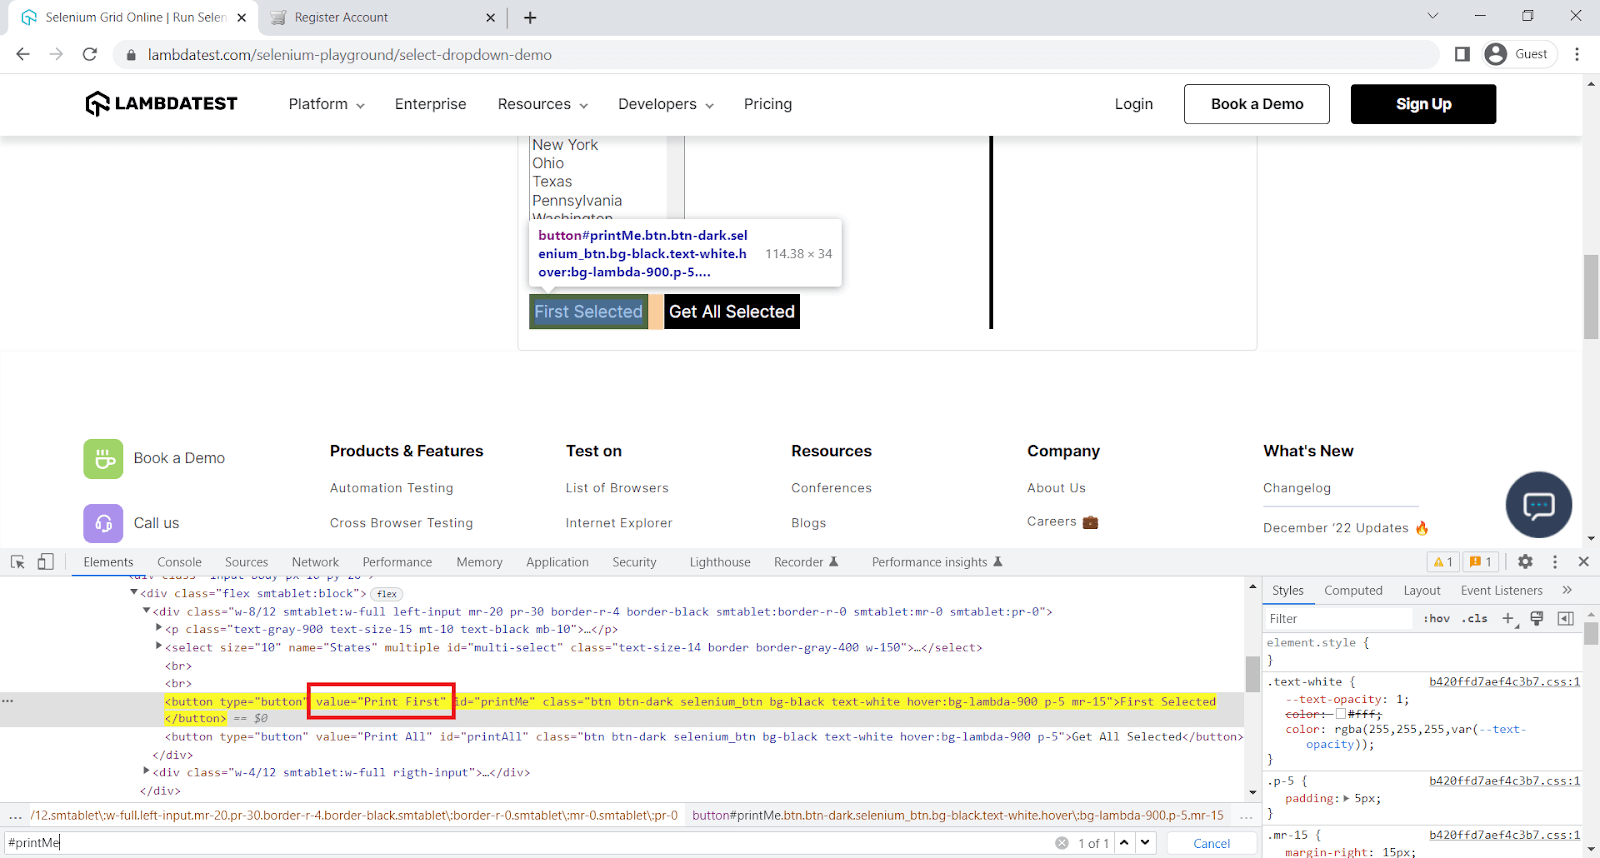
Here, we will verify the element value.
describe('toHaveValue', async () => {
it('verify element to have value', async () => {
await browser.url('https://www.lambdatest.com/selenium-playground/select-dropdown-demo');
const elem = await $("#printMe")
await expect(elem).toHaveValue('Print First')
});
});
Code Walkthrough:
Line 4: expect the element to have value.
Execution:
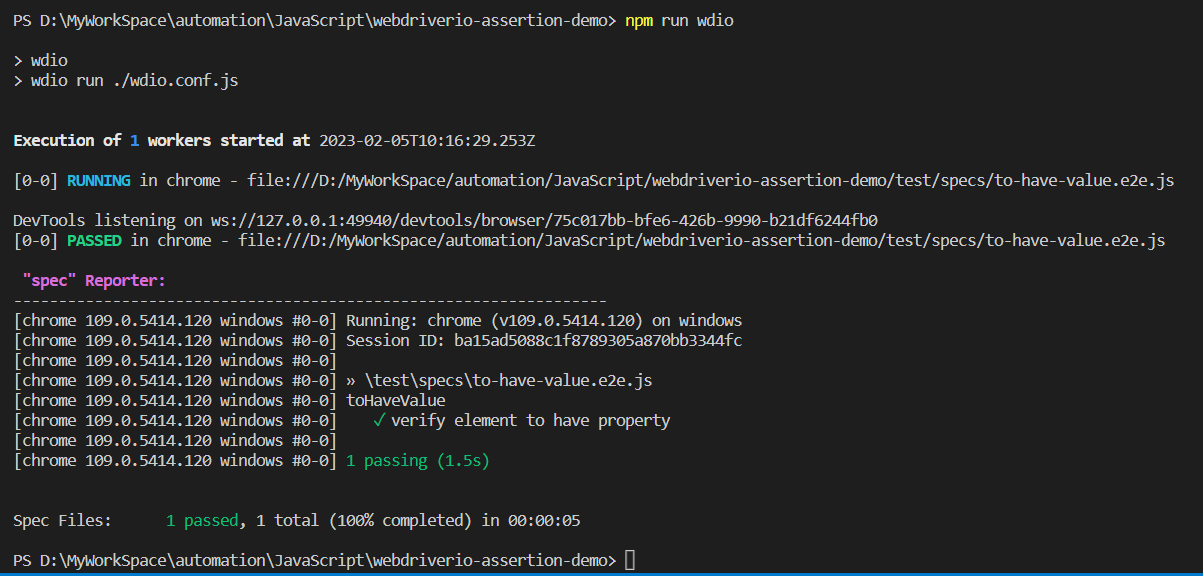
toHaveValueContaining
It’s used to check if an input element contains a certain value.
Sample Usage:
const elem = await $("#printMe")
await expect(elem).toHaveValueContaining('Print')
Parameters:

Implementation:
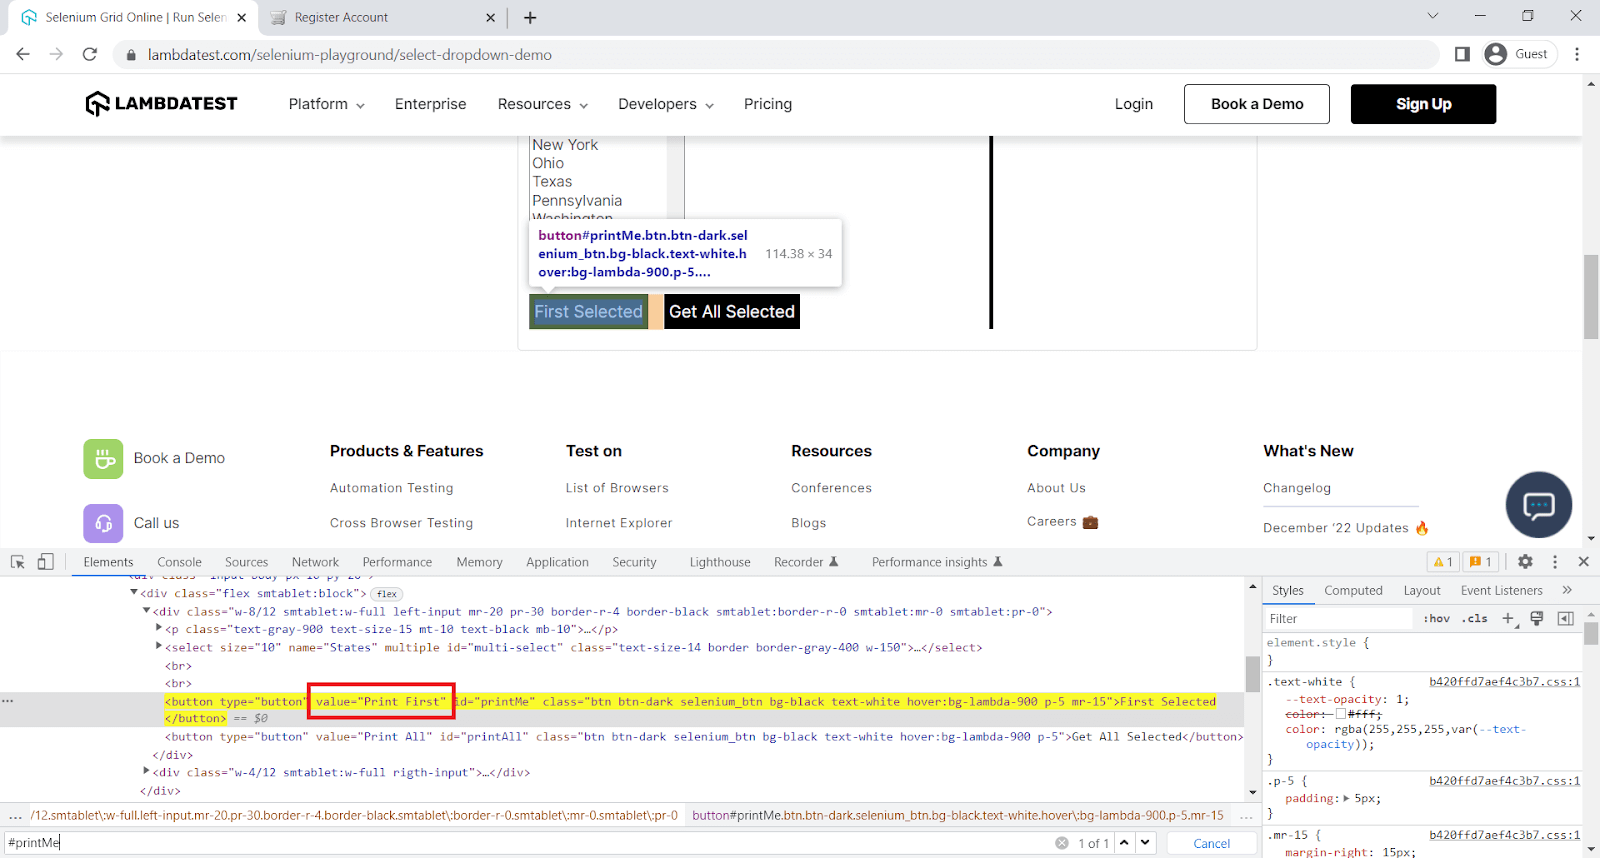
Here, we will verify if the element contains a value.
describe('toHaveValueContaining', async () => {
it('verify element to have value containing', async () => {
await browser.url('https://www.lambdatest.com/selenium-playground/select-dropdown-demo');
const elem = await $("#printMe")
await expect(elem).toHaveValueContaining('Print')
});
});
Code Walkthrough:
Line 4: expect the element to have a value containing.
Execution:
toBeClickable
It’s used to check if an element can be clicked by calling isClickable on the element.
Sample Usage:
const elem = await $("input[value='Continue']")
await expect(elem).toBeClickable()
Parameters:

Implementation:
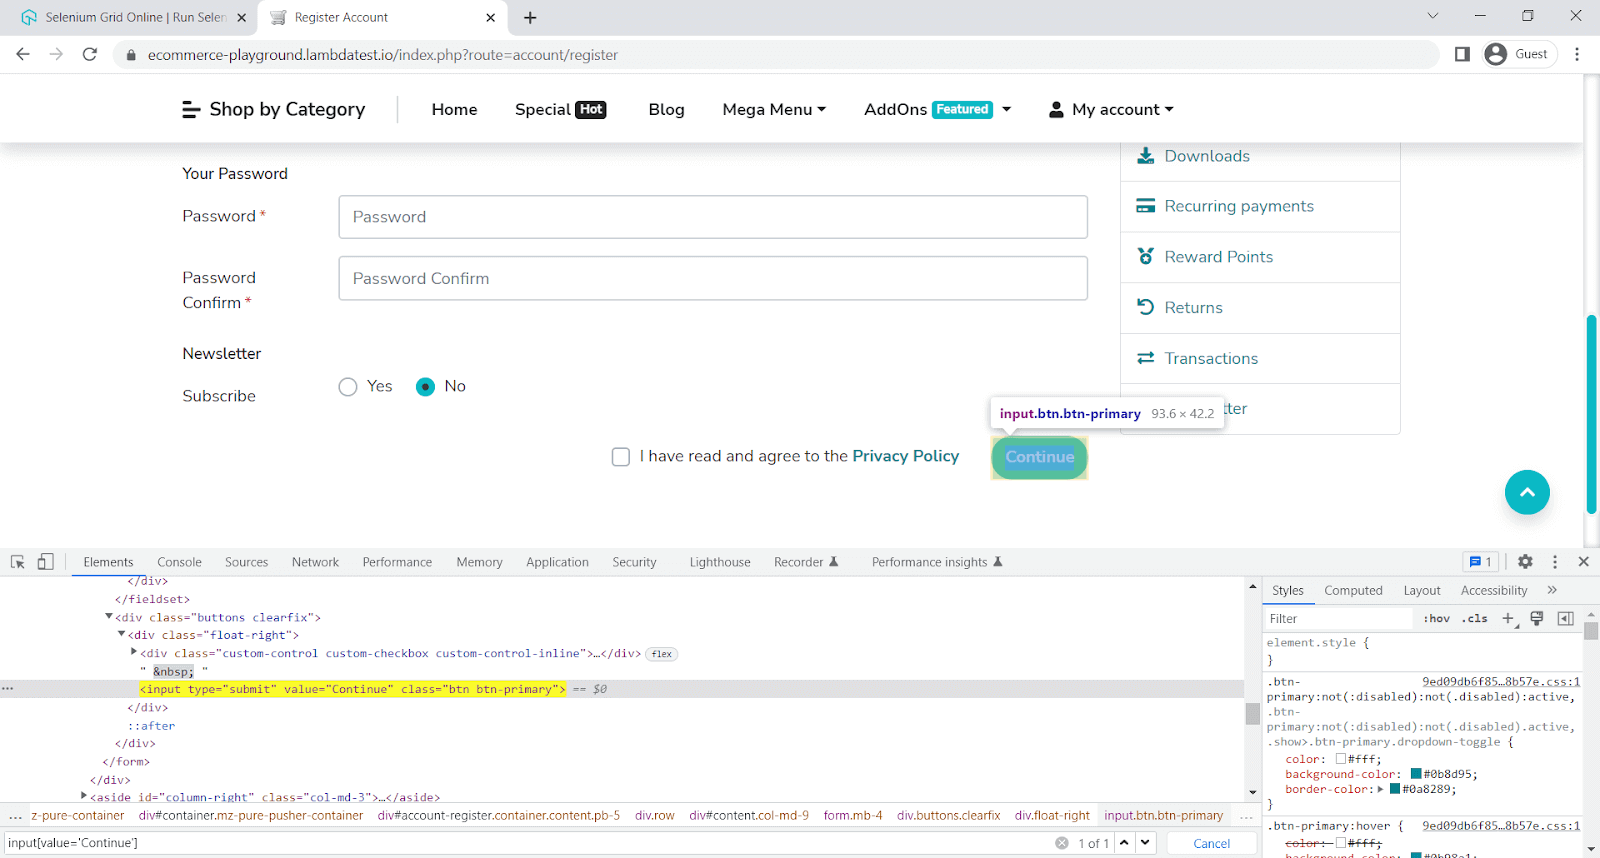
Here, we will verify if the element isClickable.
describe('toBeClickable', async () => {
it('verify element is clickable', async () => {
await browser.url('https://ecommerce-playground.lambdatest.io/index.php?route=account/register');
const elem = await $("input[value='Continue']")
await expect(elem).toBeClickable()
});
});
Code Walkthrough:
Line 4: expect the element to be clickable.
Execution:
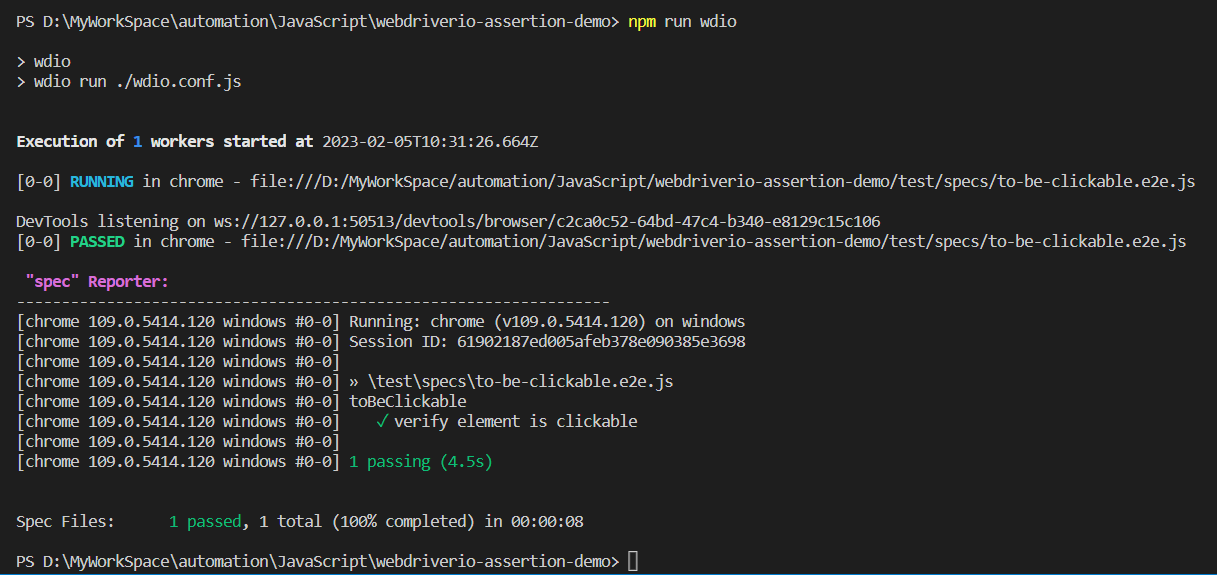
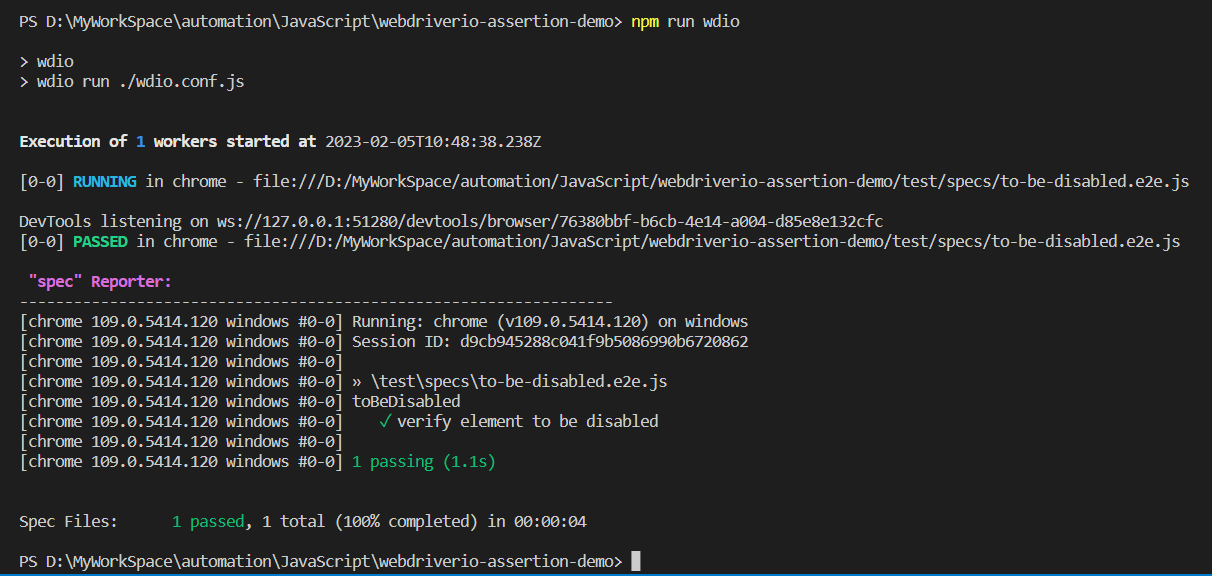
toBeDisabled
It’s used to check if an element is disabled by calling isEnabled on the element.
Sample Usage:
await expect(elem).toBeDisabled()
// same as
await expect(elem).not.toBeEnabled()
Parameters:

Implementation:
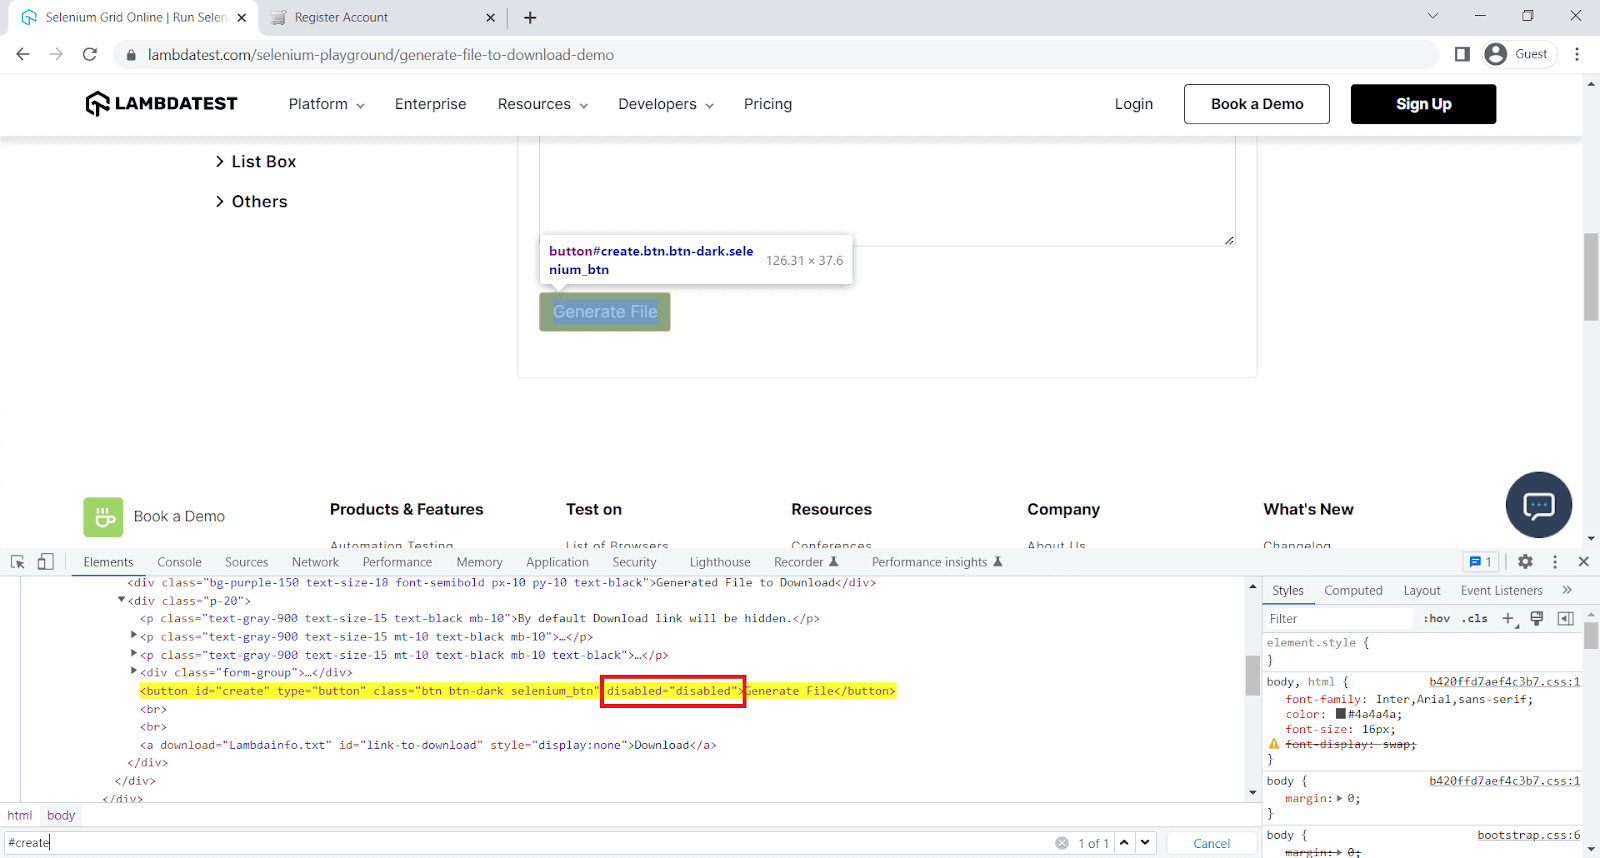
Here, we will verify if the element is disabled.
describe('toBeDisabled', async () => {
it('verify element to be disabled', async () => {
await browser.url('https://www.lambdatest.com/selenium-playground/generate-file-to-download-demo');
const elem = await $("#create")
await expect(elem).toBeDisabled()
// same as
await expect(elem).not.toBeEnabled()
});
});
Code Walkthrough:
Line 4: expect the element to be disabled.
Execution:
toBeEnabled
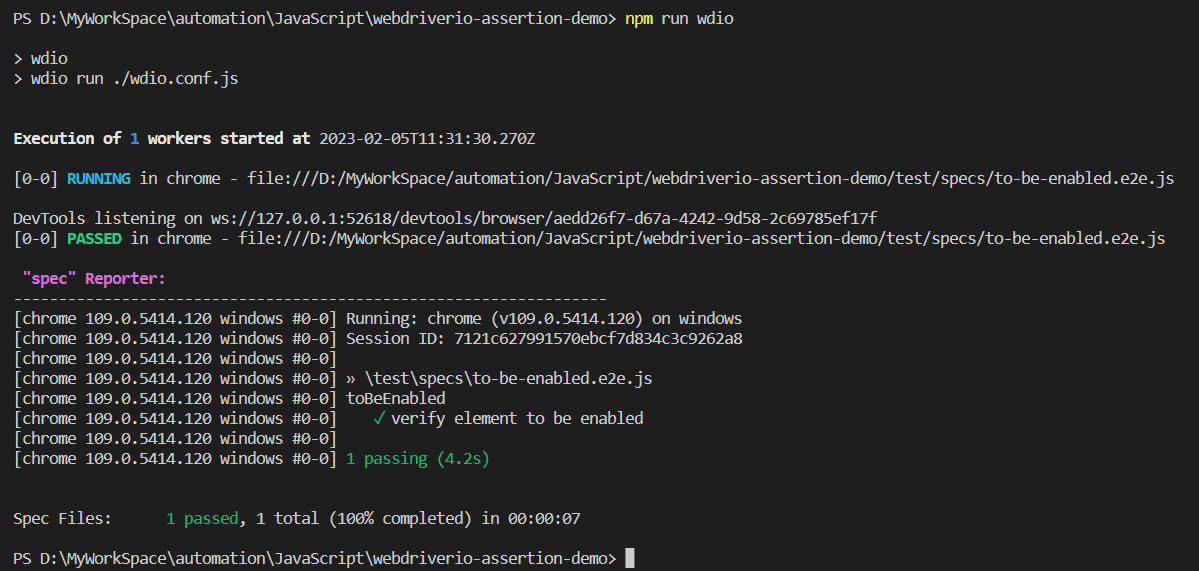
It’s used to check if an element is enabled by calling isEnabled on the element.
Sample Usage:
const elem = await $("#input-firstname")
await expect(elem).toBeEnabled()
Parameters:

Implementation:

Here, we will verify if the element is enabled.
describe('toBeEnabled', async () => {
it('verify element to be enabled', async () => {
await browser.url('https://ecommerce-playground.lambdatest.io/index.php?route=account/register');
const elem = await $("#input-firstname")
await expect(elem).toBeEnabled()
});
});
Code Walkthrough:
Line 4: expect the element to be enabled.
Execution:
toBeSelected
It’s used to check if an element is enabled by calling isSelected on the element.
Sample Usage:
const elem = await $("#isAgeSelected")
await expect(elem).toBeSelected()
Parameters:

Implementation:
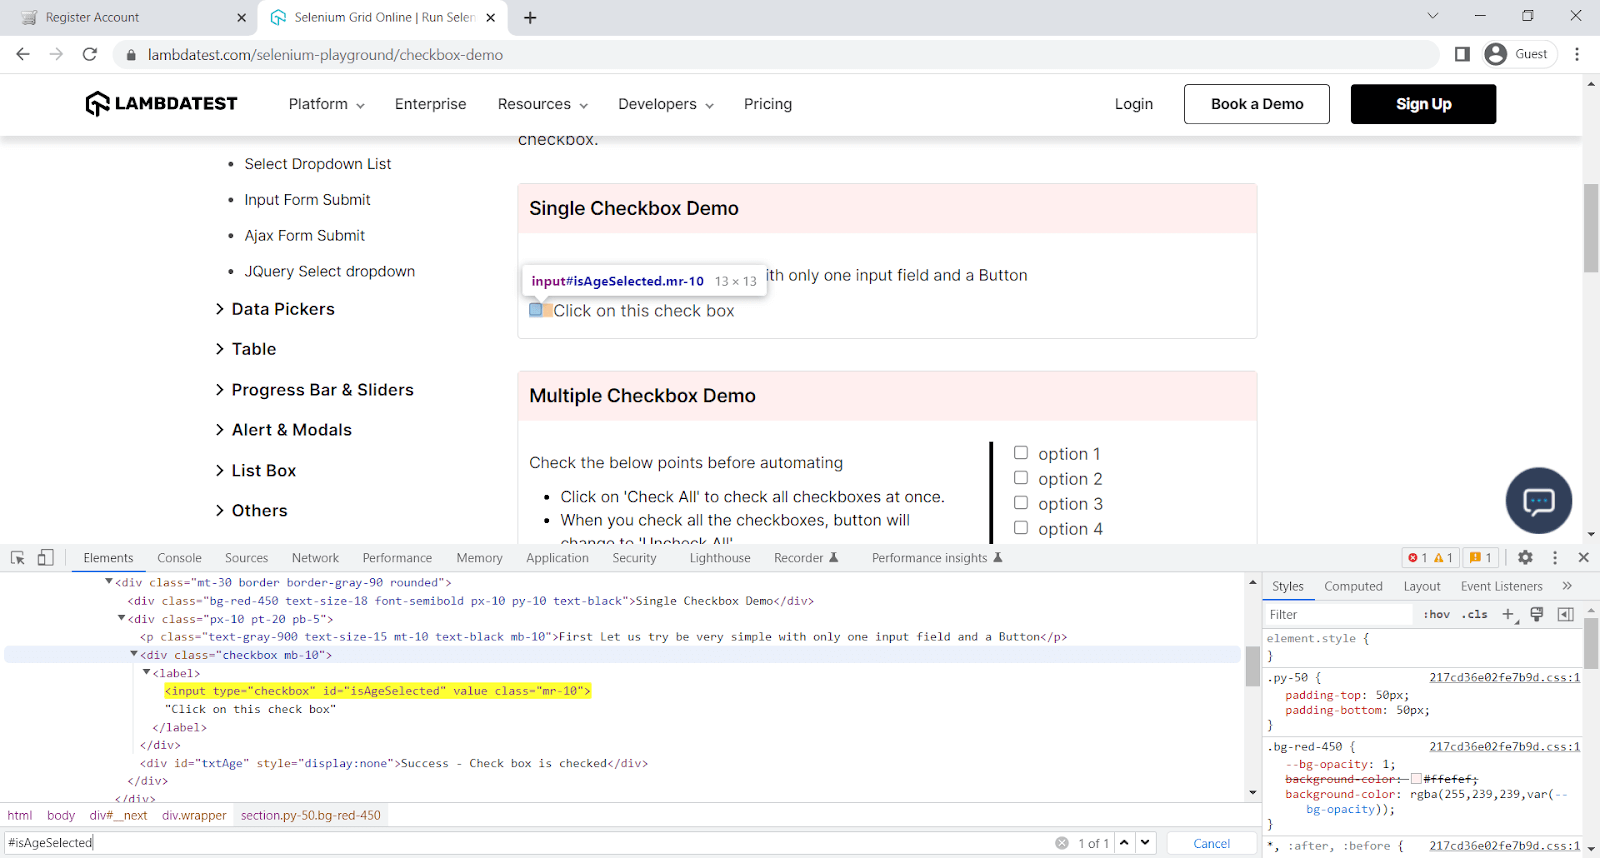
Here, we will verify if the element is selected.
describe('toBeSelected', async () => {
it('verify element to be selected', async () => {
await browser.url('https://www.lambdatest.com/selenium-playground/checkbox-demo');
const elem = await $("#isAgeSelected")
elem.click();
await expect(elem).toBeSelected()
});
});
Code Walkthrough:
Line 5: Since the element is not selected by default, you need to select it.
Line 6: expect the element to be selected.
Execution:

toBeChecked
It's the same as toBeSelected.
Sample Usage:
const elem = await $("#isAgeSelected")
await expect(elem).toBeChecked()
Parameters:

Implementation:
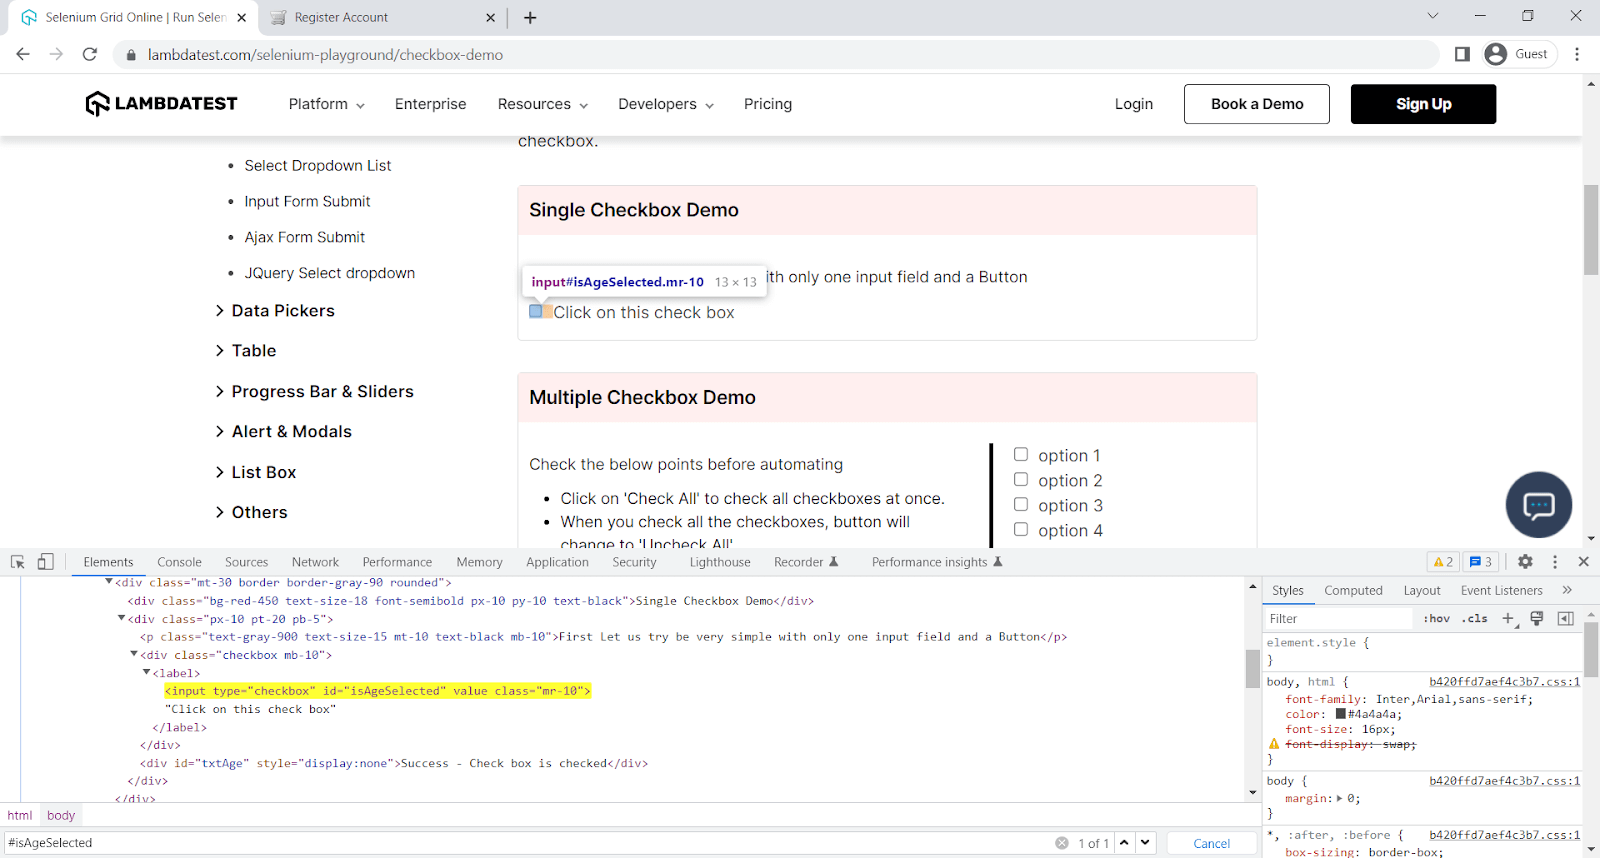
Here, we will verify if the element is checked.
describe('toBeChecked', async () => {
it('verify element to be checked', async () => {
await browser.url('https://www.lambdatest.com/selenium-playground/checkbox-demo');
const elem = await $("#isAgeSelected")
await expect(elem).not.toBeChecked()
await elem.click()
await expect(elem).toBeChecked()
});
});
Code Walkthrough:
Line 5: expect the element not checked.
Line 6: Click on the element so that element is marked checked.
Line 7: expect the element to be checked.
Execution:

toHaveHref
It checks if a link element has a specific link target.
Sample Usage:
const elem = await $("div[id='content'] p a")
await expect(elem).toHaveHref('https://ecommerce-playground.lambdatest.io/index.php?route=account/login')
Parameters:

Implementation:
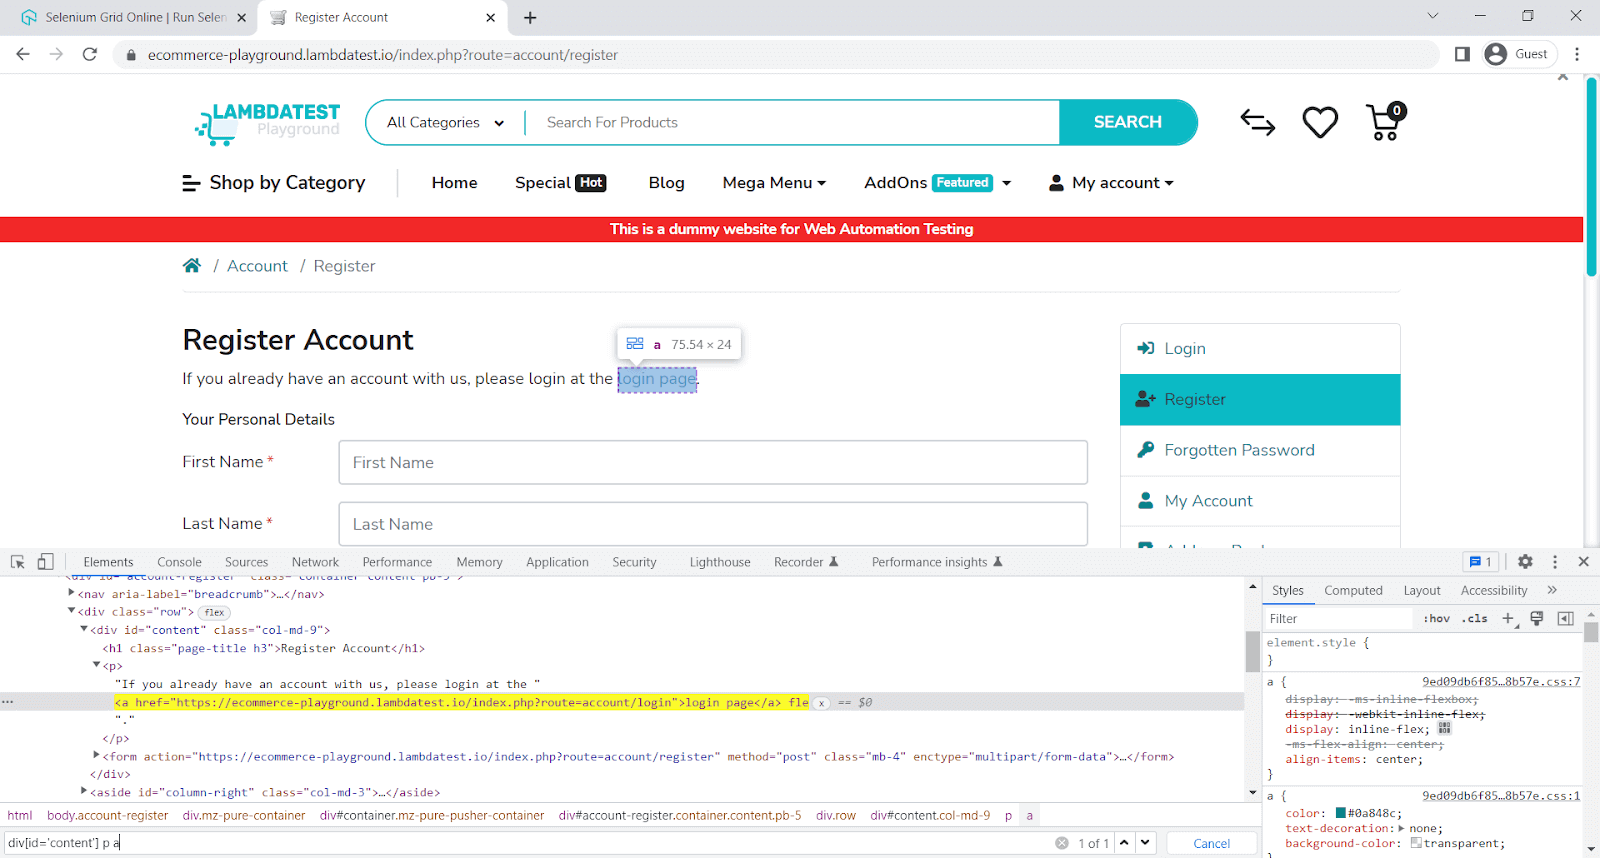
Here, we will verify if the element contains href.
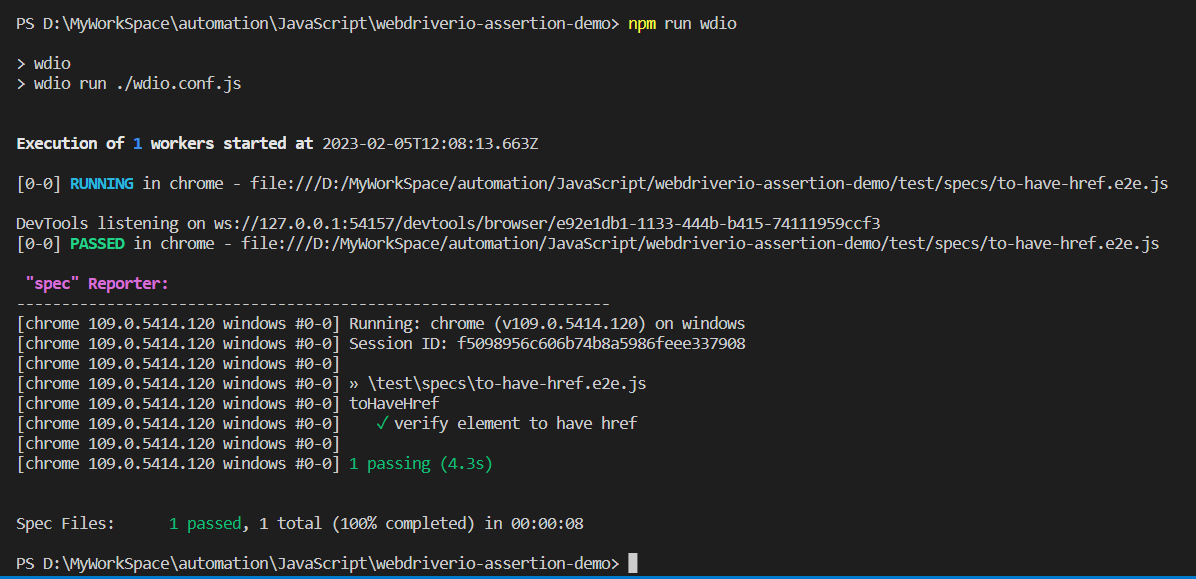
describe('toHaveHref', async () => {
it('verify element to have href', async () => {
await browser.url('https://ecommerce-playground.lambdatest.io/index.php?route=account/register');
const elem = await $("div[id='content'] p a")
await expect(elem).toHaveHref('https://ecommerce-playground.lambdatest.io/index.php?route=account/login')
});
});
Code Walkthrough:
Line 5: expect the element to have href.
Execution:
toHaveLink
It’s the same as toHaveHref.
Sample Usage:
const elem = await $("div[id='content'] p a")
await expect(elem).toHaveLink('https://ecommerce-playground.lambdatest.io/index.php?route=account/login')
Parameters:

Implementation:
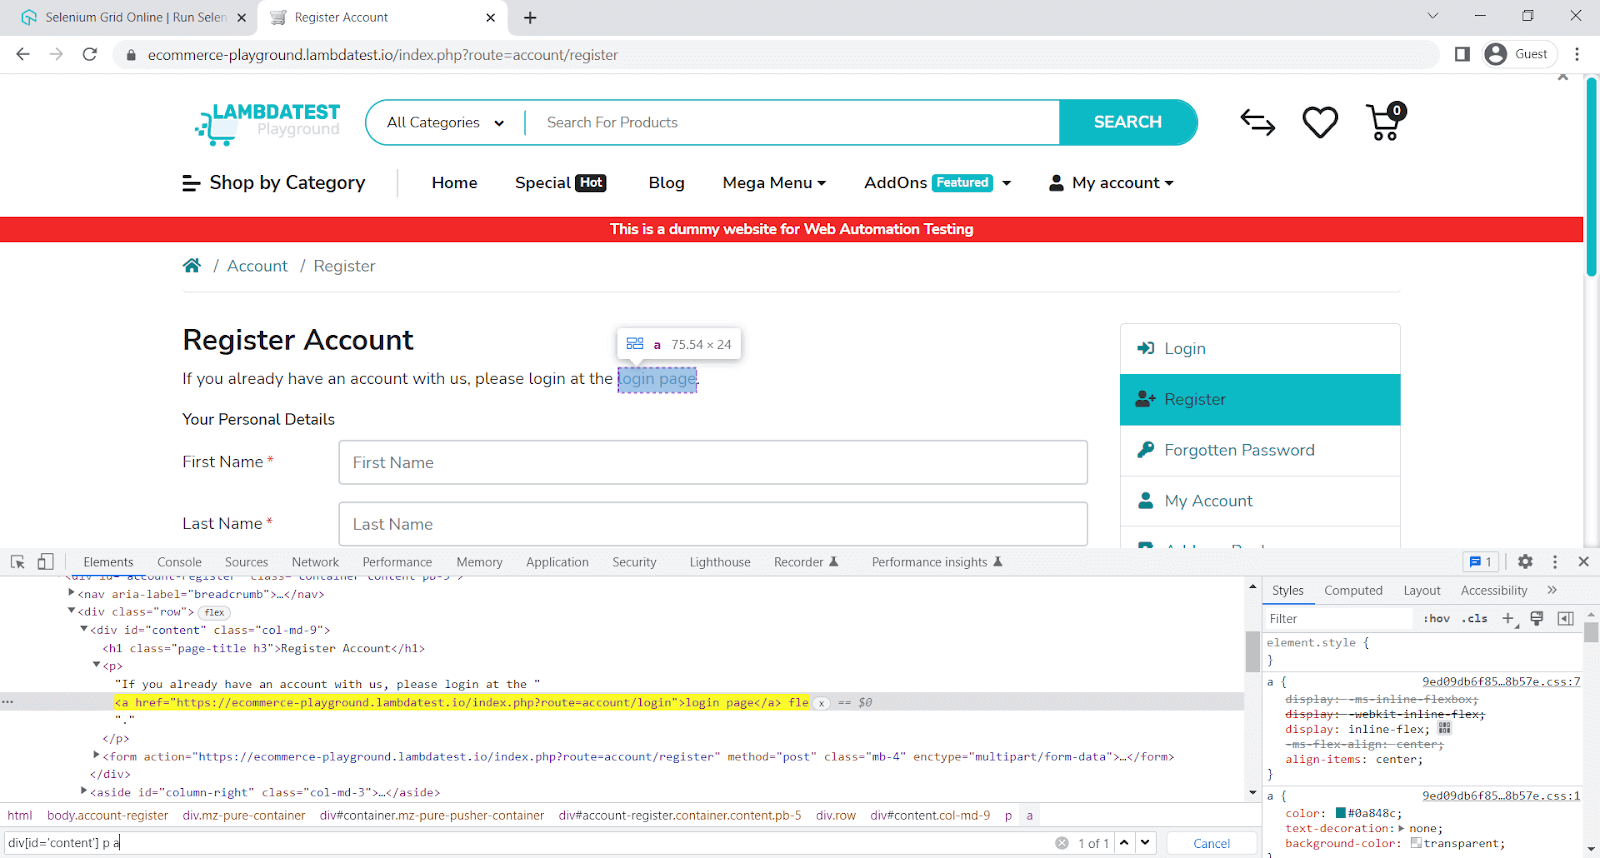
Here we will verify if the element contains a link.
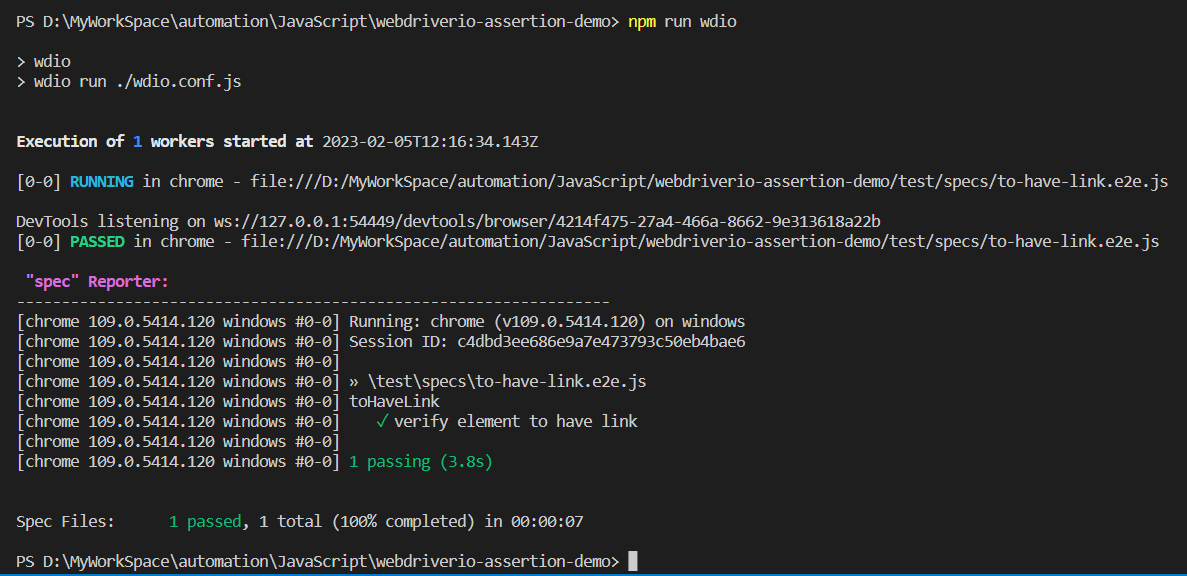
describe('toHaveLink', async () => {
    it('verify element to have link', async () => {
        await browser.url('https://ecommerce-playground.lambdatest.io/index.php?route=account/register');
        const elem = await $("div[id='content'] p a")
        await expect(elem).toHaveLink('https://ecommerce-playground.lambdatest.io/index.php?route=account/login')
    });
});
Code Walkthrough:
Line 5: expect the element to have a link.
Execution:
toHaveHrefContaining
It’s used to check if a link element contains a specific link target.
Sample Usage:
const elem = await $("div[id='content'] p a")
await expect(elem).toHaveHrefContaining('route=account/login')
Parameters:

Implementation:
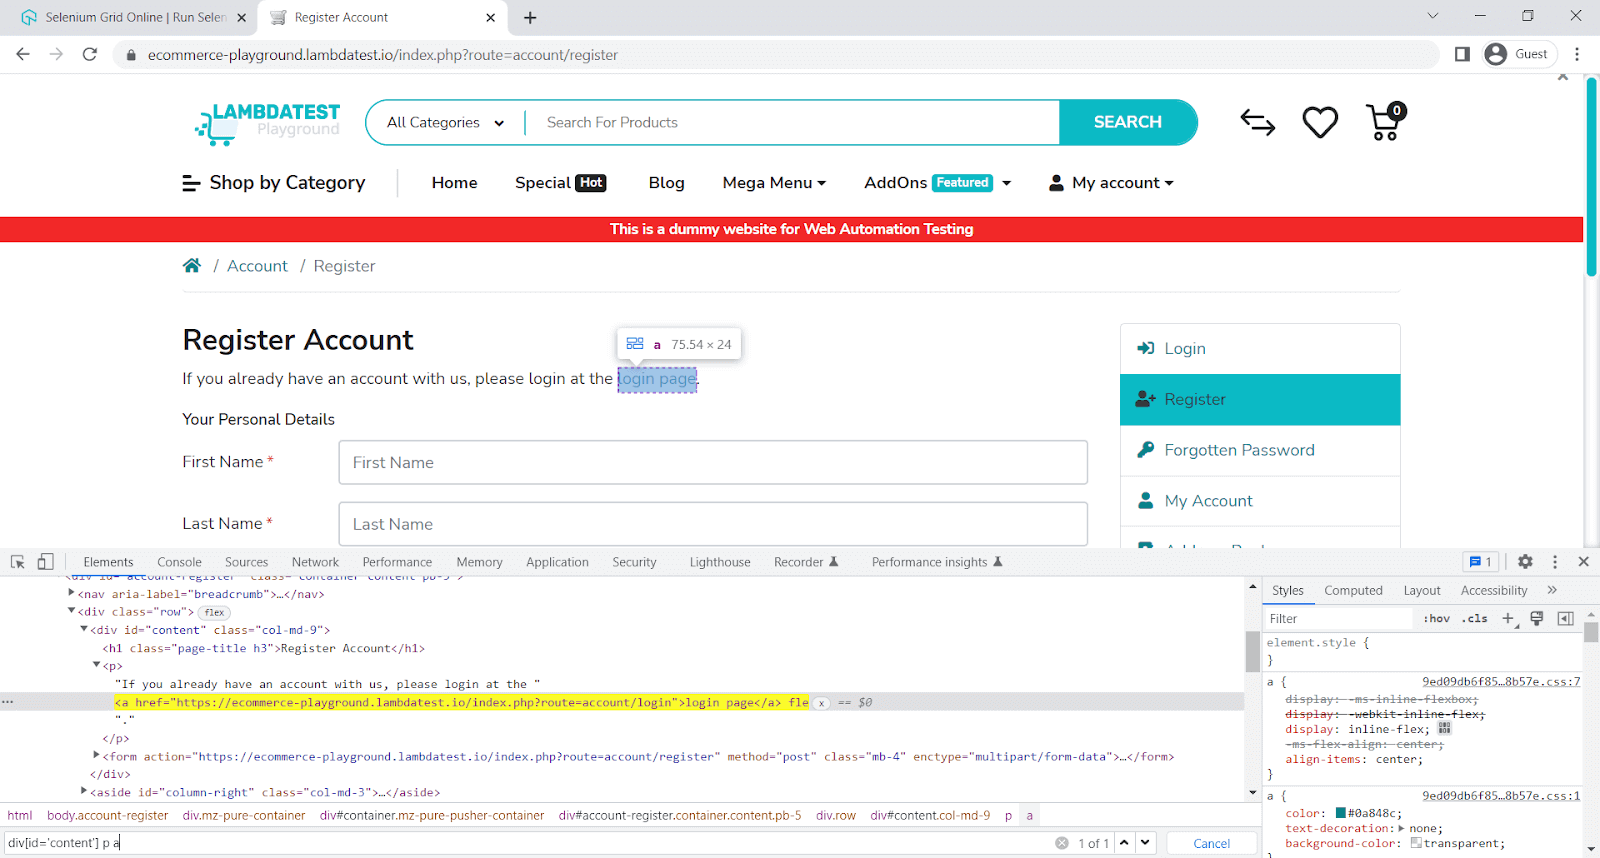
Here, we will verify if the element href contains a value.
describe('toHaveHrefContaining', async () => {
    it('verify element to have href containing value', async () => {
        await browser.url('https://ecommerce-playground.lambdatest.io/index.php?route=account/register');
        const elem = await $("div[id='content'] p a")
        await expect(elem).toHaveHrefContaining('route=account/login')
    });
});
Code Walkthrough:
Line 5: expect the element to have href containing value.
Execution:
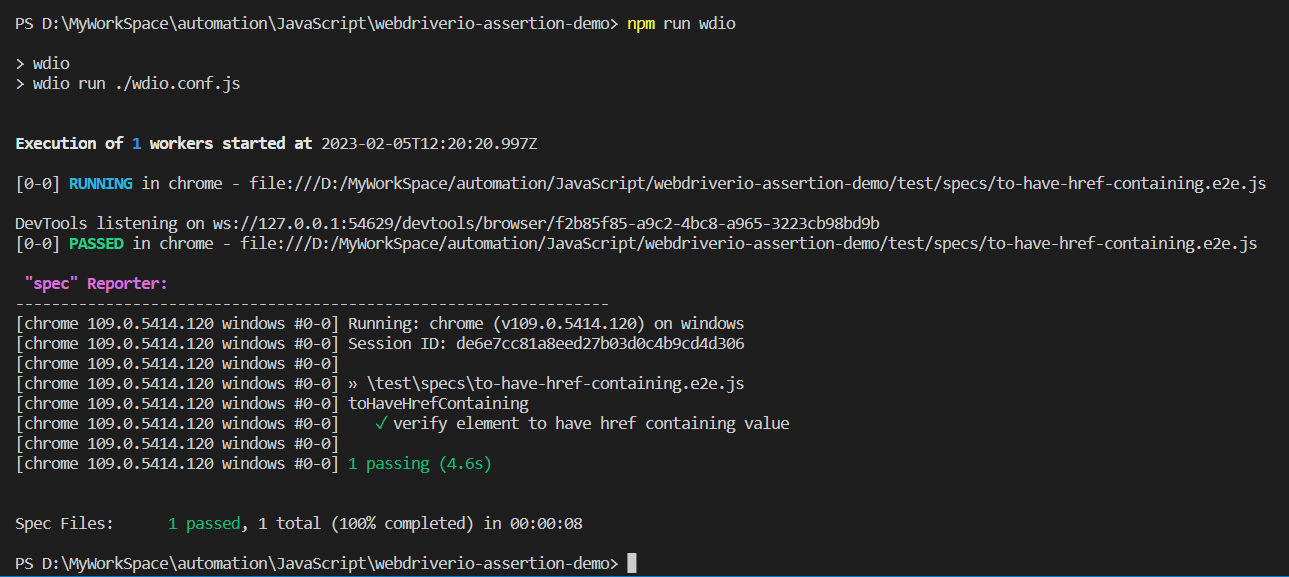
toHaveLinkContaining
It’s the same as toHaveHrefContaining.
Sample Usage:
const elem = await $("div[id='content'] p a")
await expect(elem).toHaveLinkContaining('route=account/login')
Parameters:

Implementation:
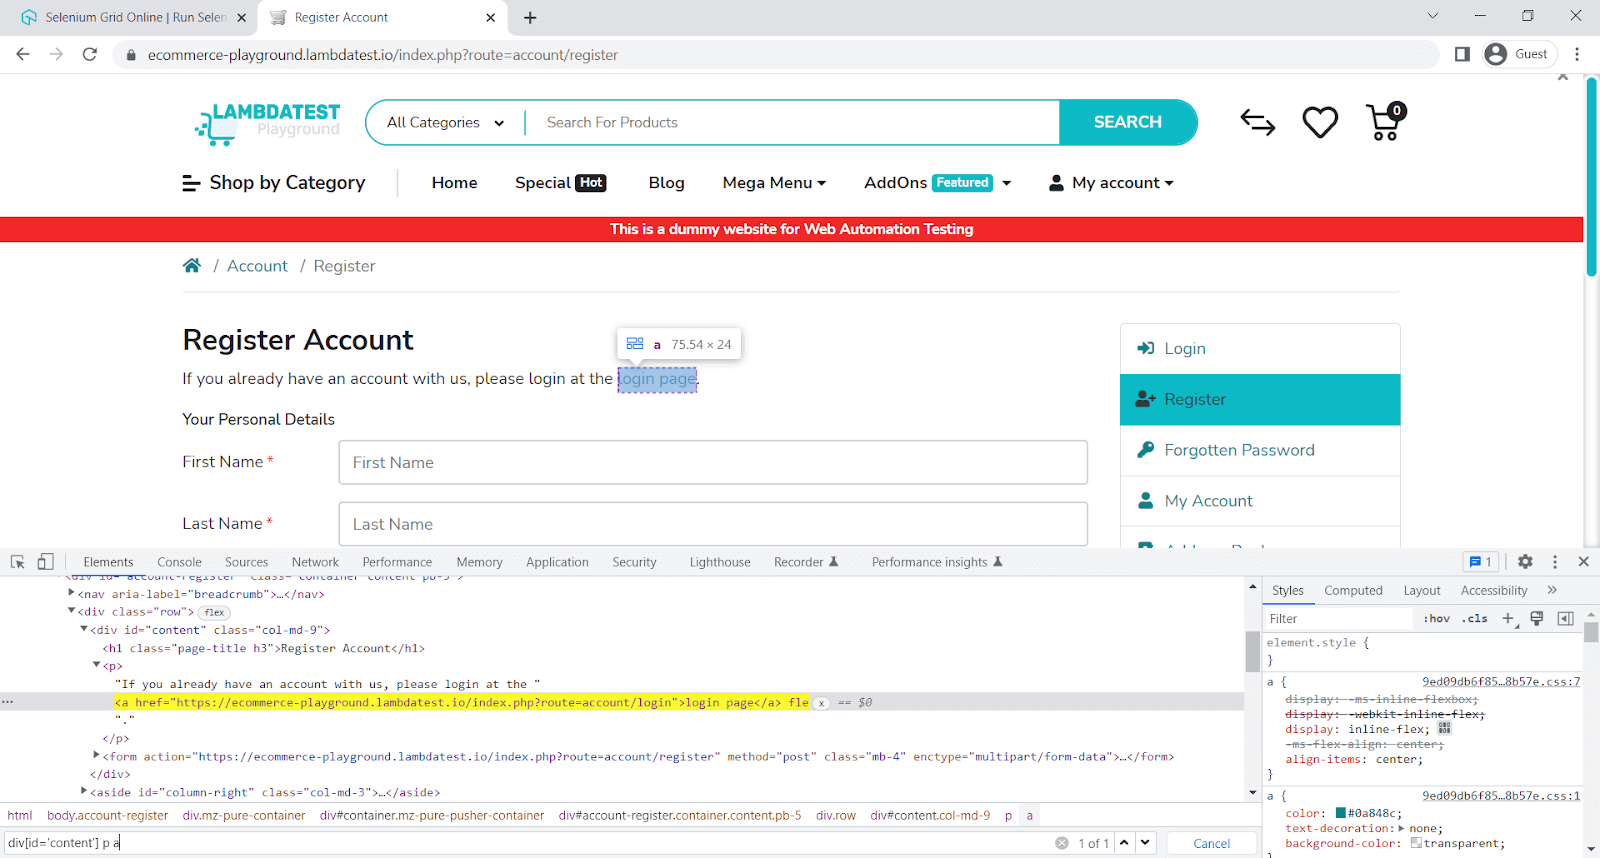
Here, we will verify if the element link contains a value.
describe('toHaveLinkContaining', async () => {
    it('verify element to have link containing value', async () => {
        await browser.url('https://ecommerce-playground.lambdatest.io/index.php?route=account/register');
        const elem = await $("div[id='content'] p a")
        await expect(elem).toHaveLinkContaining('route=account/login')
    });
});
Code Walkthrough:
Line 5: expect the element to have a link containing value.
Execution:
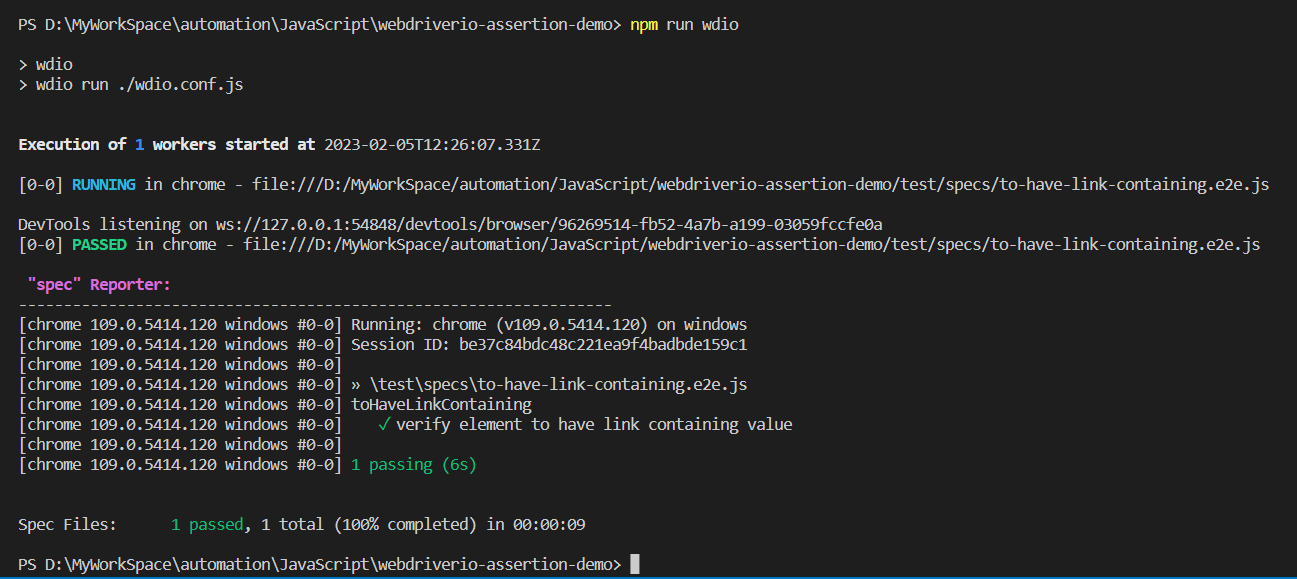
toHaveId
It’s used to check if an element has a specific id attribute.
Sample Usage:
const elem = await $("//input[@id='input-firstname']")
await expect(elem).toHaveId('input-firstname')
Parameters:

Implementation:
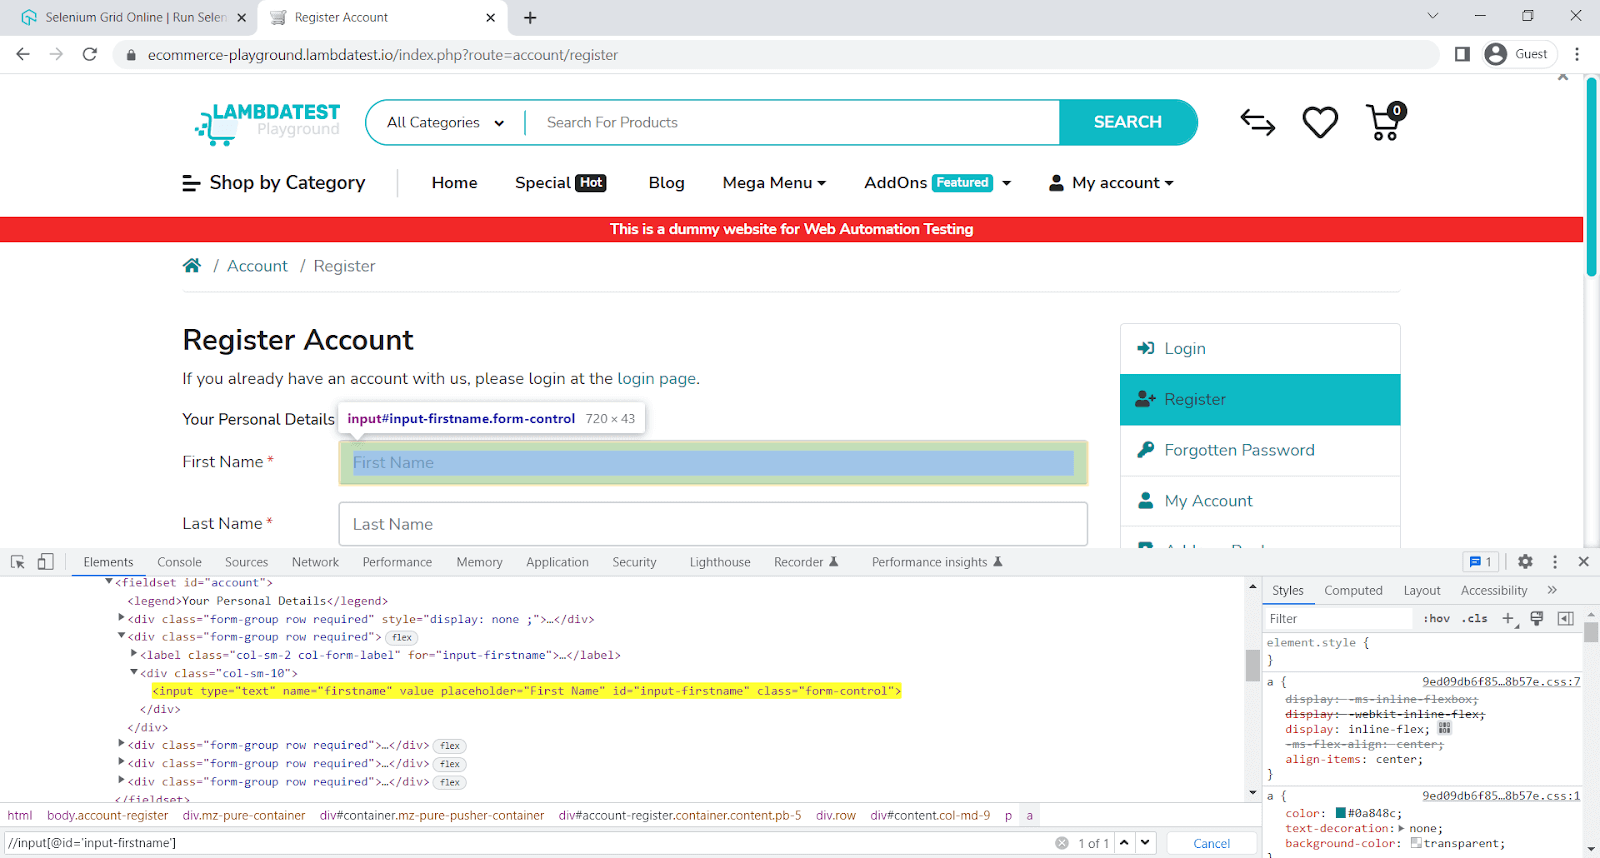
Here, we will verify the element Id.
describe('toHaveId', async () => {
    it('verify element to have id', async () => {
        await browser.url('https://ecommerce-playground.lambdatest.io/index.php?route=account/register');
        const elem = await $("//input[@id='input-firstname']")
        await expect(elem).toHaveId('input-firstname')
    });
});
Code Walkthrough:
Line 5: expect the element to have Id.
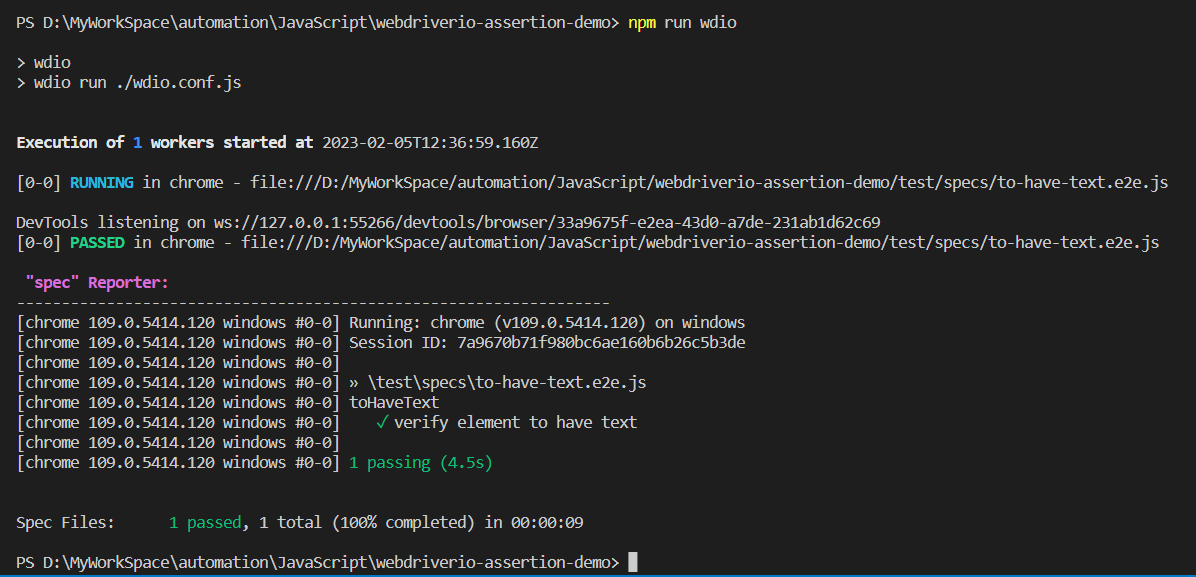
Execution:
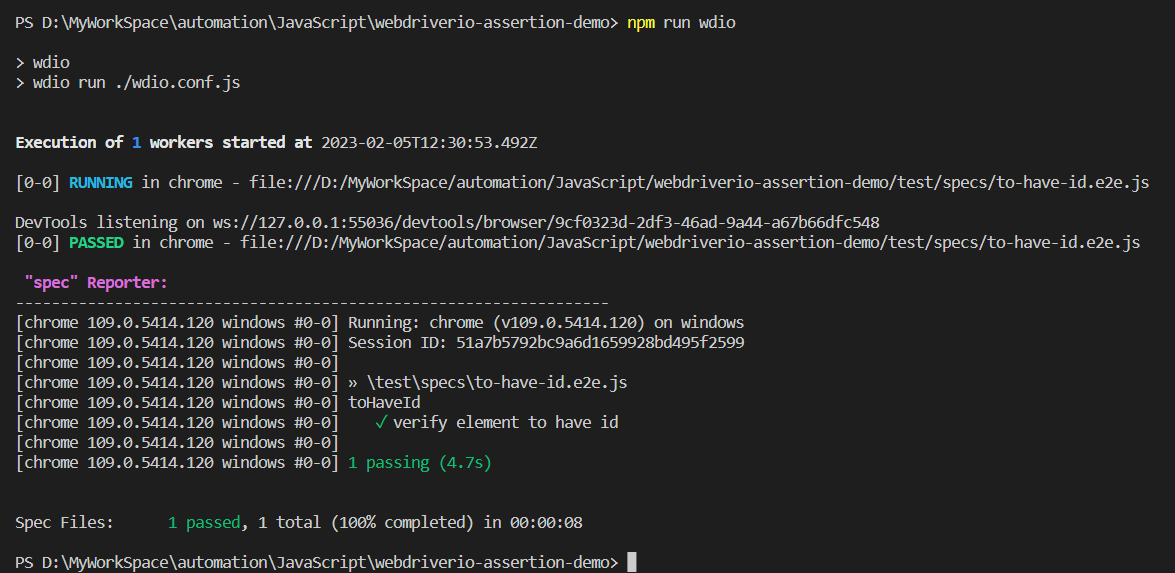
toHaveText
It’s used to check if an element has a specific text. It can also be called with an array as a parameter in the case where the element can have different texts.
Sample Usage:
const elem = await $(".page-title.h3")
await expect(elem).toHaveText('Register Account')
Parameters:

Implementation:
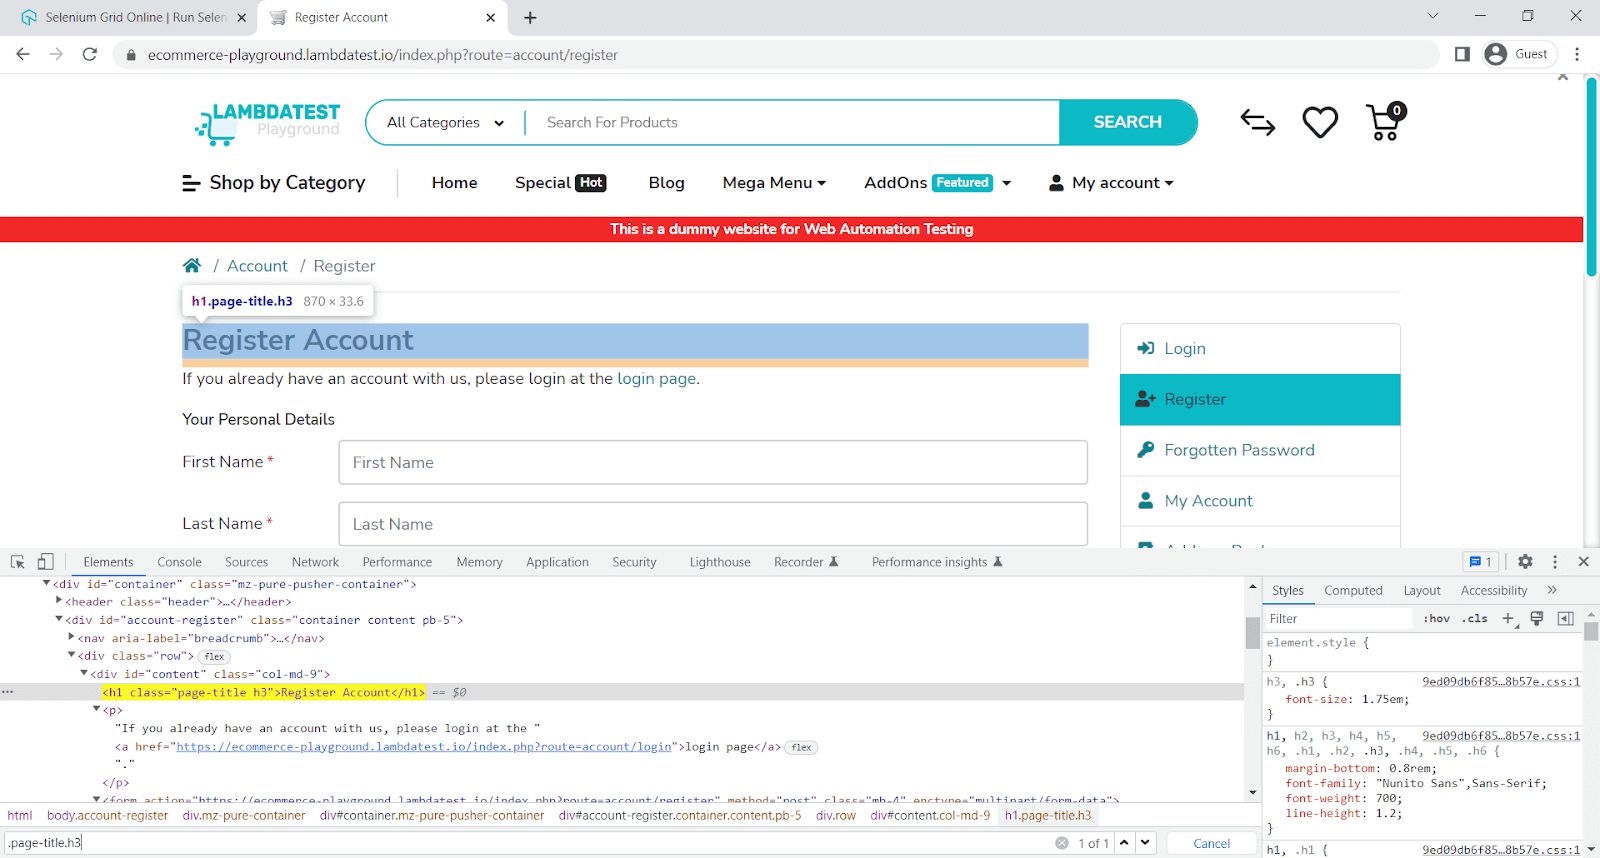
Here, we will verify the element text.
describe('toHaveText', async () => {
    it('verify element to have text', async () => {
        await browser.url('https://ecommerce-playground.lambdatest.io/index.php?route=account/register');
        const elem = await $(".page-title.h3")
        await expect(elem).toHaveText('Register Account')
    });
});
Code Walkthrough:
Line 5: expect the element to have Text.
Execution:
toHaveTextContaining
It’s used to check if an element contains a specific text. It can also be called with an array as a parameter when the element has different texts.
Sample Usage:
const elem = await $(".page-title.h3")
await expect(elem).toHaveTextContaining('Register')
Parameters:

Implementation:
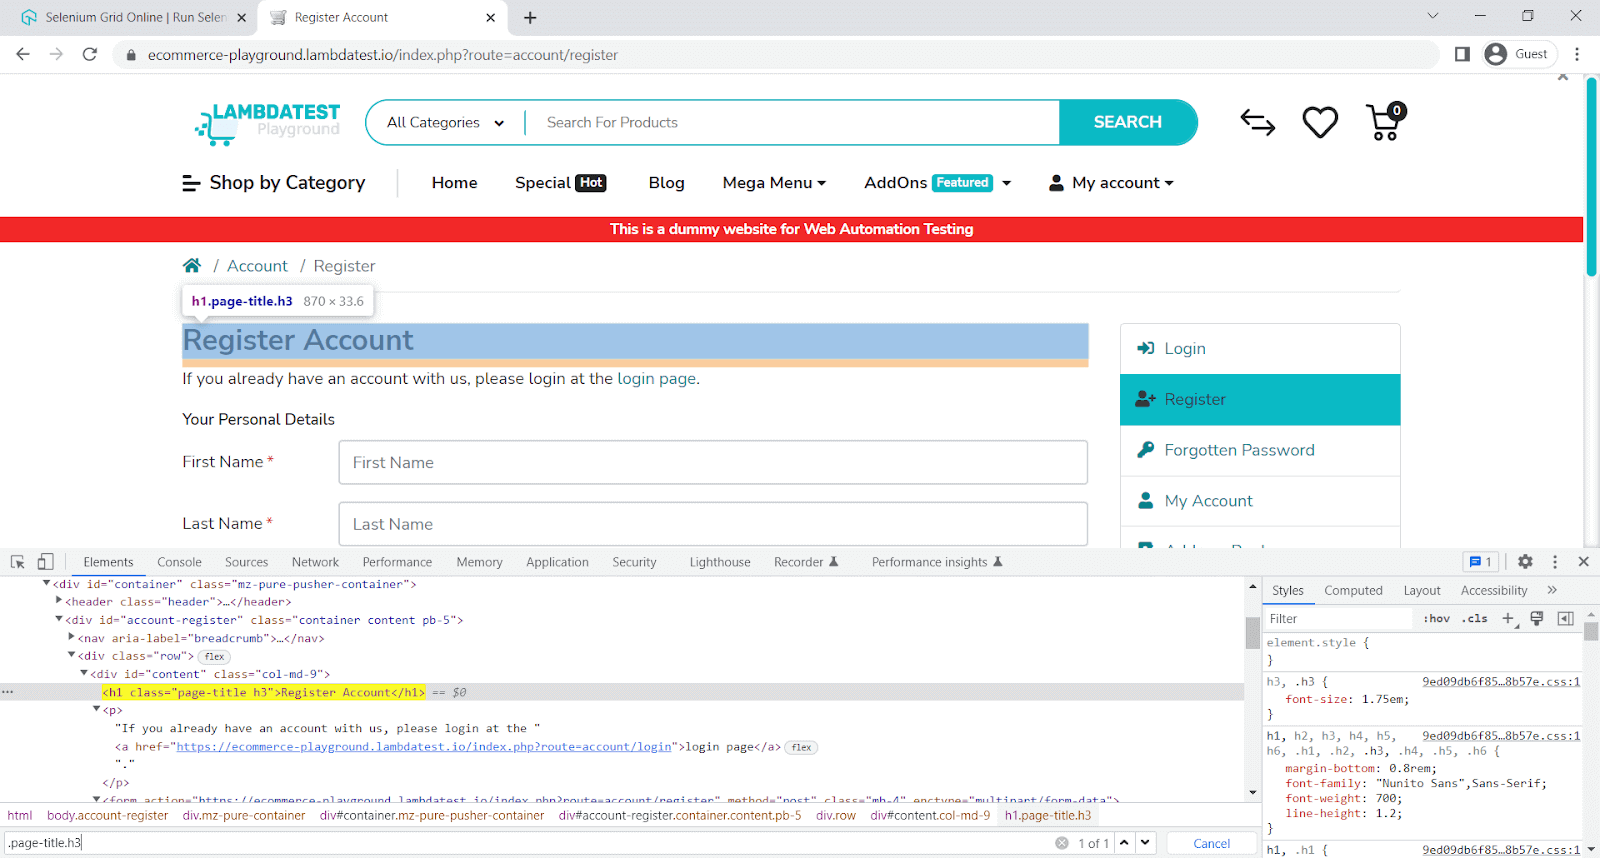
Here, we will verify if the element has text value.
describe('toHaveTextContaining', async () => {
    it('verify element to have text containing value', async () => {
        await browser.url('https://ecommerce-playground.lambdatest.io/index.php?route=account/register');
        const elem = await $(".page-title.h3")
        await expect(elem).toHaveTextContaining('Register')
    });
});
Code Walkthrough:
Line 5: expect the element to have Text containing value.
Execution:
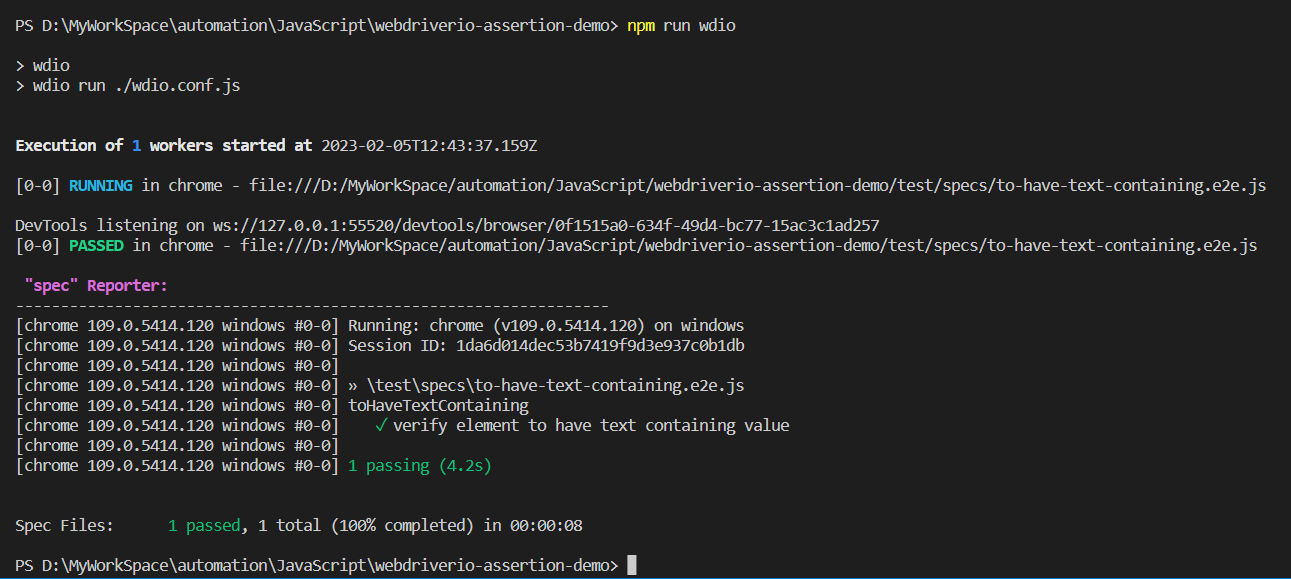
toBeDisplayedInViewport
It’s used to check if an element is within the viewport by calling isDisplayedInViewport on the element.
Sample Usage:
const elem = await $("#input-firstname")
await expect(elem).toBeDisplayedInViewport()
Parameters:

Implementation:
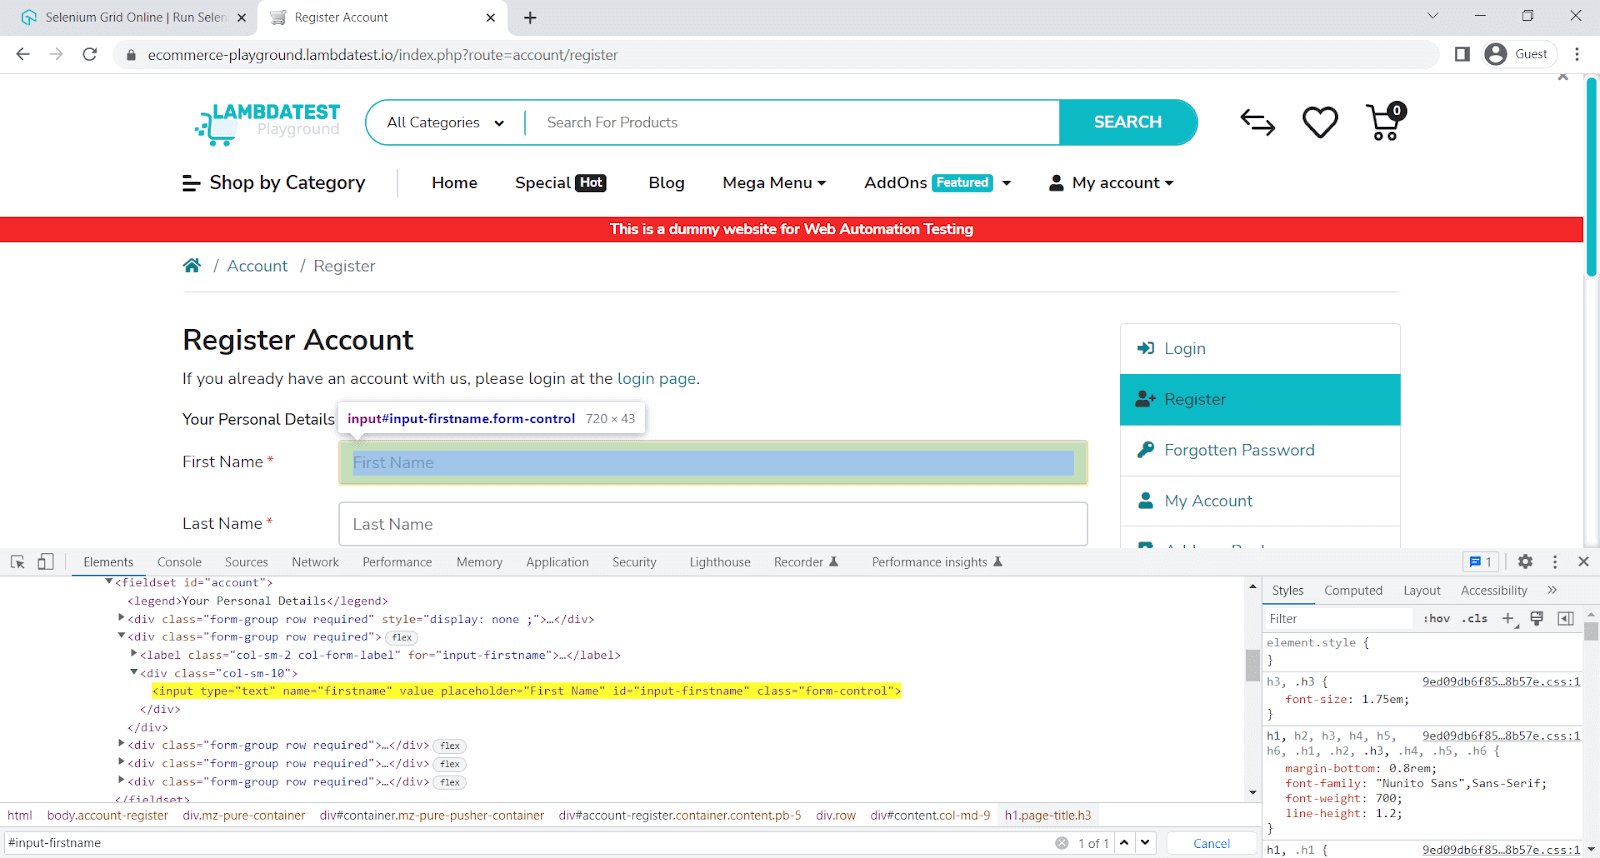
Here, we will verify if the element is displayed in the viewport.
describe('toBeDisplayedInViewport', async () => {
    it('verify element to be displayed in viewport', async () => {
        await browser.url('https://ecommerce-playground.lambdatest.io/index.php?route=account/register');
        const elem = await $("#input-firstname")
        await expect(elem).toBeDisplayedInViewport()
    });
});
Code Walkthrough:
Line 5: expect the element to be displayed in the viewport.
Execution:
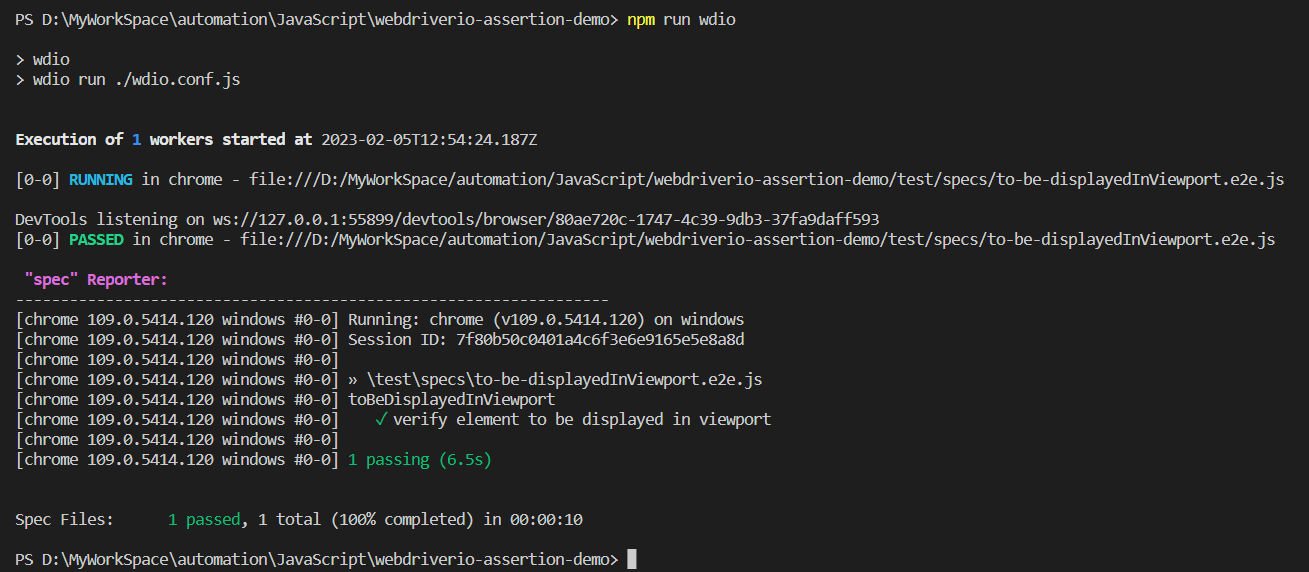
toHaveChildren
It’s used to check the mount of the fetched element's children by calling element.$('./*') command.
Sample Usage:
const elem = await $("(//div[@class='form-group row required'])[2]")
await expect(elem).toHaveChildren()
Parameters:

Implementation:
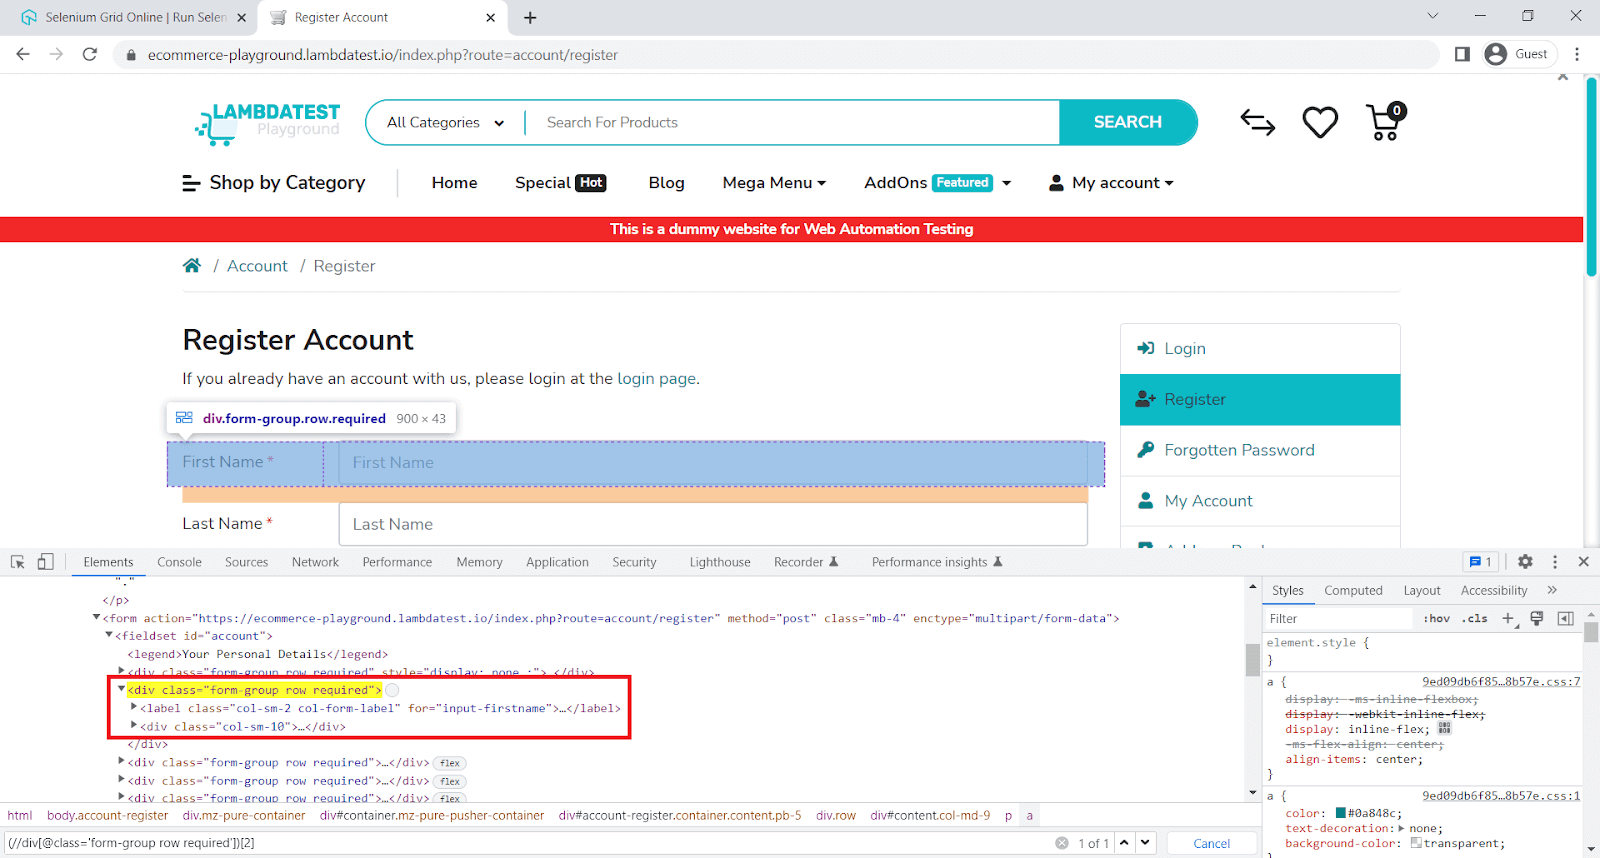
Here, we will verify if the element has children.
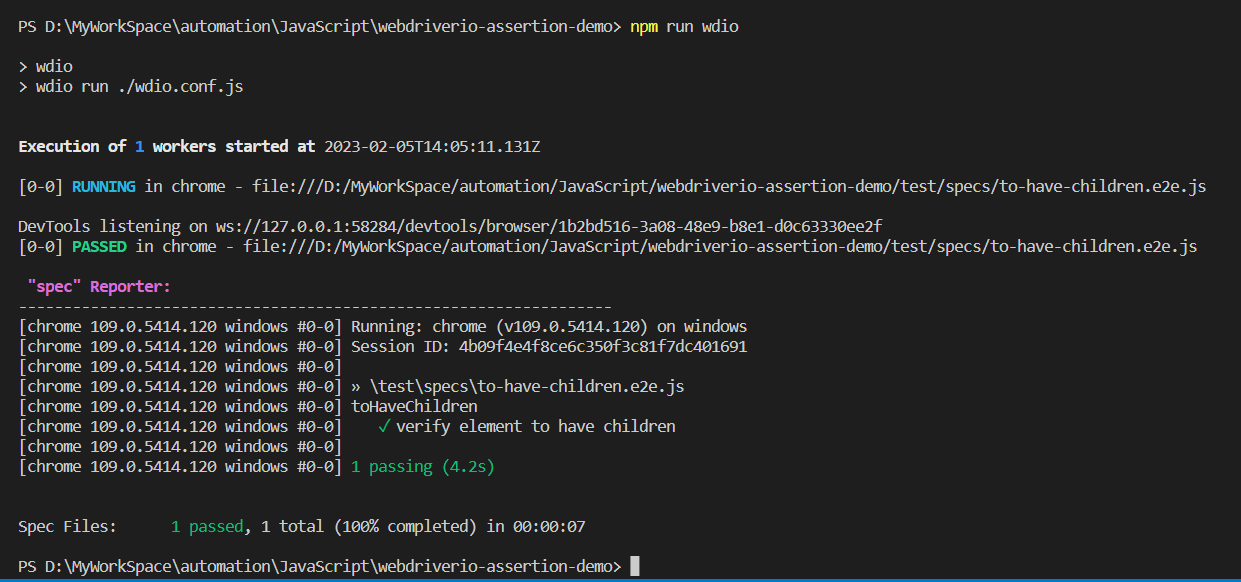
describe('toHaveChildren', async () => {
    it('verify element to have children', async () => {
        await browser.url('https://ecommerce-playground.lambdatest.io/index.php?route=account/register');
        const elem = await $("(//div[@class='form-group row required'])[2]")
        await expect(elem).toHaveChildren()
        // same as
        await expect(elem).toHaveChildren({ gte: 1 })
        // the list has 2 items
        await expect(elem).toHaveChildren(2)
        // same as
        await expect(elem).toHaveChildren({ eq: 2 })
    });
});
Code Walkthrough:
Line 5: expect the element to have children.
Line 7: expect the element to have children - it's the same as Line 5.
Line 9: expect the element to have 2 children elements.
Line 11: expect the element to have 2 children elements - it's the same as Line 9.
Execution:
toBeElementsArrayOfSize
It’s used to check the amount of fetched elements using the $$ command.
Sample Usage:
const listItems = await $$("//li[@class='nav-item']")
await expect(listItems).toBeElementsArrayOfSize(54)
await expect(listItems).toBeElementsArrayOfSize({ lte: 54 })
Parameters:

Implementation:
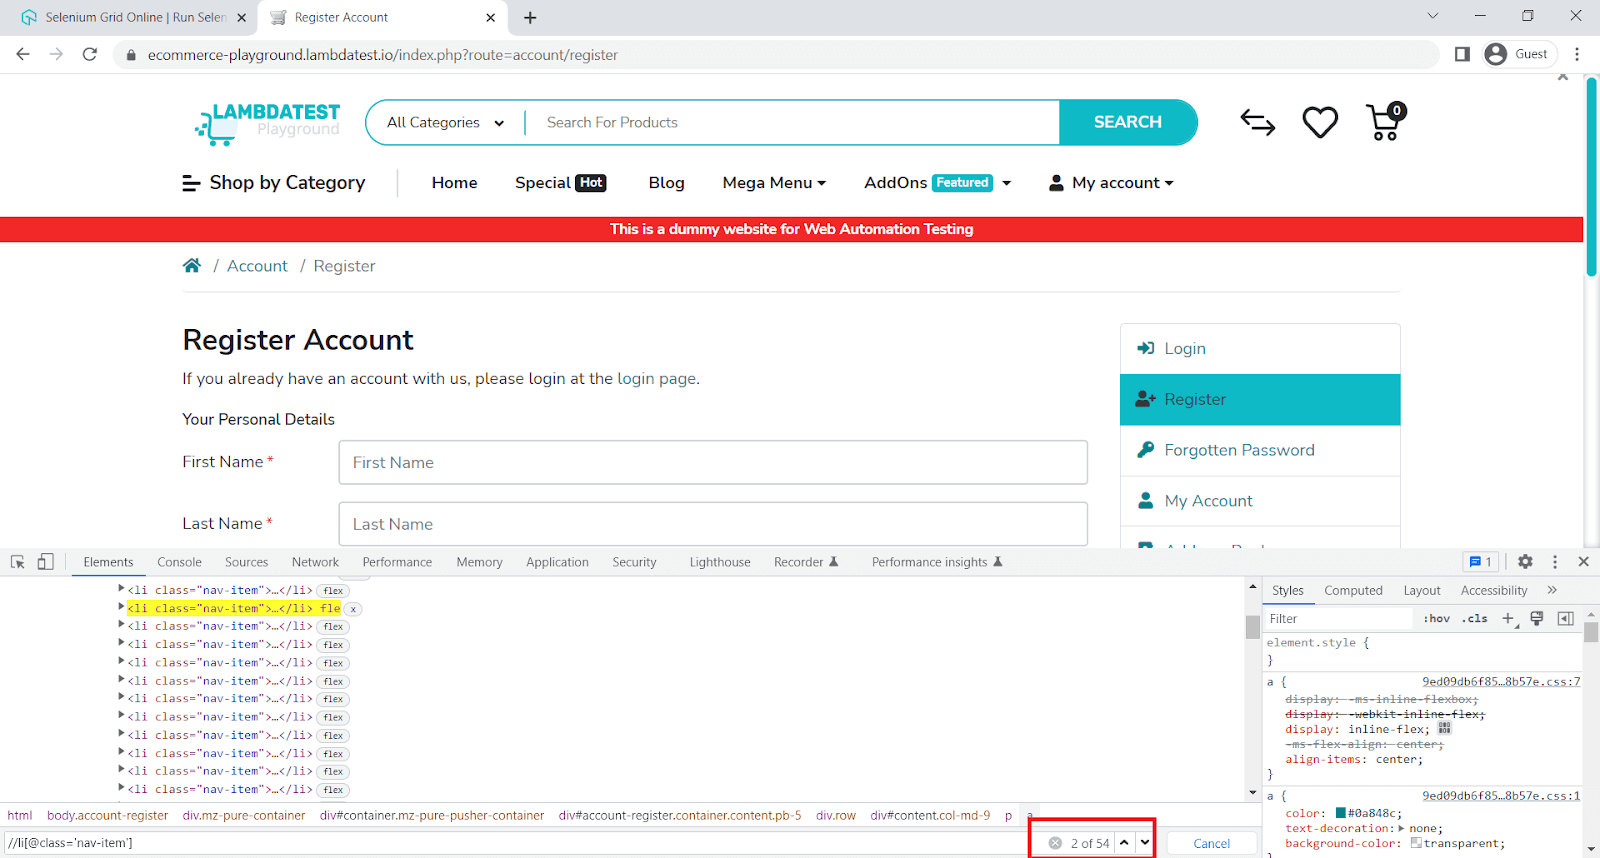
Here, we will verify the element array size.
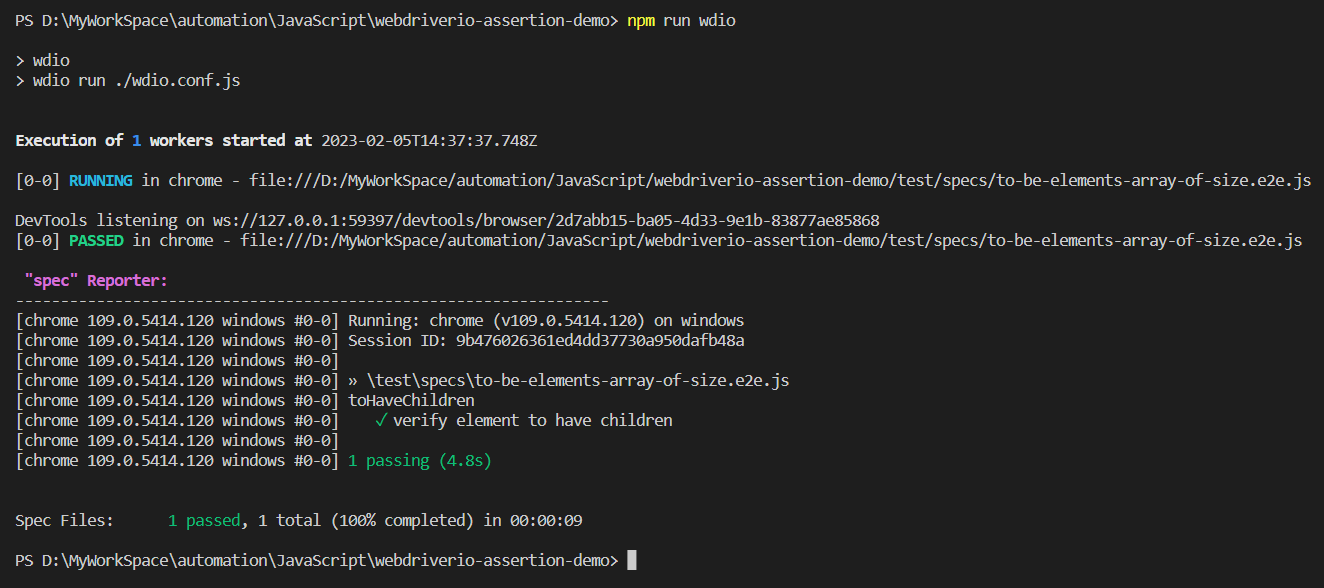
describe('toHaveChildren', async () => {
    it('verify element to have children', async () => {
        await browser.url('https://ecommerce-playground.lambdatest.io/index.php?route=account/register');
        const listItems = await $$("//li[@class='nav-item']")
        // 54 items in the list
        await expect(listItems).toBeElementsArrayOfSize(54)
        await expect(listItems).toBeElementsArrayOfSize({ lte: 54 })
    });
});
Code Walkthrough:
Line 6: expect the elements array size.
Execution:
Using regular expressions
When there is a need to do conditional verification, then you can use the regular expression. You can directly use regular expressions for all matchers that make text comparisons.
Sample Usage:
const elem = await $(".page-title.h3")
await expect(elem).toHaveText(/register/i)
Implementation:
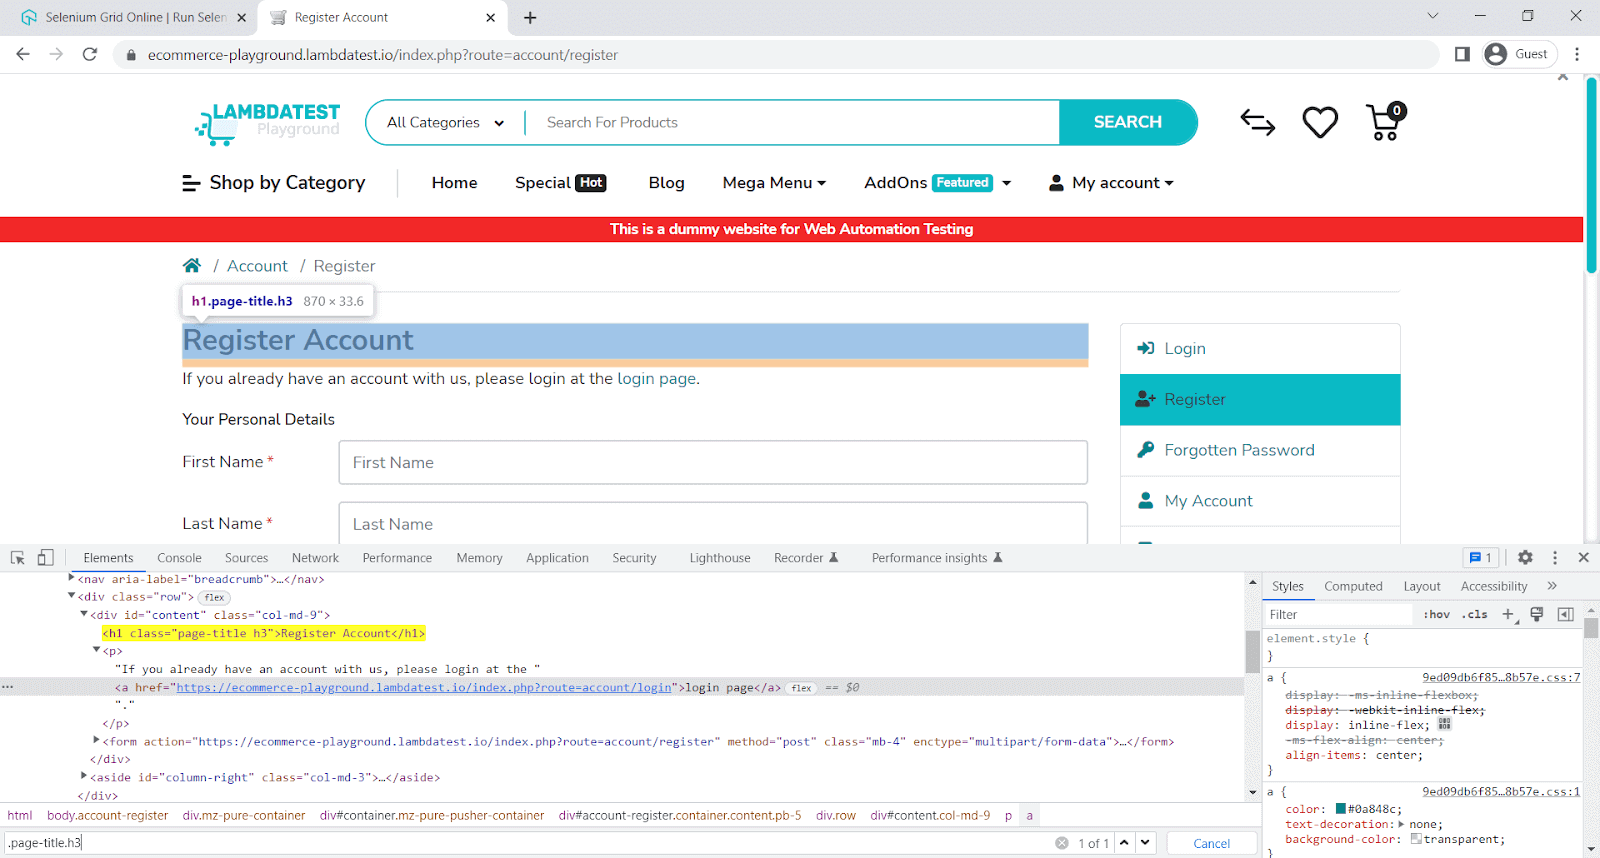
Here, you will verify element text using regular expressions.
describe('toHaveText with regular expression', async () => {
    it('verify element to have text with regular expression', async () => {
        await browser.url('https://ecommerce-playground.lambdatest.io/index.php?route=account/register');
        const elem = await $(".page-title.h3")
        await expect(elem).toHaveText(/register/i)
    });
});
Code Walkthrough:
Line 5: expect the element to have text using regular expression and case insensitive.
Execution:
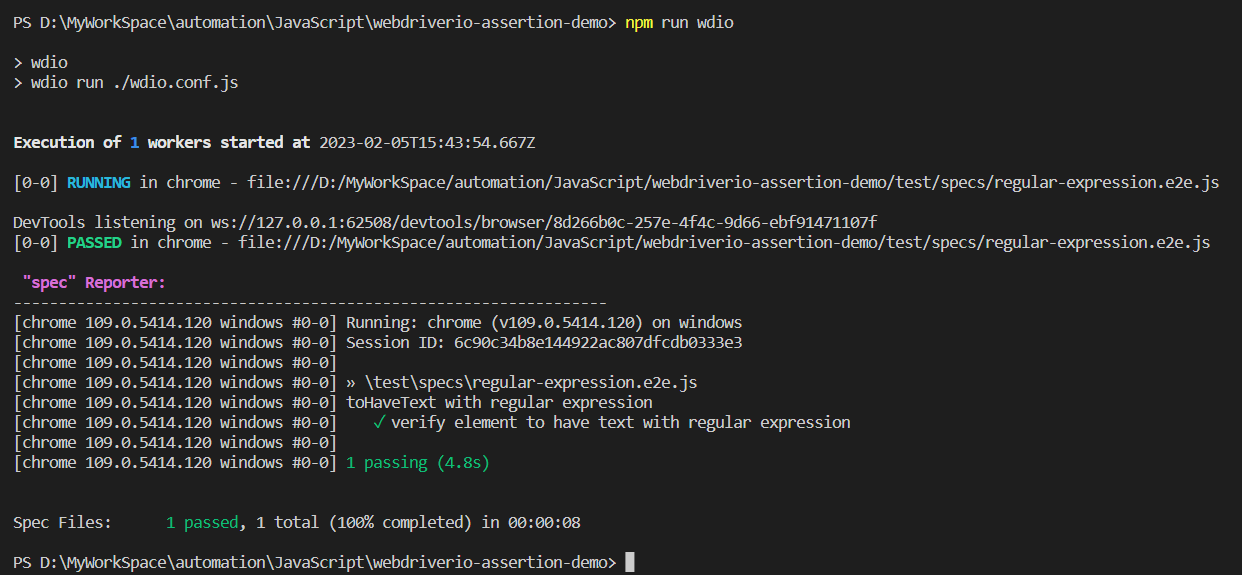
In the below section of this WebdriverIO Assertions tutorial, we will use a cloud-based testing platform to execute WebdriverIO tests.
Running your WebdriverIO tests on Cloud Grid
Here, we will be running the WebdriverIO tests on the LambdaTest cloud grid. Cloud testing platforms like LambdaTest allows you to perform JavaScript automation testing using the WebdriverIO framework over an online browser farm of 3000+ browsers and operating systems.
You can also Subscribe to the LambdaTest YouTube Channel and stay updated with the latest tutorials around Appium, Playwright, and Selenium testing.
To execute the test on LambdaTest, we will add a script in package.json.
We will update the package.json with minor changes like description and keywords. However, it's optional..
{
  "name": "playwright-lambdatest-javascript",
  "version": "1.0.0",
  "description": "This is Test Automation framework designed using Playwright, and JavaScript to execute on LambdaTest",
  "main": "index.js",
  "scripts": {
    "clean": "rimraf playwright-report && rimraf allure-results && rimraf allure-report",
    "test": "npm run clean && npx playwright test",
    "lambdatest": "npm run clean && npx playwright test --config=./lambdatest.config.js --reporter=line,html,allure-playwright",
    "allure-report": "npx allure generate ./allure-results && allure open"
  },
  "keywords": [
    "node",
    "javascript",
    "allure-report",
    "rimraf",
    "lambdatest",
    "allure-reporting",
    "playwright-tests",
    "lambdatest-playwright"
  ],
  "author": "Code with MMAK",
  "license": "ISC",
  "devDependencies": {
    "@playwright/test": "^1.29.2",
    "allure-commandline": "^2.20.1",
    "allure-playwright": "^2.0.0-beta.23",
    "playwright": "^1.29.2",
    "rimraf": "^3.0.2"
  }
}
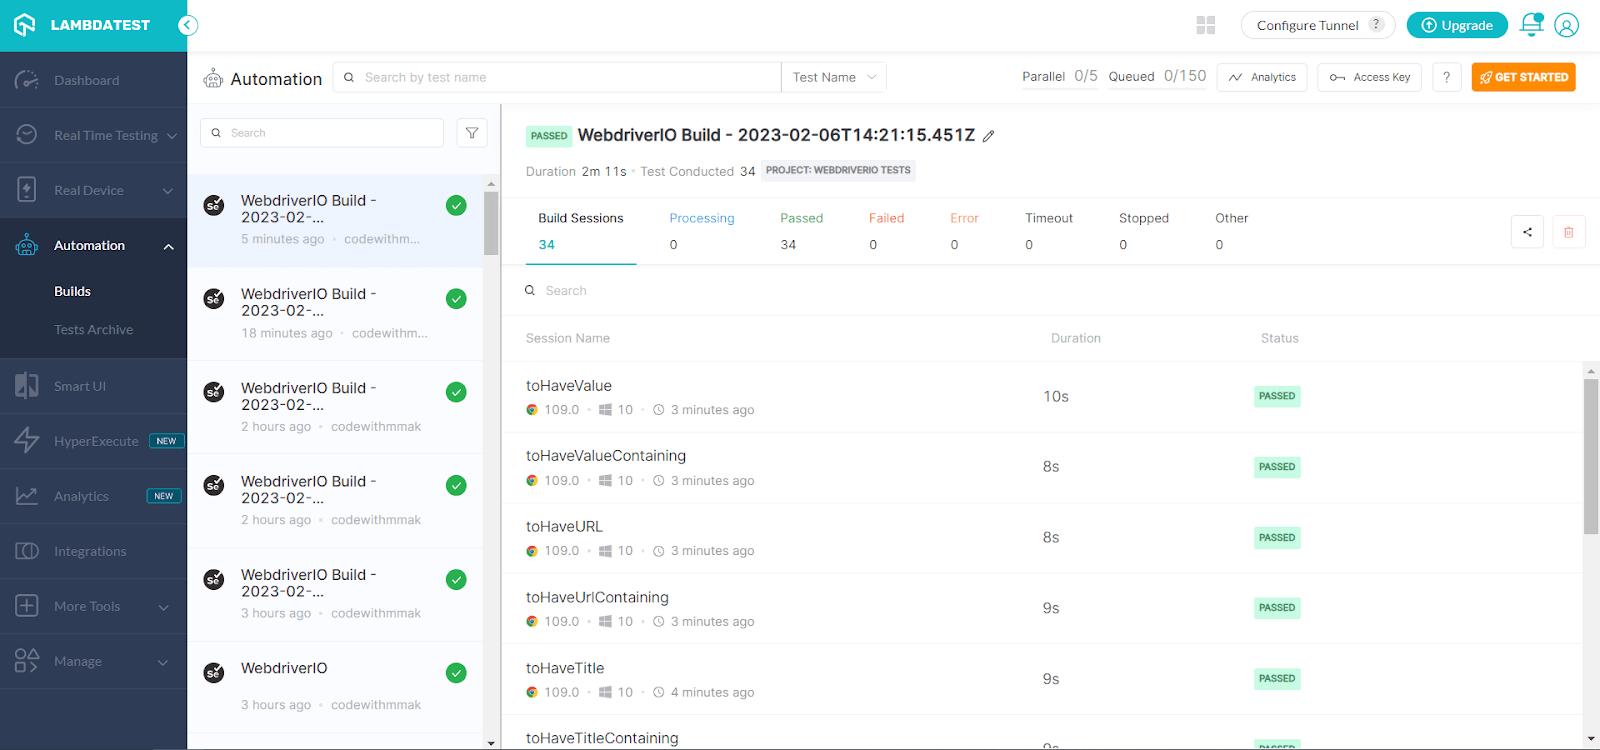
With all configuration done, now to run the test on LambdaTest Cloud type npm run wdio-lt-single on the terminal.
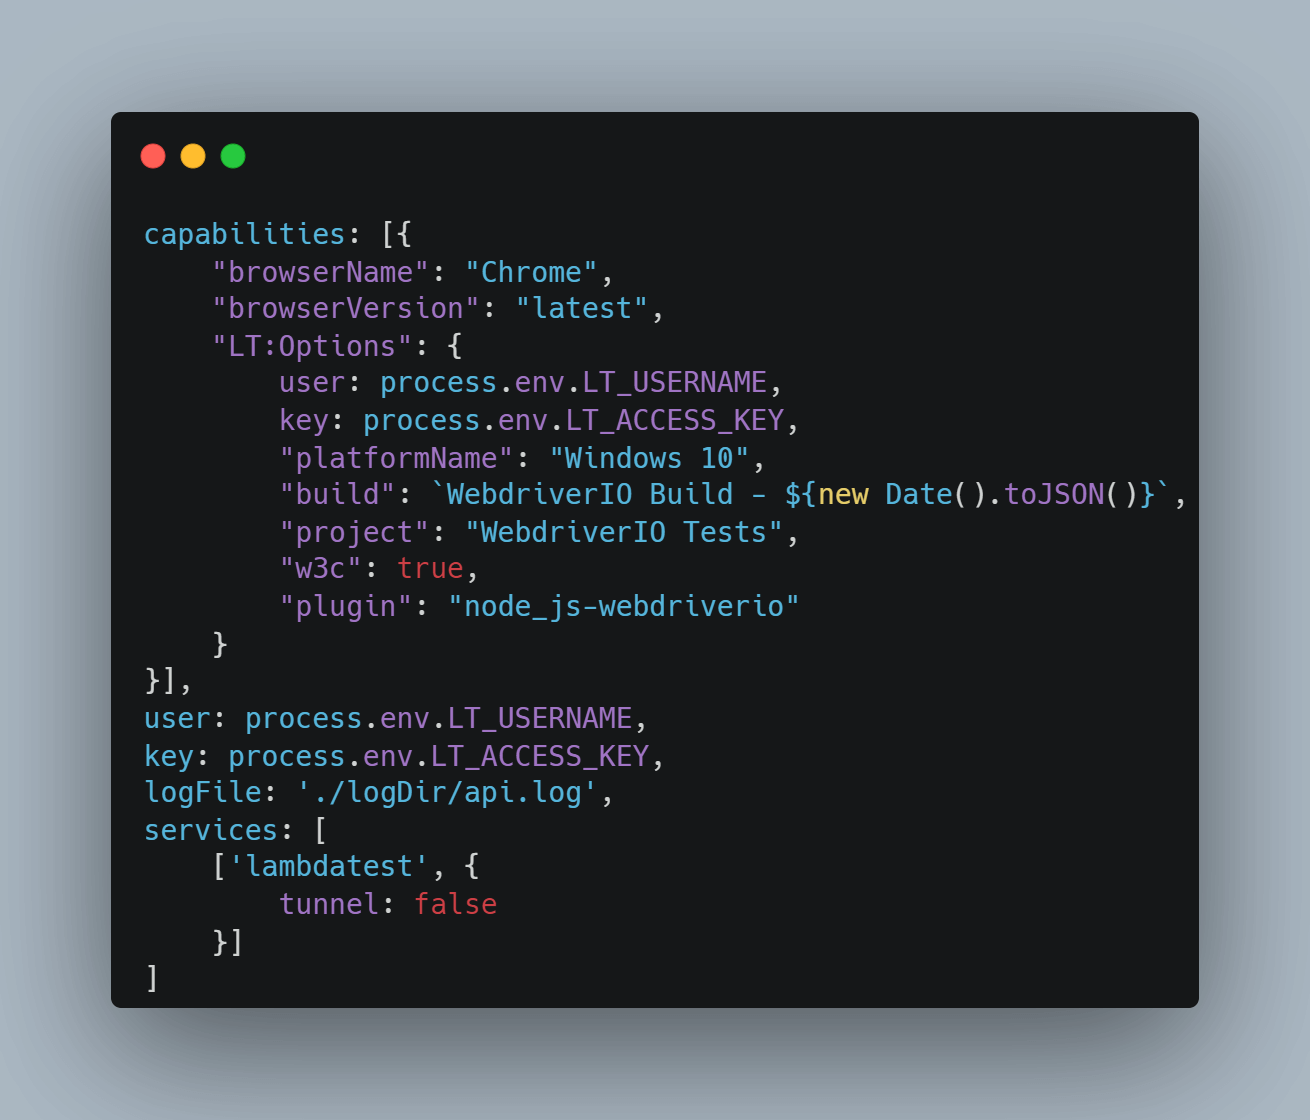
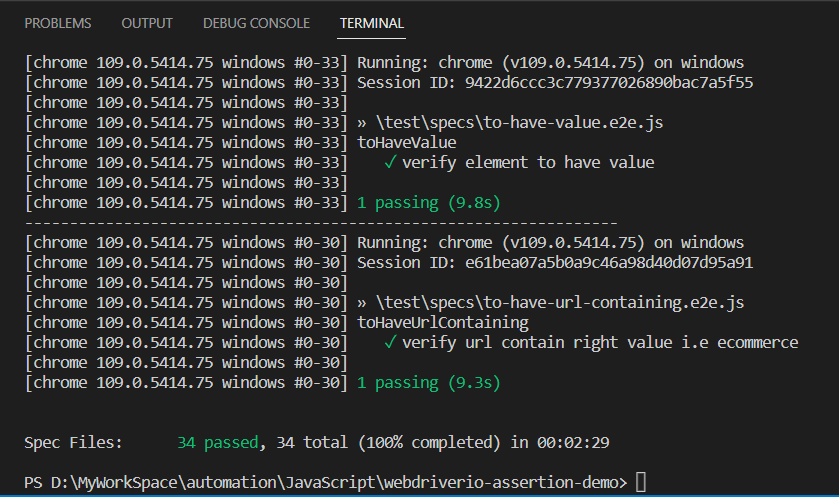
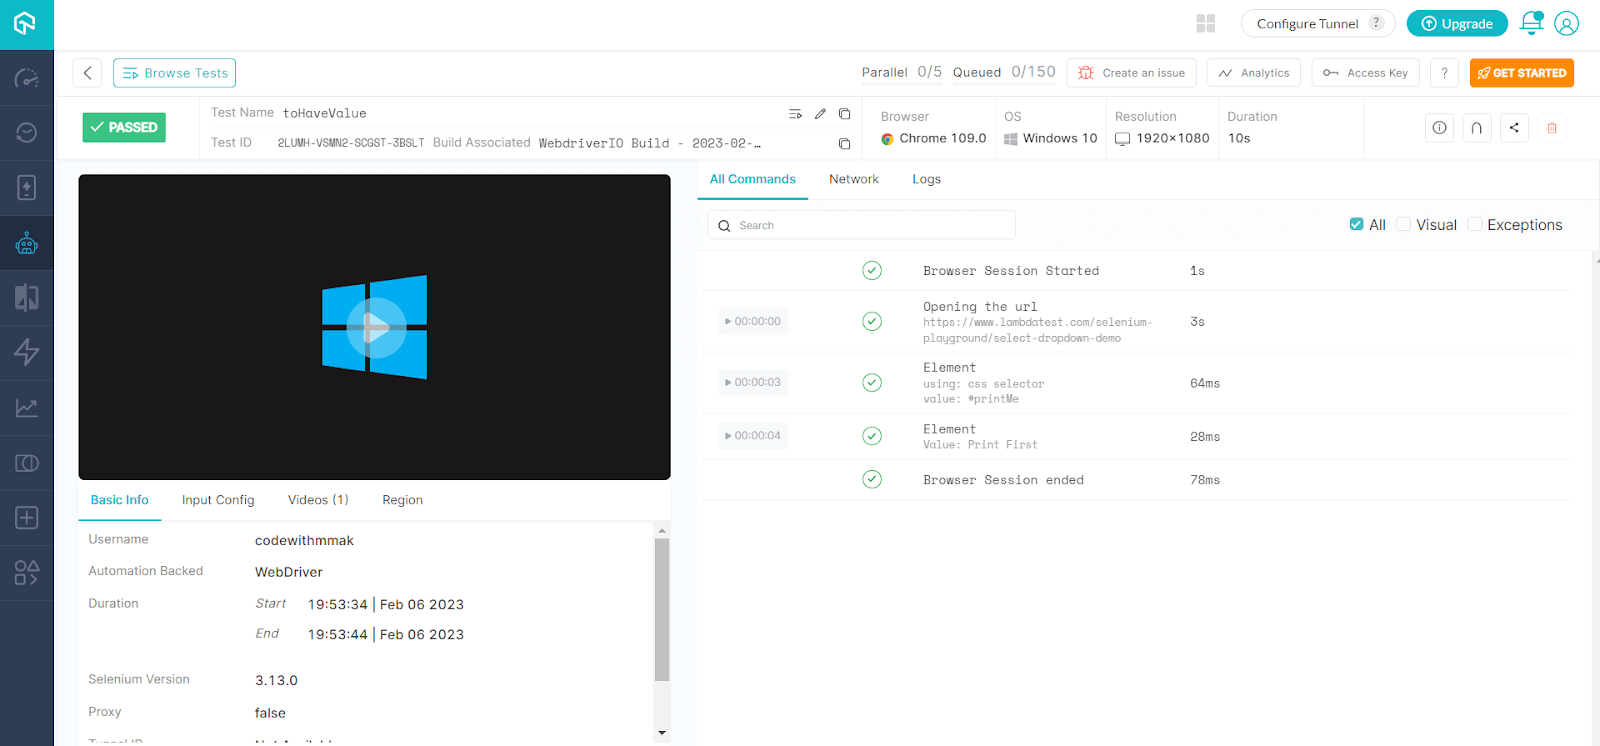
You will see that test execution starts, and the status of each test will be reported in the terminal. You will see a spec report configured in the configuration file, which you can change as needed.
Execution:
Build Result:
Expanded view of test result:
Parallel test execution using the WebdriverIO
In this section of WebdriverIO Assertions tutorial, we will run our WebdriverIO tests in parallel. With the increasing number of test and execution time for larger flows it will be required that you configure tests in such a way that you can execute in parallel.
Add a configuration file named wdio.lt.parallel.conf.js and the capabilities for Windows Chrome, Firefox, and Mac Safari
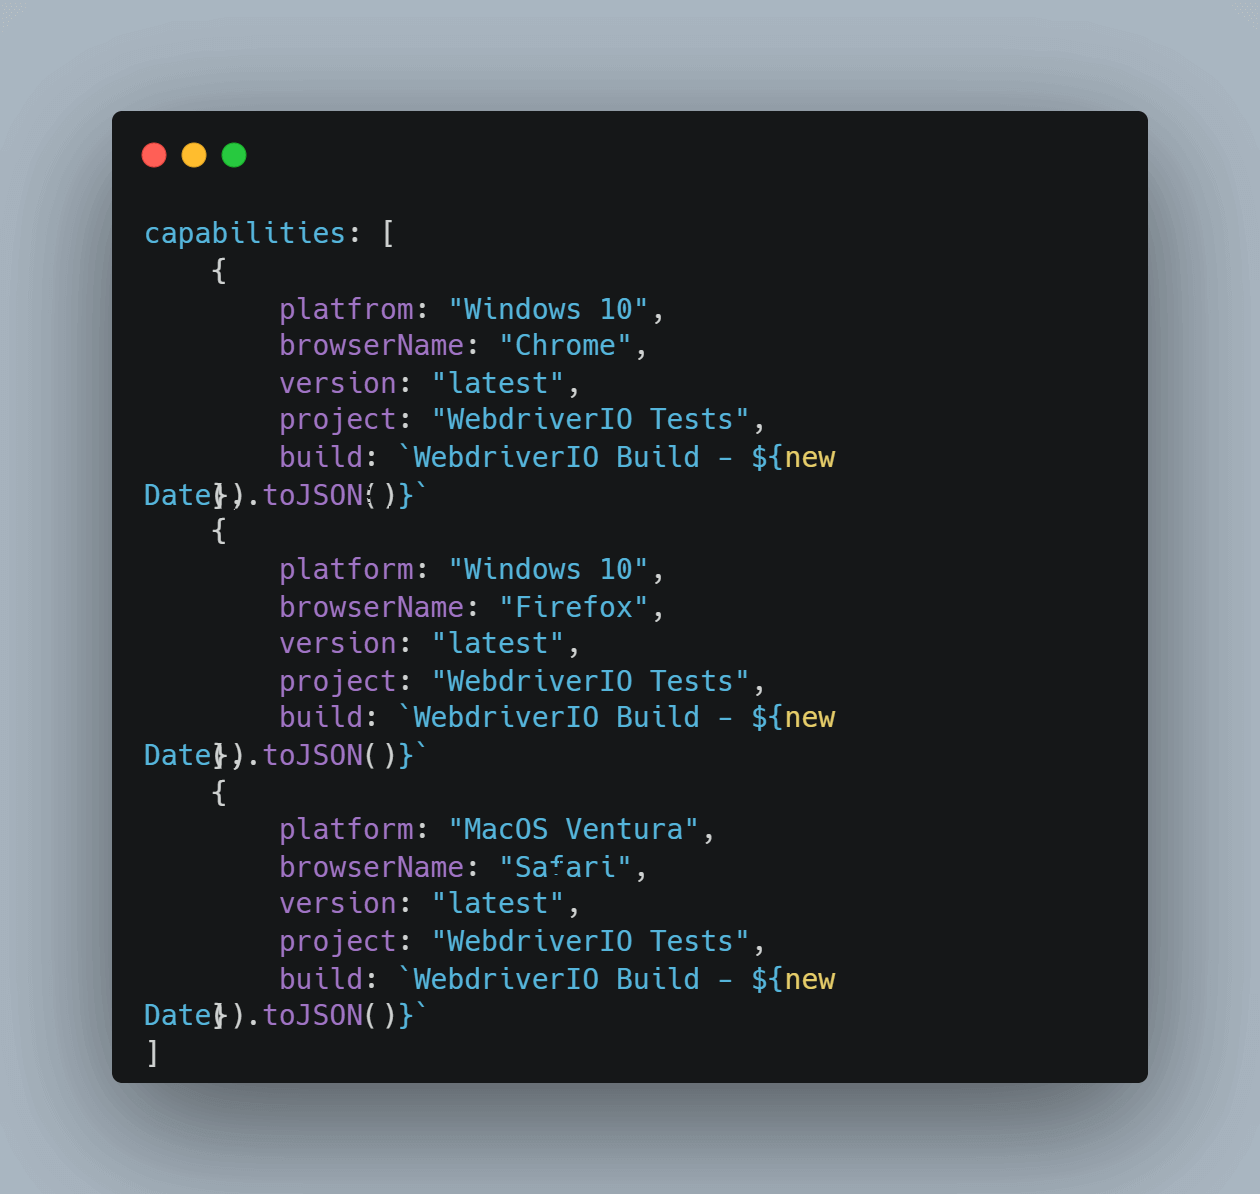

Add the LambdaTest username and access key, which you will get from your LambdaTest Dashboard.
Finally, add the LambdaTest in services; however, the WebdriverIO configuration remains unchanged.
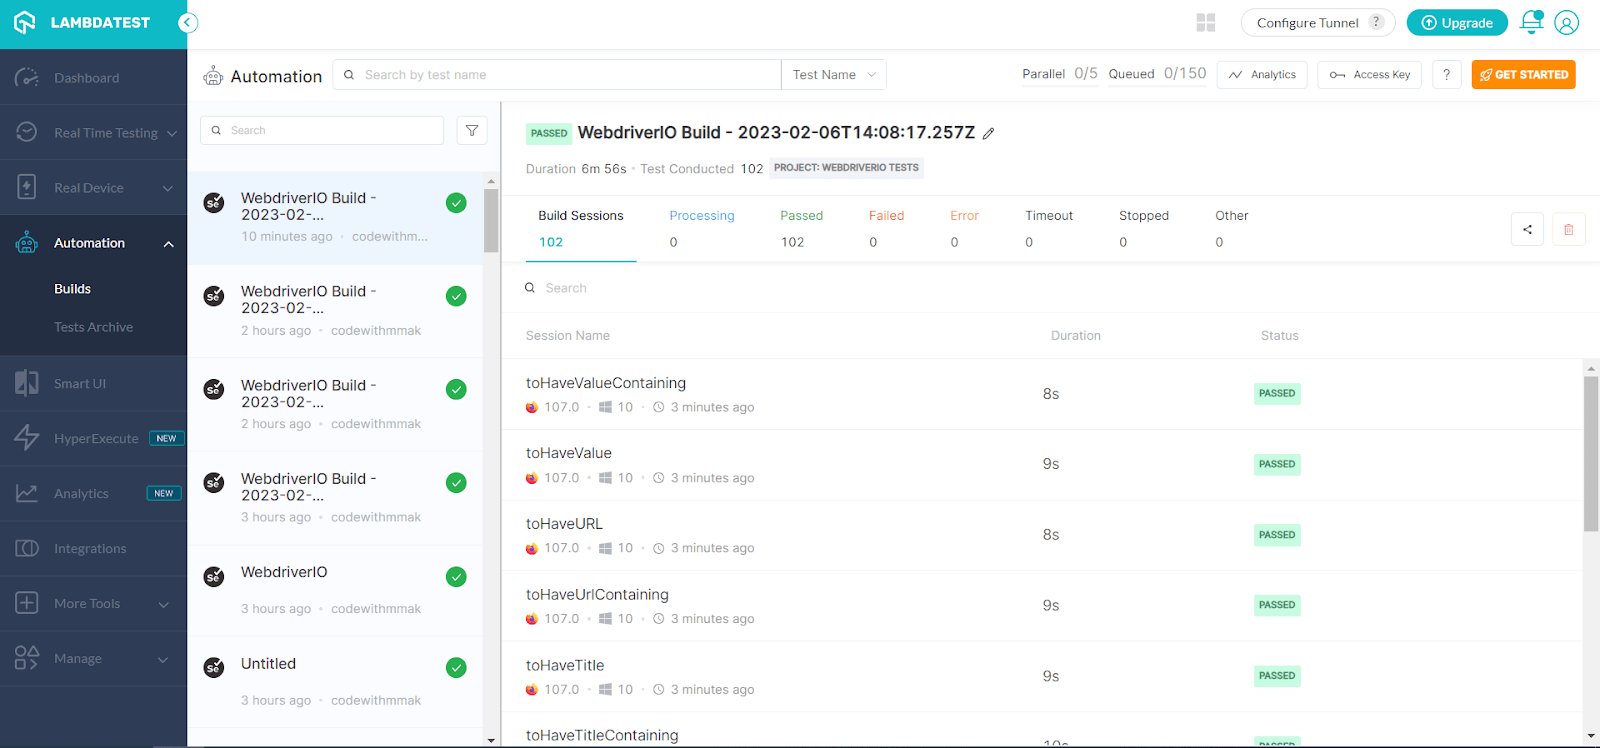
With all configuration done, now to run the test on LambdaTest Cloud, type npm run wdio-lt-parallel on the terminal.
Execution:

Build Result:
Expanded view of test result:

This certification provides the comprehensive knowledge and fundamental skills required for a JavaScript developer to succeed in automation testing, allowing you to excel in any JavaScript automation role.
Conclusion
You have a fair understanding of how to expect or WebdriverIO Assertions to work. Also, you saw how you could run the tests on Cloud Grid and parallel execution of tests on different capabilities.
QA folks should only worry about the tests, not the test configuration and its maintenance. With the Cloud Grid solution, you can run the tests on almost all the browser and OS configurations without you being worried about how to maintain them.
Frequently Asked Questions (FAQs)
What are the different types of assertion in Selenium?
In Selenium, assertions are used to validate the expected results of a test. There are several types of assertions in Selenium: assertTrue, assertFalse, assertEquals, assertNotEquals, assertNull, assertNotNull, assertSame, assertNotSame, assertArrayEquals, These assertions can be used to verify the expected results of a test and ensure that the application under test is working correctly.
Which is better WebdriverIO or Selenium?
WebDriverIO and Selenium are both popular tools for automated web testing. Both have advantages and disadvantages, and which one is better depends on the specific needs and goals of the testing project. Selenium is a widely-used open-source tool with a large community of users and contributors. It supports a variety of programming languages and has a broad range of integrations with other tools and frameworks. On the other hand, WebdriverIO is a more streamlined testing framework built on top of Selenium. It has a more user-friendly and intuitive API, which can make test development faster and easier. Both Selenium and WebdriverIO are powerful tools for automated web testing. Selenium is a more established and flexible option, while WebdriverIO is a more streamlined and user-friendly option. The best choice depends on the specific needs and goals of the testing project.
About The Author
Moeen Ajaz Khan works as Test Manager in AgreeYa Solutions and comes with 13+ years of experience. He has experience in the areas of Quality Engineering, Technical Support, and Program Management.You can also follow him on Twitter.
Reviewer's Profile

Shahzeb Hoda
Shahzeb currently holds the position of Senior Product Marketing Manager at LambdaTest and brings a wealth of experience spanning over a decade in Quality Engineering, Security, and E-Learning domains. Over the course of his 3-year tenure at LambdaTest, he actively contributes to the review process of blogs, learning hubs, and product updates. With a Master's degree (M.Tech) in Computer Science and a seasoned expert in the technology domain, he possesses extensive knowledge spanning diverse areas of web development and software testing, including automation testing, DevOps, continuous testing, and beyond.


